EthPillar
For Testnet setups, replace all Holesky references with Hoodi.
Full Node Setup
Video Guide
Download EthPillar
Review EthPillar's homepage at Coincashew website, then run:
/bin/bash -c "$(curl -fsSL https://raw.githubusercontent.com/coincashew/EthPillar/main/install.sh)"
Next, type and enter ethpillar to launch the terminal UI and:
- Sync an execution client and a consensus + validator client. The MEV Boost service is installed with pre-configured relays. Learn more about CSM relay requirements here.
- [For Testnet only] select Generate validator keys, choose how many to generate, set a password, and save your 24-word mnemonic.
- [For Mainnet] select No for key generation here (use a secure process in the Key Generation for Mainnet guide).
- Verify the fee recipient and withdrawal address below or on the CSM Operator Portal.
- Import the generated validator keys into your validator client.
- Withdrawal Address
- Fee Recipient Address
Deposit Data
Copy your deposit data for the CSM widget:
cat ~/ethstaker_deposit-cli/validator_keys*/deposit*json
Interfaces:
- Mainnet: https://csm.lido.fi/
- Hoodi: https://csm.testnet.fi/
ETHPillar Terminal-UI Navigation
- Arrow & Tab keys: cycle options
- Space bar: select option
- Enter: confirm
- Ctrl+B, then D: exit split-screen
- Ctrl+C: exit individual view
- Type
exit+ Enter to leave the current screen
Setup Additional CSM Validator Client Only
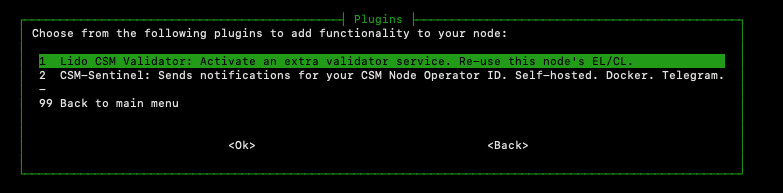
- EthPillar CSM VC Additional Plugin
- EthPillar CSM VC + Existing Setup
This lets you run an extra validator client using your existing EthPillar setup with the Lido Execution Layer Rewards Vault as the fee recipient.
- Run
ethpillarto open the UI. - Select Plugins → Lido CSM Validator: Activate an extra validator service. Reuse this node's EL/CL.
-
Enter the fee recipient address:
-
Generate and import your CSM validator keys here.
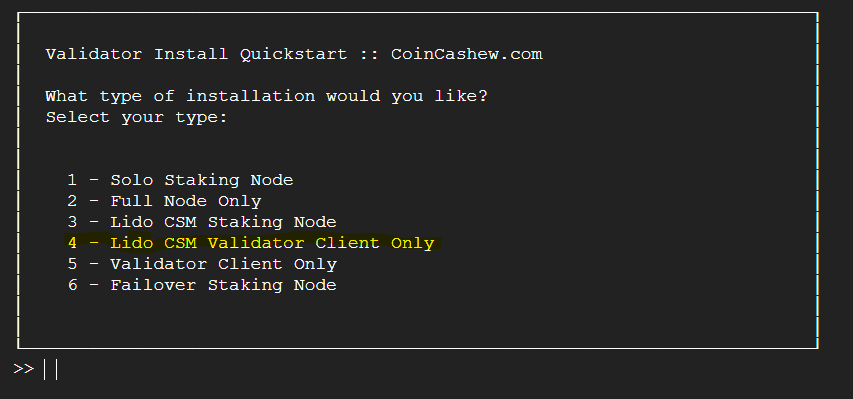
This lets you attach a new validator client to an existing beacon node, with a separate fee recipient (Lido Execution Layer Rewards Vault).
-
Run
ethpillar. -
Select 4 – Lido CSM Validator Client Only.
-
Enter your beacon node endpoint (e.g.
http://127.0.0.1:5052). -
Verify the fee recipient address:
-
Generate and import your CSM validator keys.
Keep your clients up to date
To keep your clients and other packages up to date for network upgrades, security releases or minor improvements please follow this guide.