How to Bridge Tokens through Jumpgate
Jumpgates are a class of contracts that facilitate cross-chain token transfers under DAO operations. Each jumpgate is set up to work with a particular token and a pre-defined recipient. Below is the procedure of transferring tokens using a jumpgate.
1. Verify Jumpgate
In this step we will be making sure that the jumpgate is correctly configured. You will only need to do this once because jumpgates are non-upgradeable contracts.
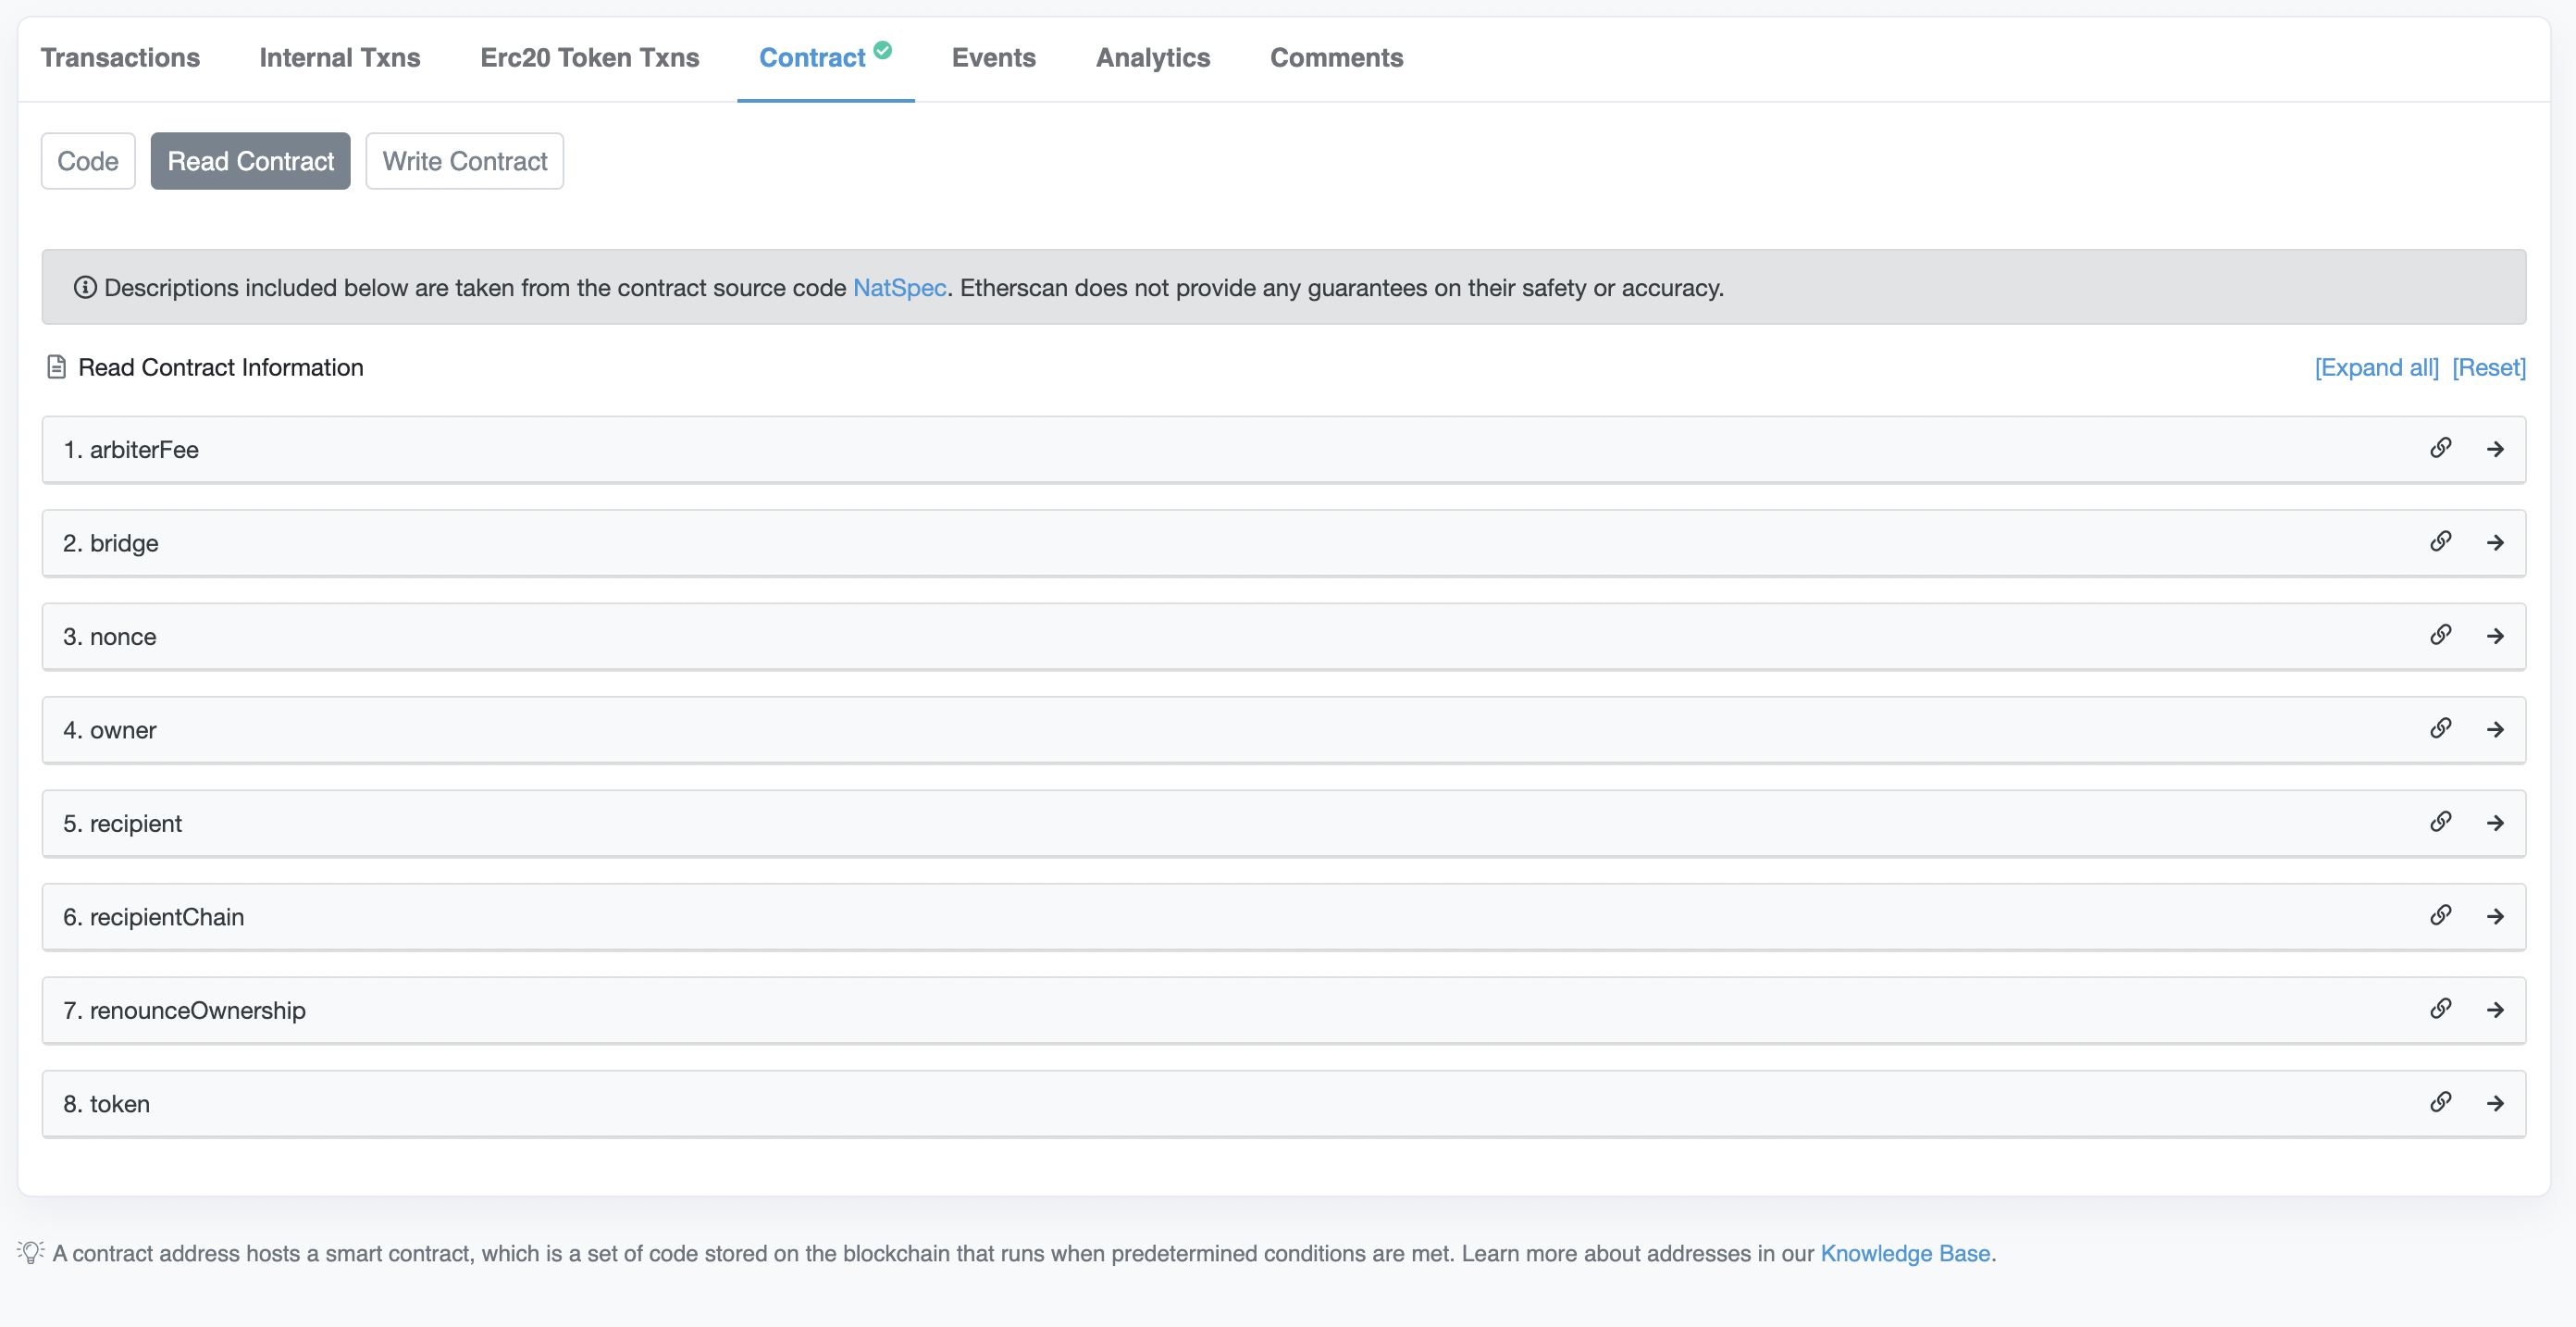
Go to Etherscan and open the Jumpgate page. Click the "Contract" tab, the green check mark confirms that the source code is verified. Check the parameters:
arbiterFeeis always 0;bridgeis the address of the bridge. Currently, all jumpgates use only Wormhole Token bridge at0x3ee18B2214AFF97000D974cf647E7C347E8fa585, and you can check the address against the Wormhole docs;nonceis always 0;owneris the Aragon Agent at0x3e40D73EB977Dc6a537aF587D48316feE66E9C8cverifiable against Deployed contracts;recipientis the recipient address in hexadecimal form. For Solana, this will be an encoded LDO token account. Use Base 58 decoder to decode this hexadecimal sequence to the Solana address format.recipientChainis the target chain identifier. If the Jumpgate is using Wormhole bridge, you can check the id against the Wormhole docs, Solana id is 1;renounceOwnershipshould yield an error;tokenis the address of the token being transferred, e.g. LDO at 0x5A98FcBEA516Cf06857215779Fd812CA3beF1B32. Check the LDO address against Deployed contracts.
2. Transfer tokens to Jumpgate
The jumpgate is agnostic to how tokens were received. You can either transfer tokens directly or in the context of DAO operations via an Aragon vote or Easytrack transfer motion.
3. Bridge Tokens
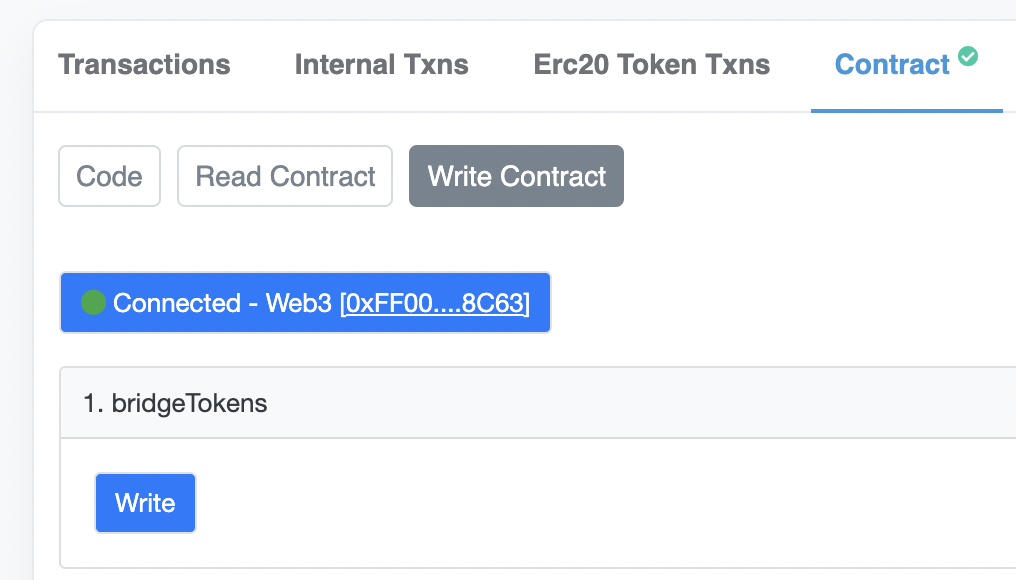
Now we can send tokens through the bridge. We cannot input the amount of tokens to bridge and the jumpgate will transfer the entirety of its token balance.
Open "Write contract" tab and connect your wallet by clicking the "Connect to Web3" button. We will now expand bridgeTokens function and click "Write". Remember that this function is permissionless and you can initiate the transfer from any account as long as you have enough ether for gas.
4. Claim tokens
Claiming process may be different depending on the bridge but for now all jumpgates only support Wormhole Token Bridge. We will be using Portal Bridge (formerly Wormhole) website to claim tokens on Solana.
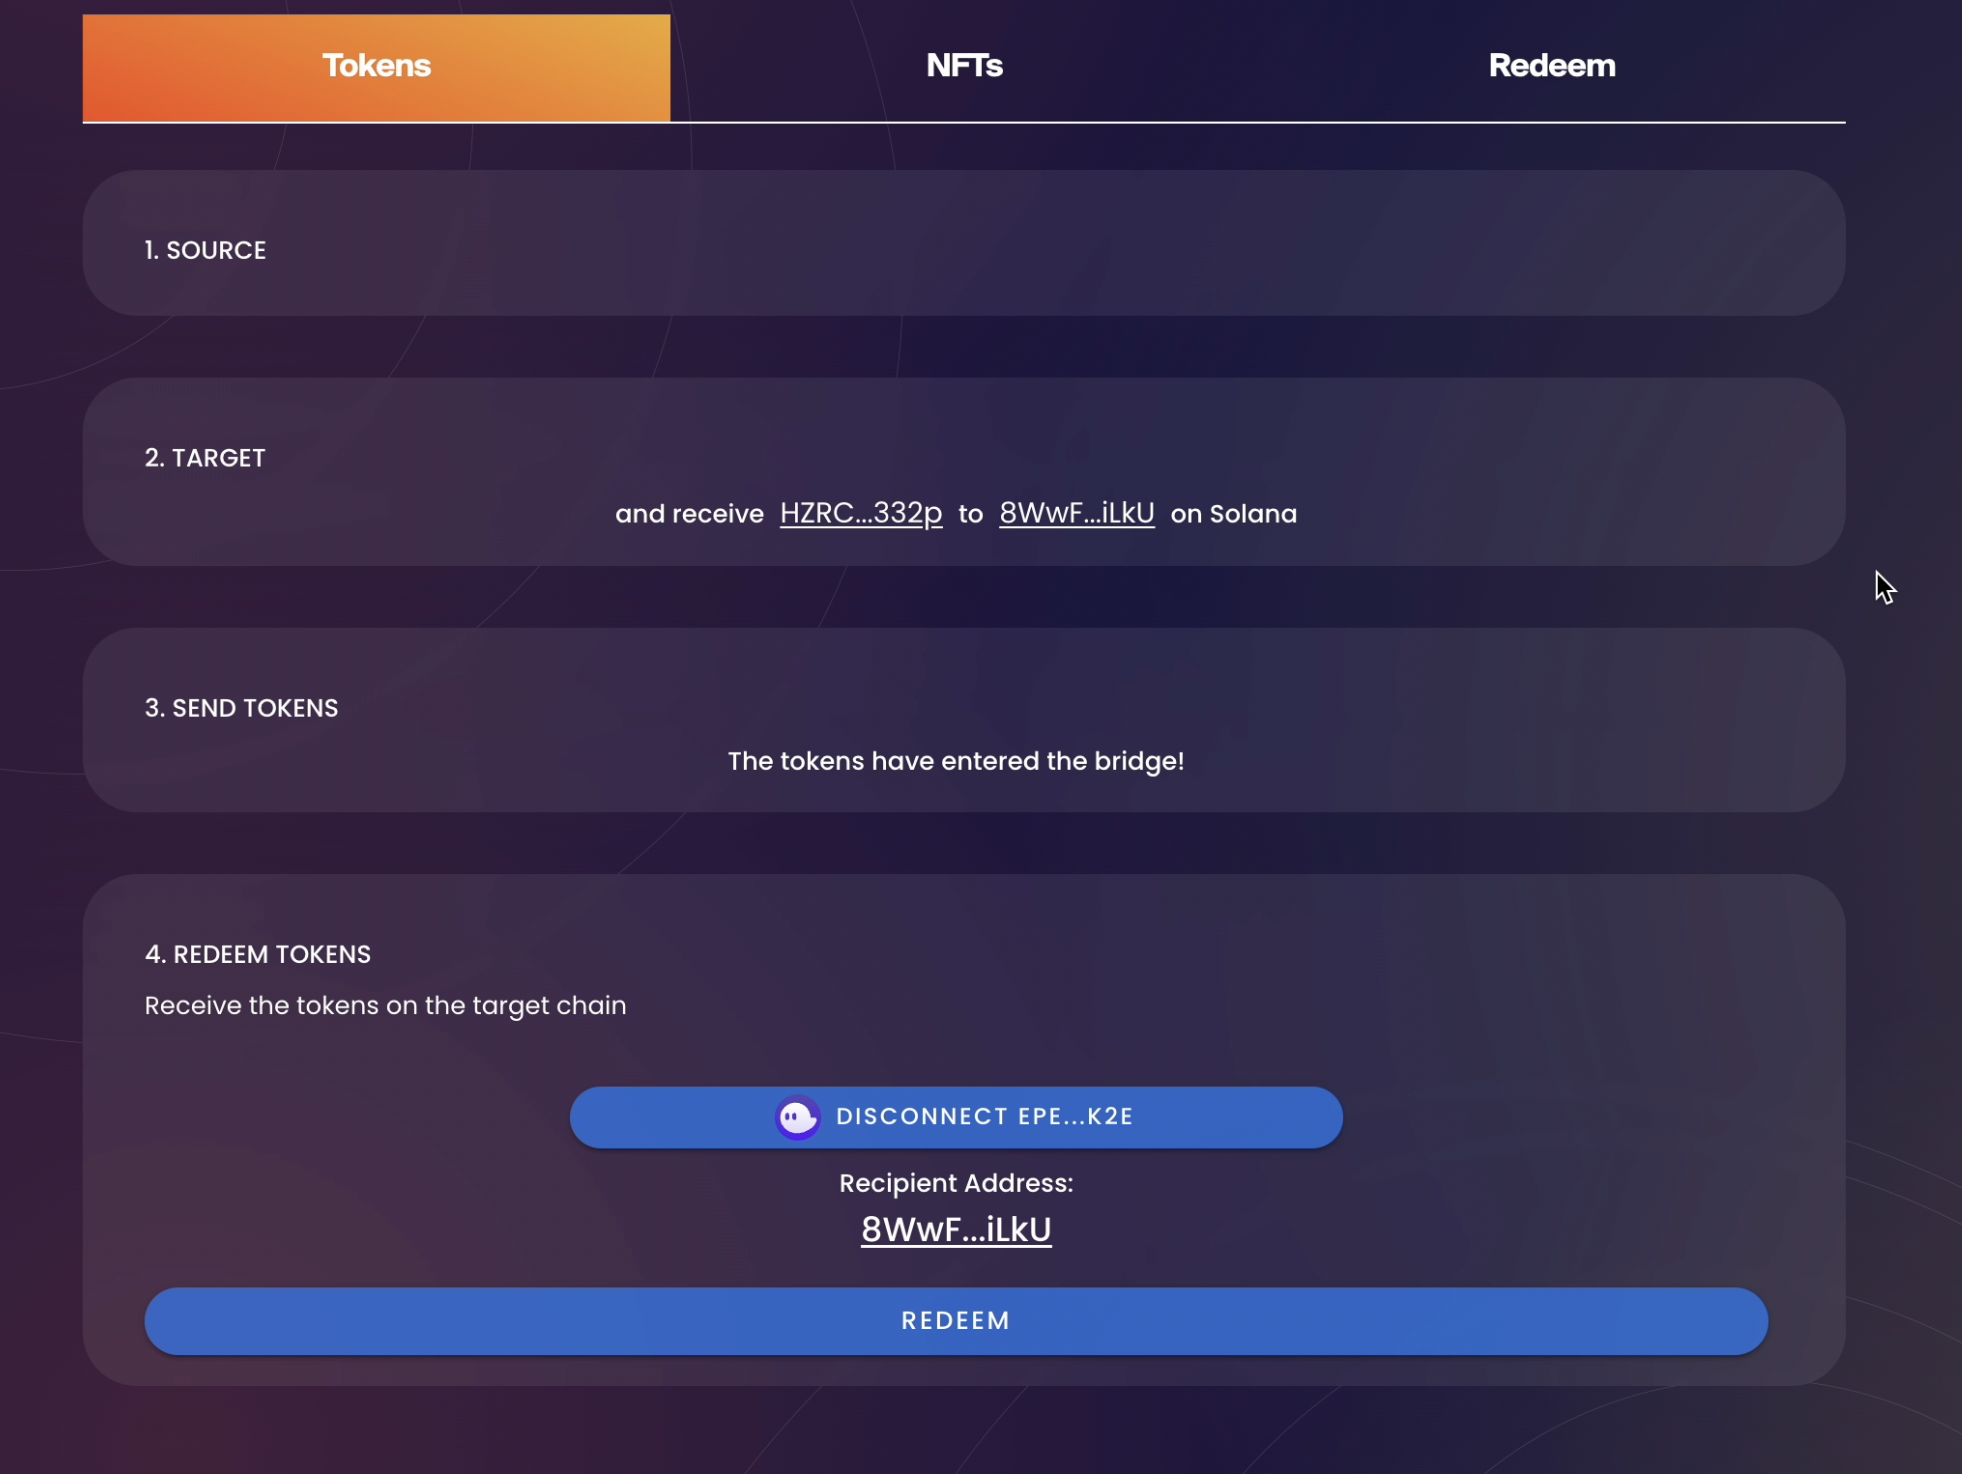
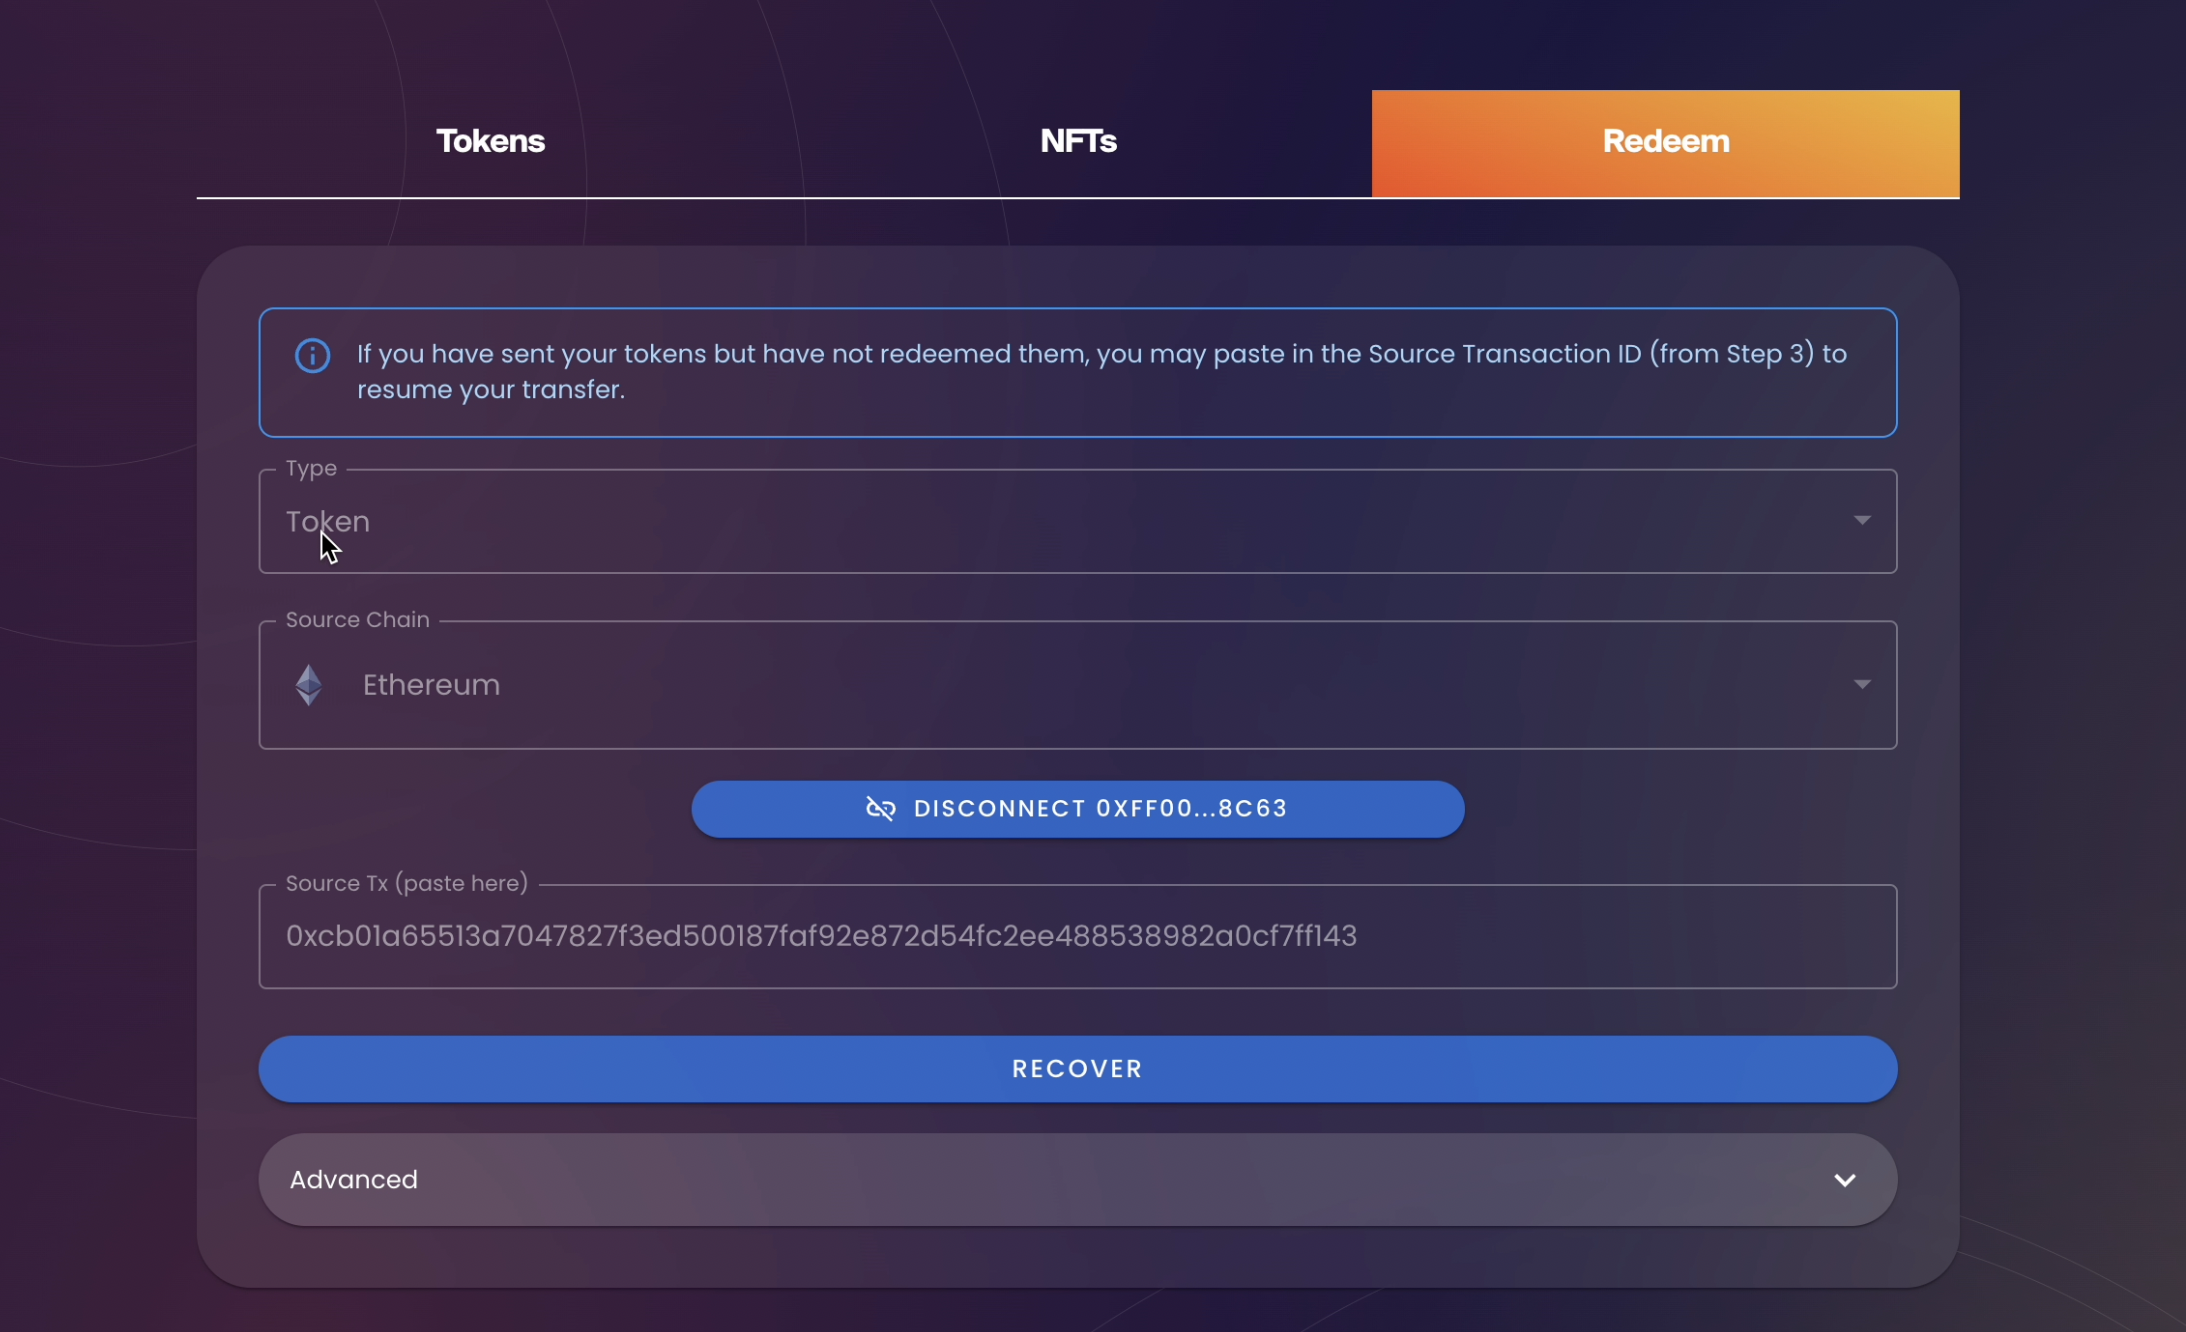
- To go Portal Bridge website Redeem page and connect your Ethereum wallet. Select "Token" in "Type" dropdown and "Ethereum" in "Source Chain". Paste the hash of the
bridgeTokenstransaction. At first, this should produce an error because it takes some time for Portal Bridge to process the bridge transaction. Try this step again in 10-20 minutes and click "Recover" button.
- "Recover" will redirect you to "Tokens" tab, where you will be able to confirm the recipient address. Connect your Solana wallet, click "Redeem". You will be prompted to sign a few transactions. Once those are confirmed, you will be able to see the tokens on the recipient.