Guide to Dual Governance
The Dual Governance interface provides stETH holders with tools to monitor the governance state, escrow tokens for Veto Signaling, manage them during Veto Signaling and withdraw after a Rage Quit.
For more information about Dual Governance visit the blog or check the specification.
Understanding Governance State
-
Visit https://dao.lido.fi/dg
-
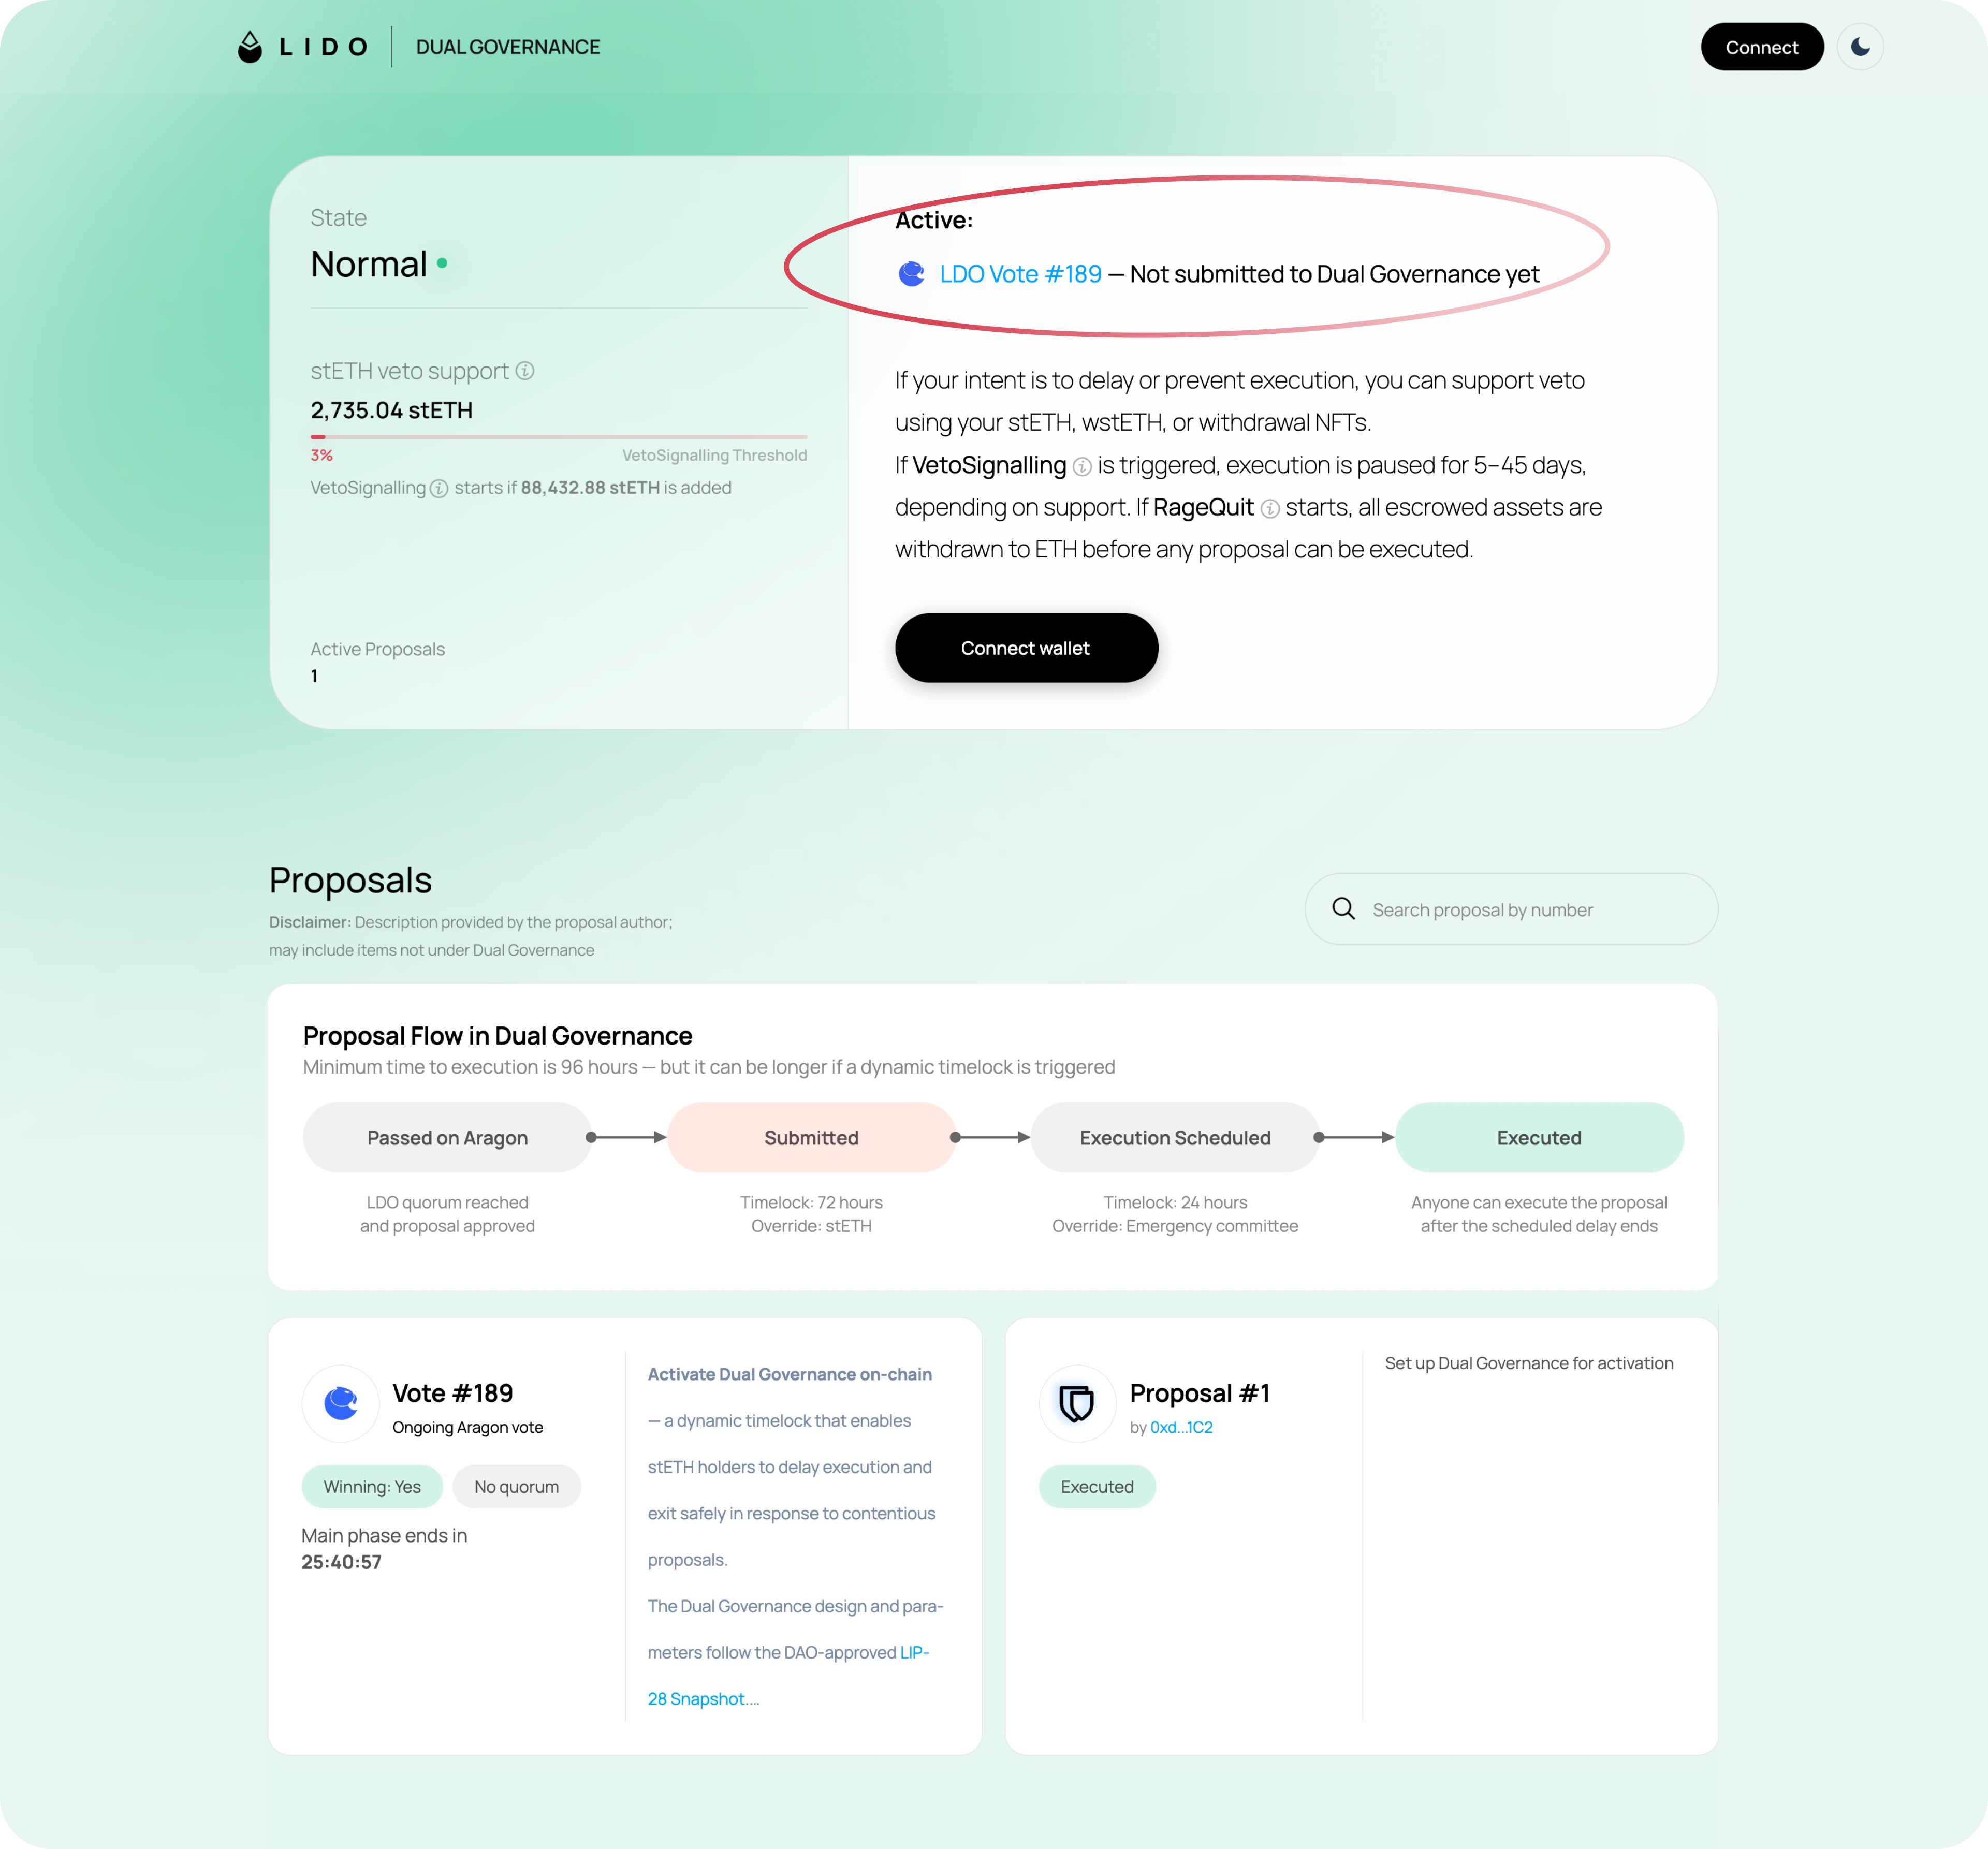
Ongoing proposals and their status are listed on the right side of the block. To learn more about the proposals, scroll down and click for more details.
-
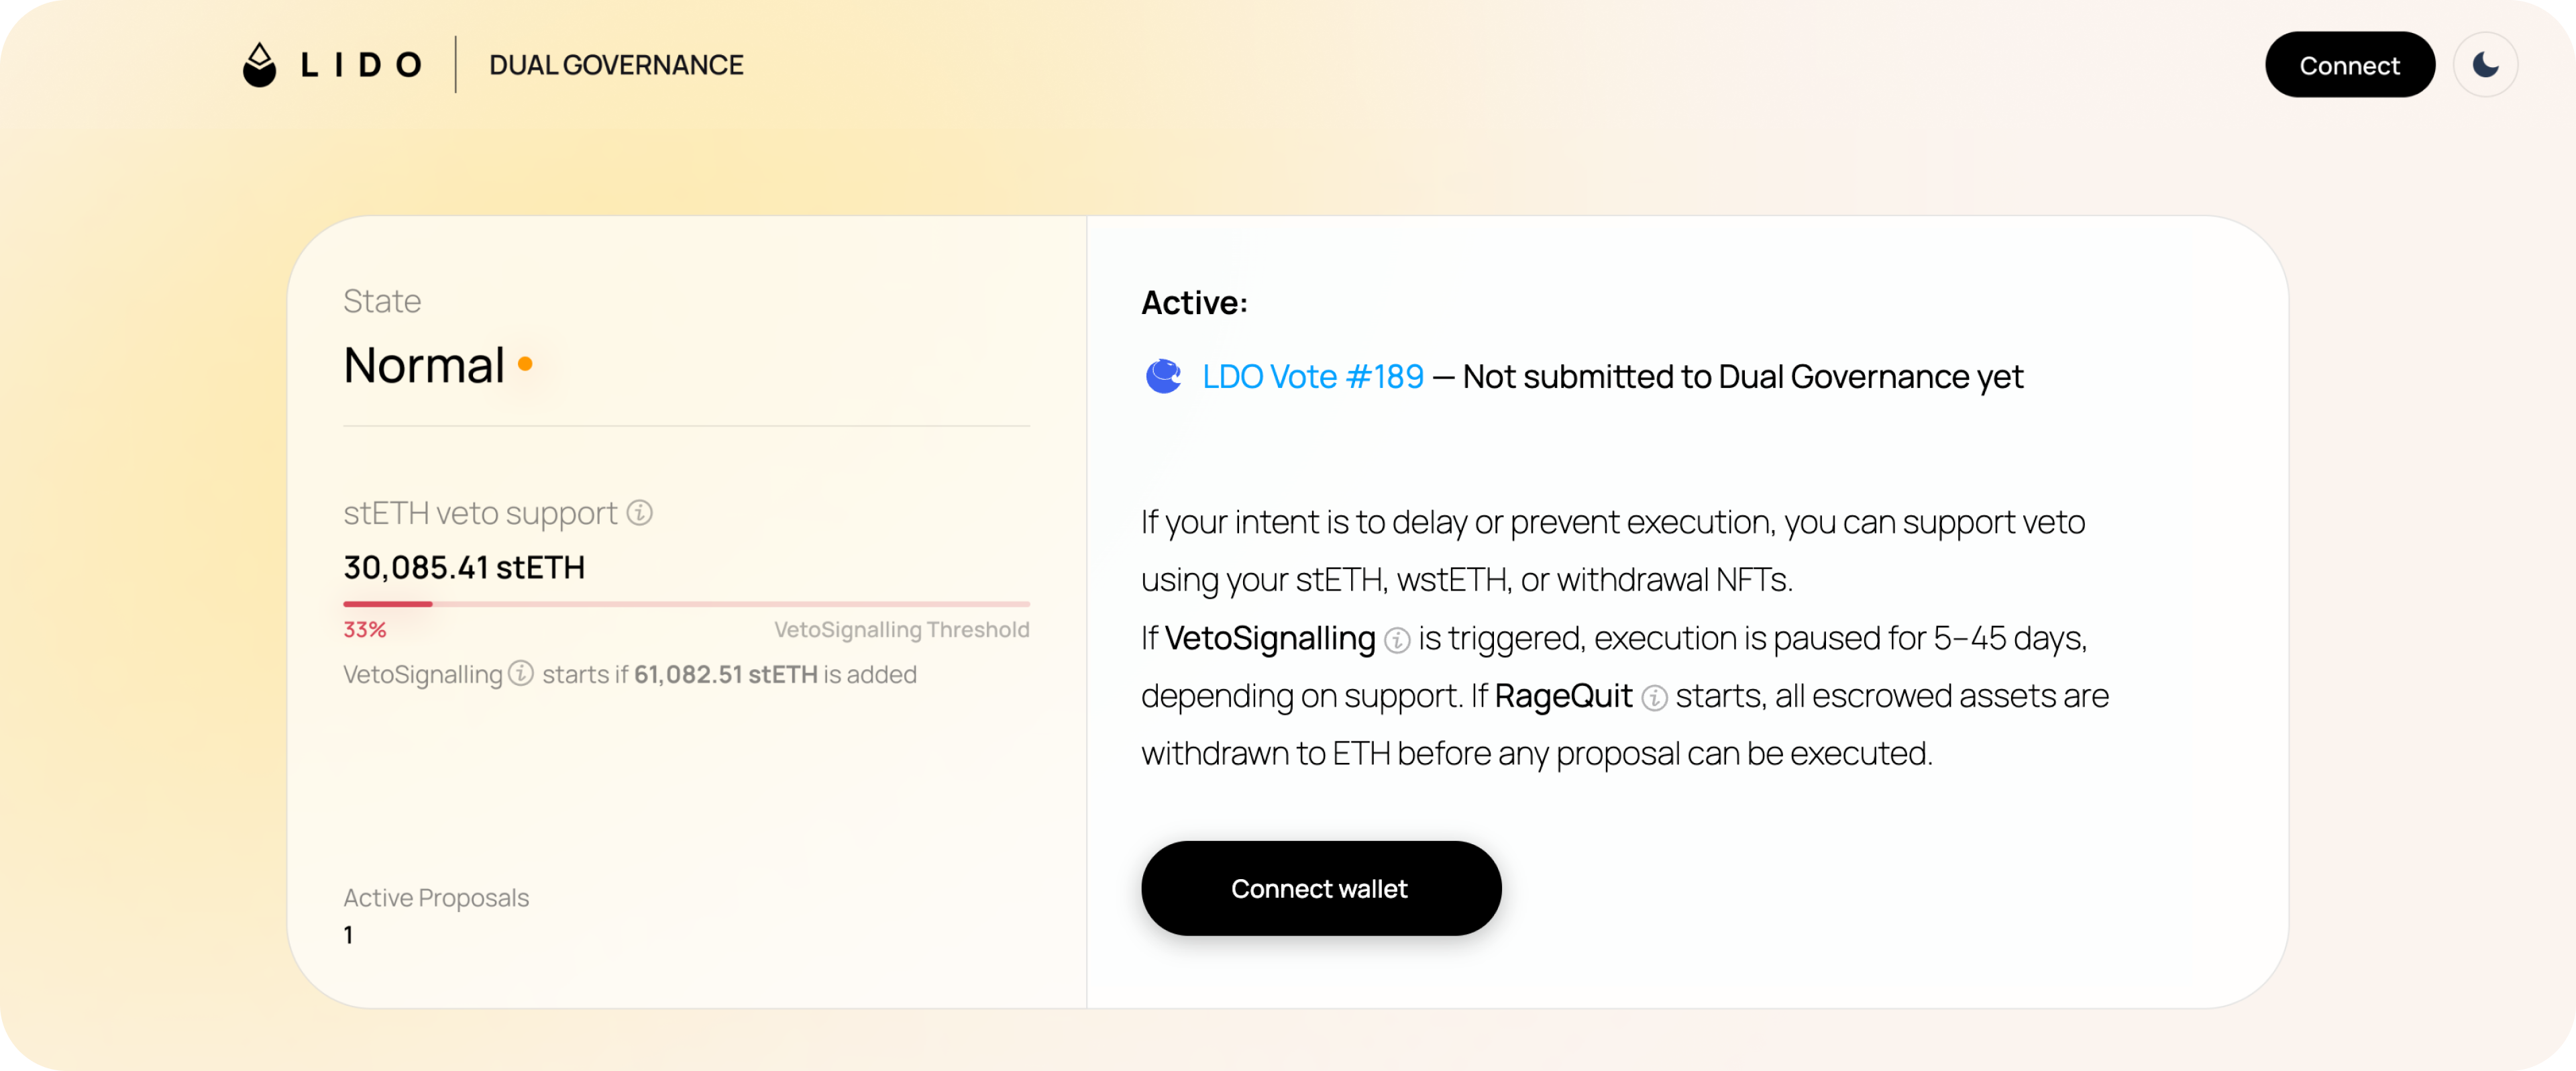
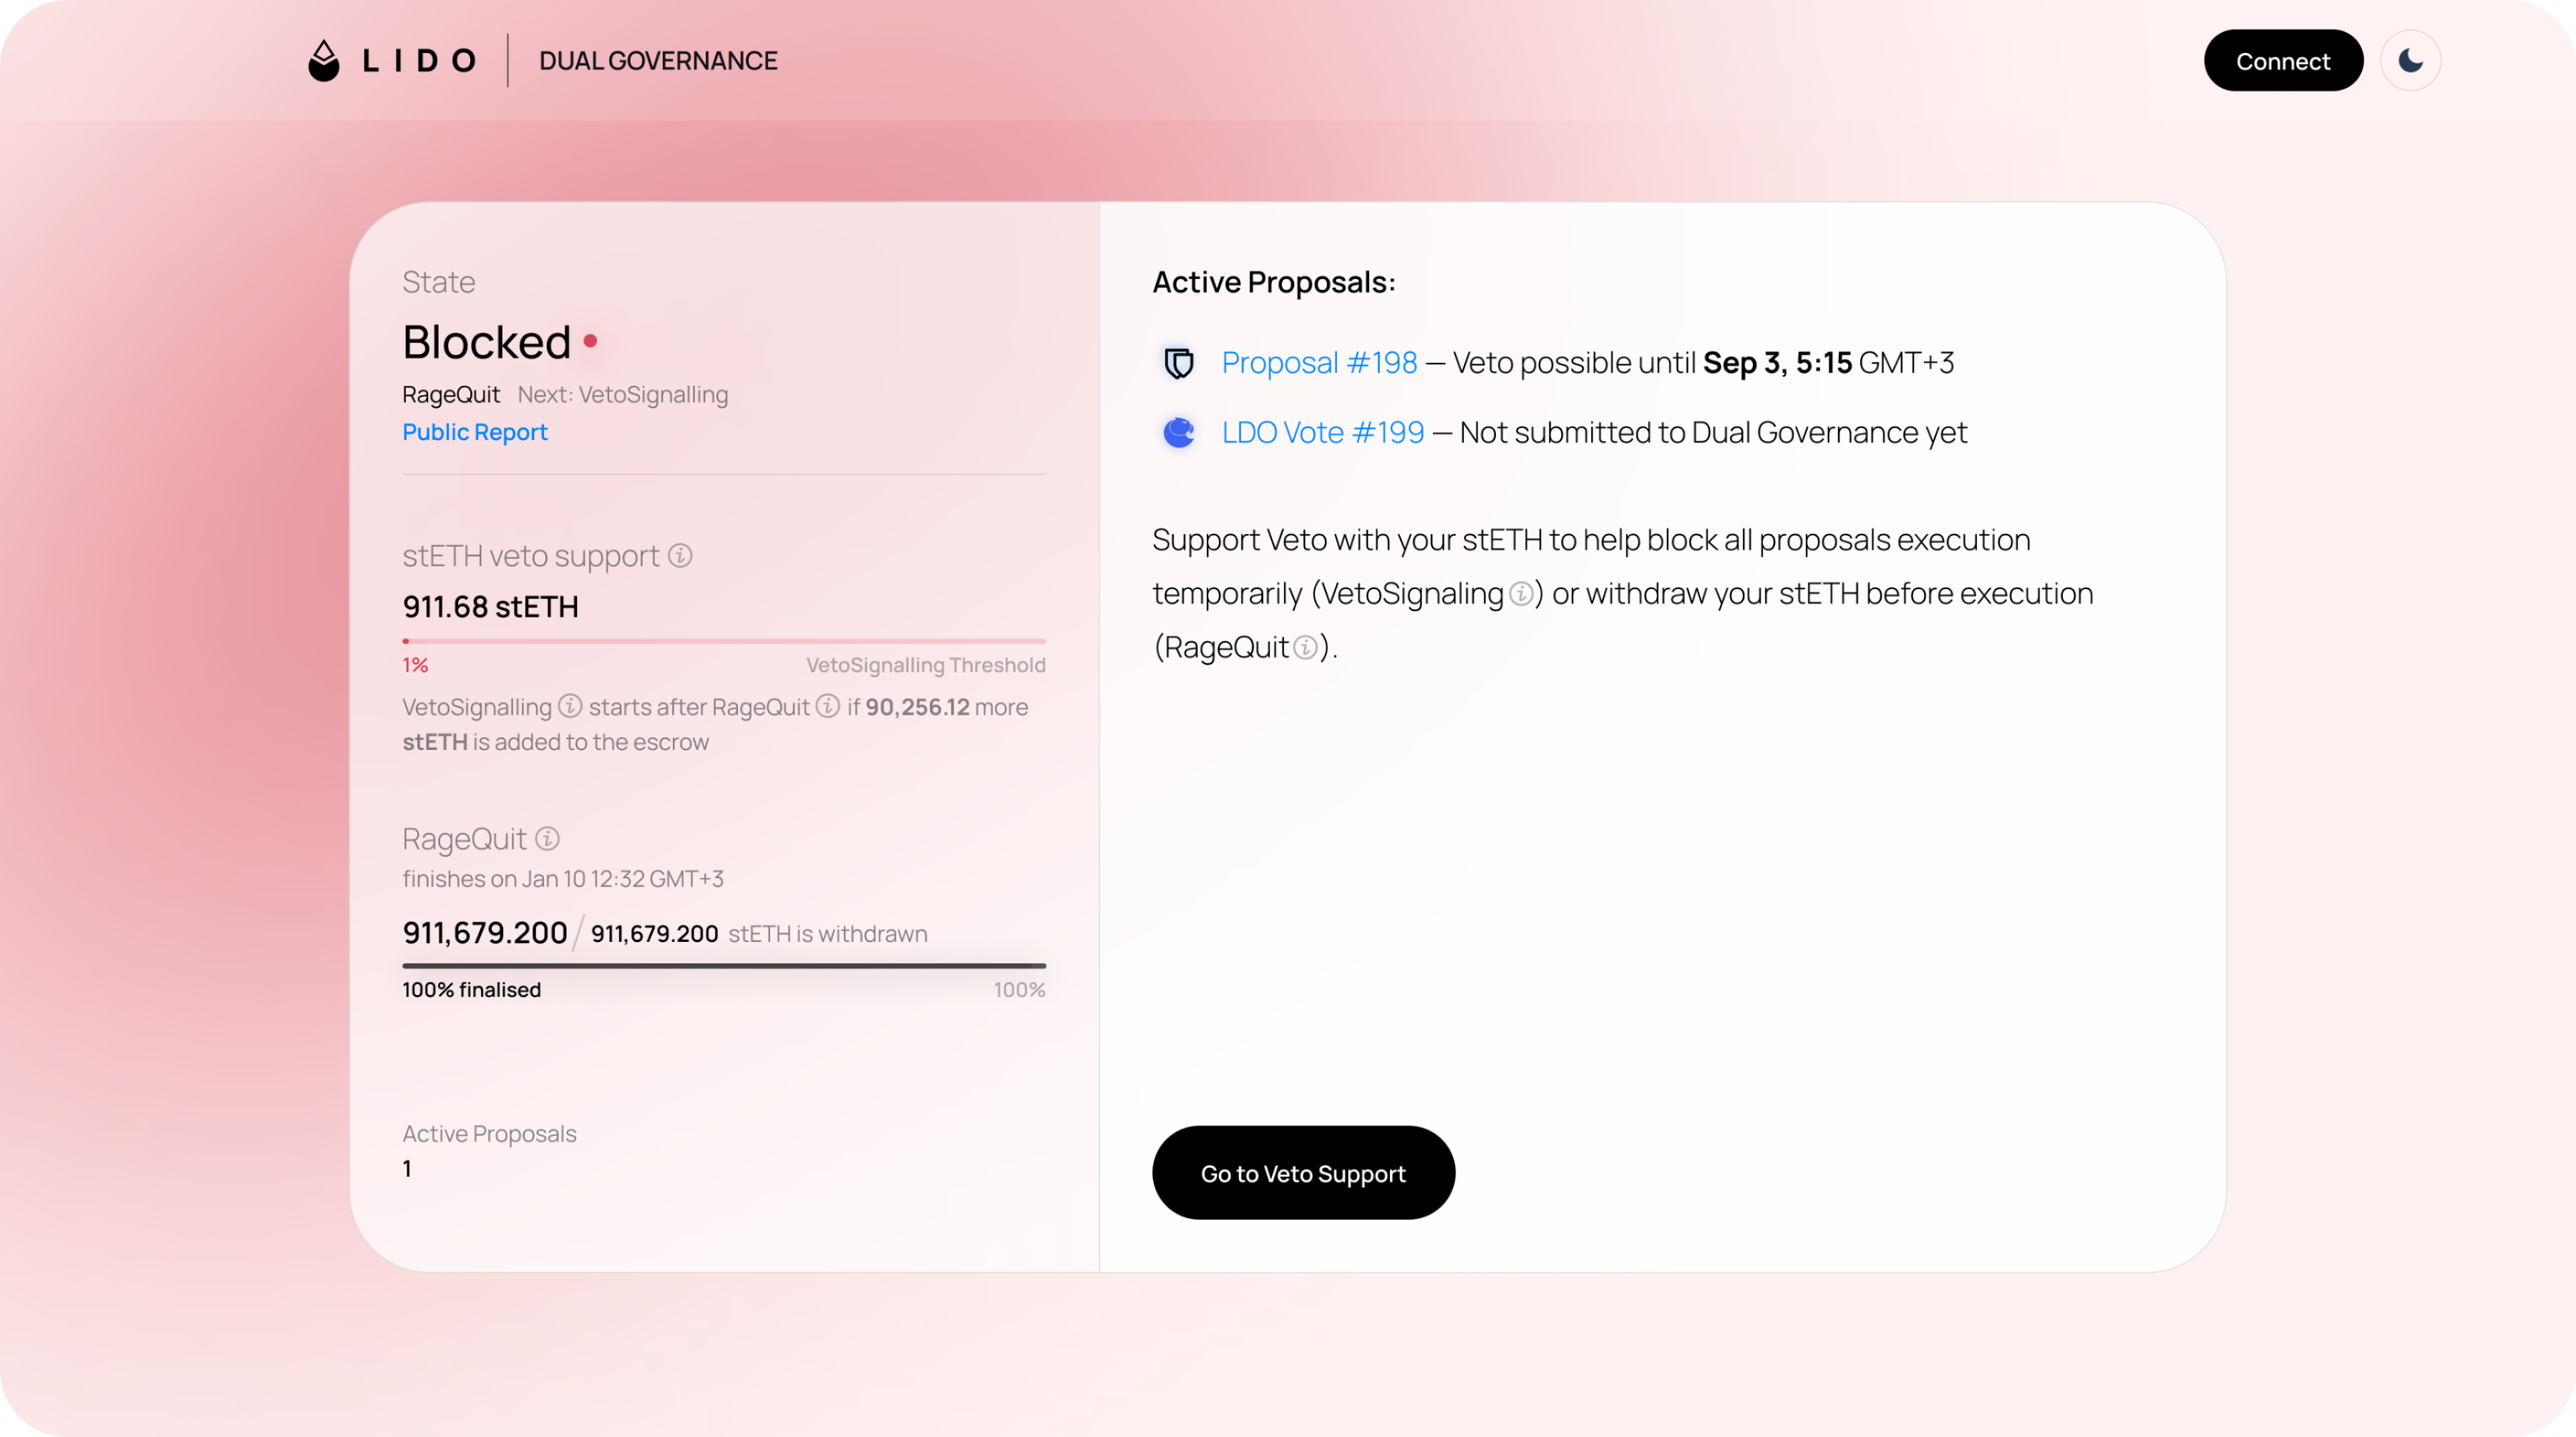
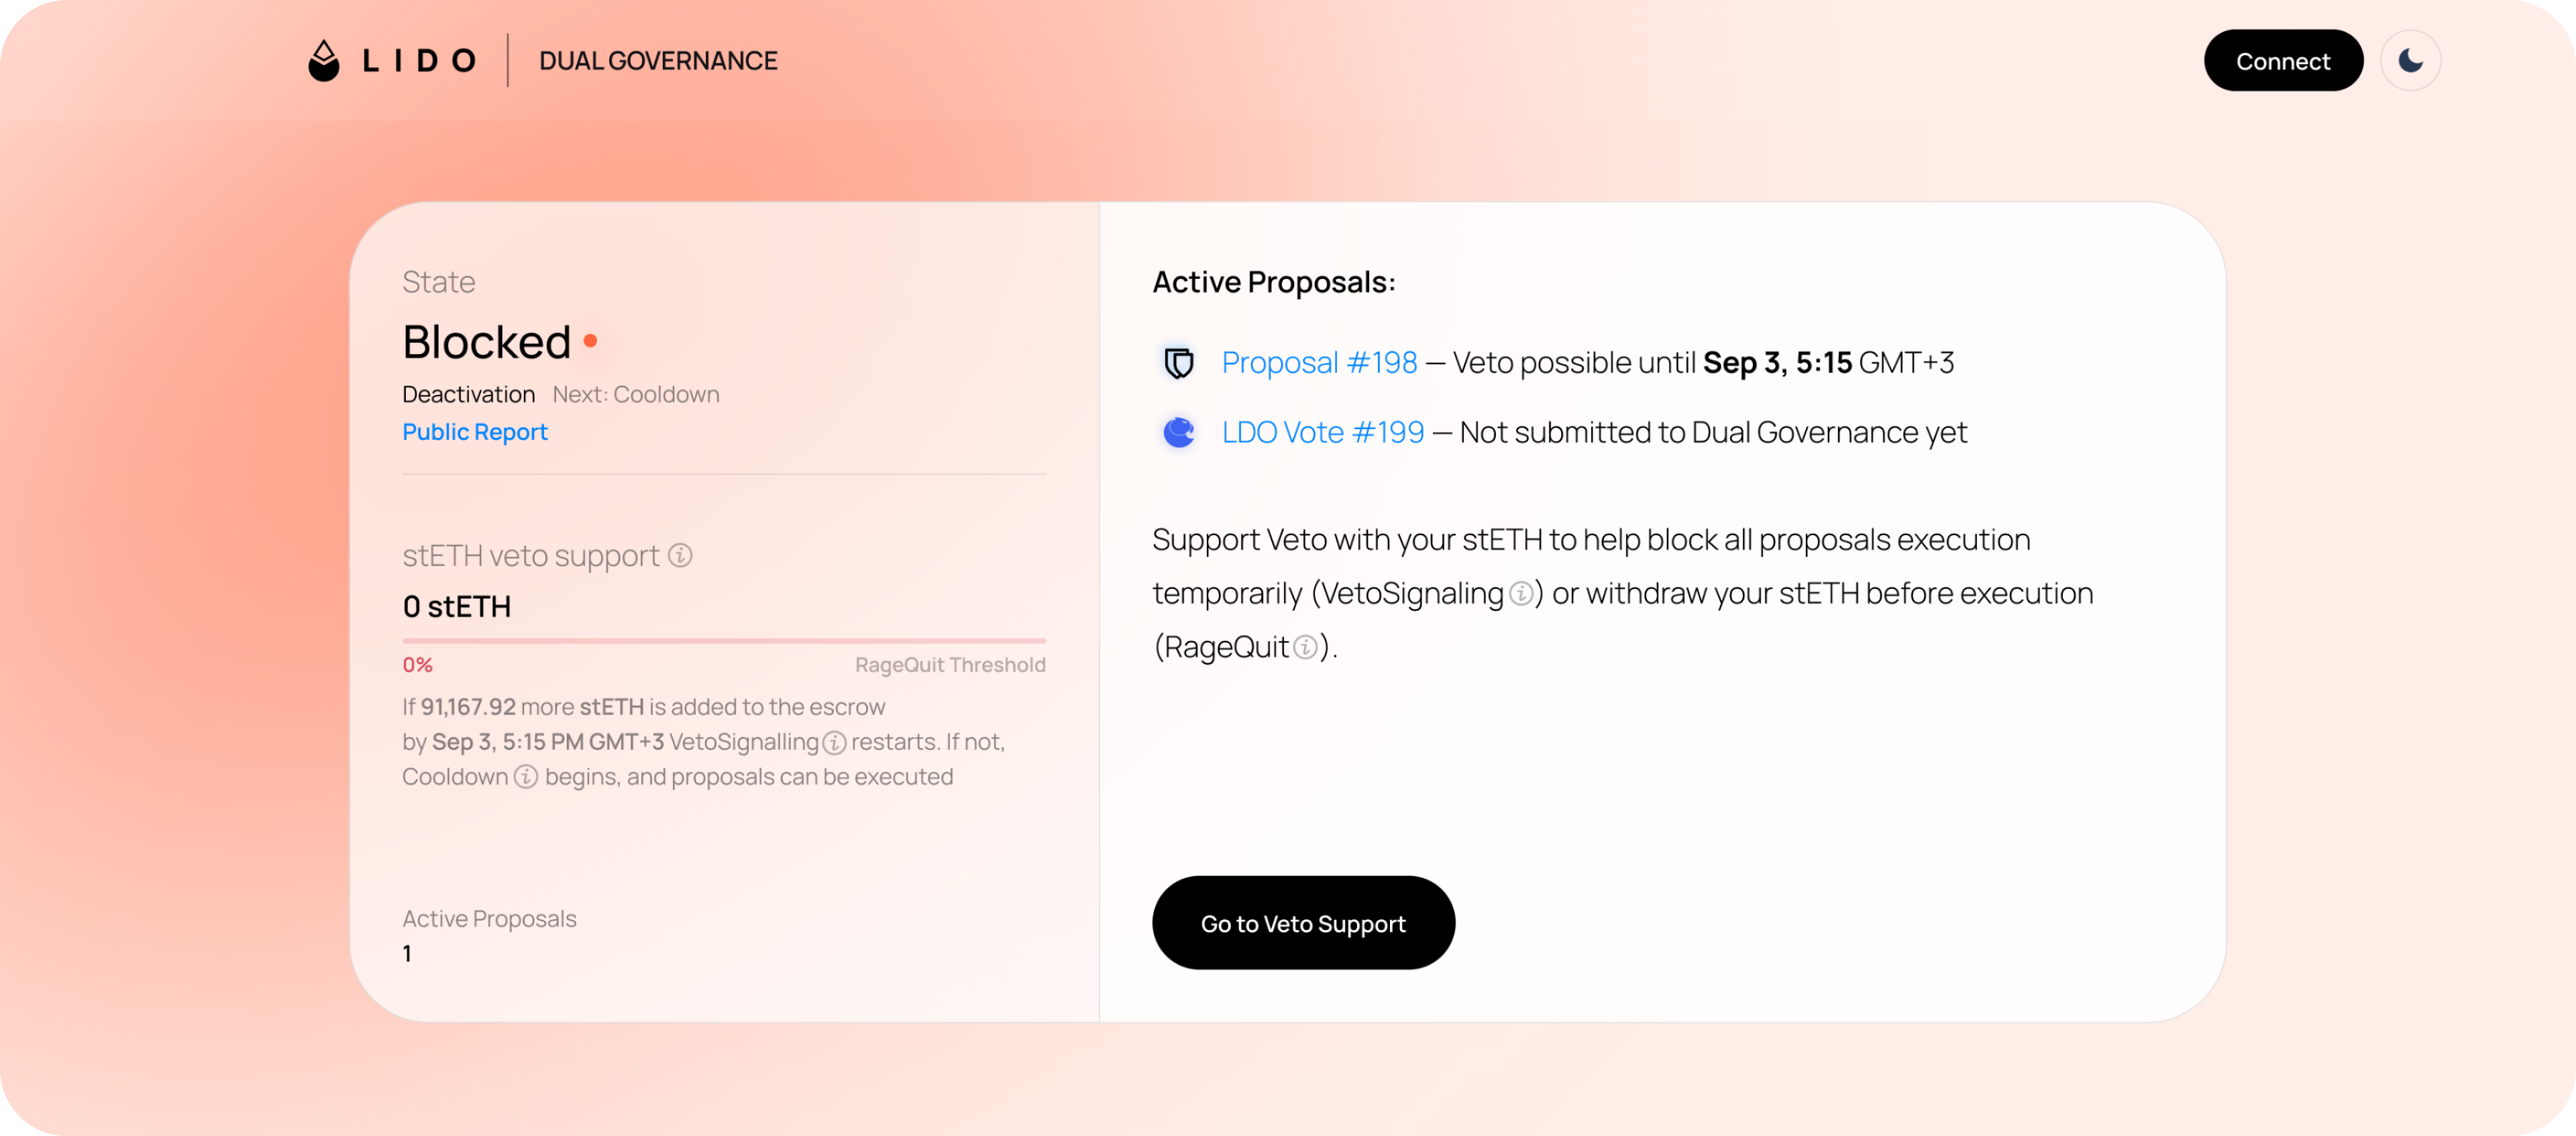
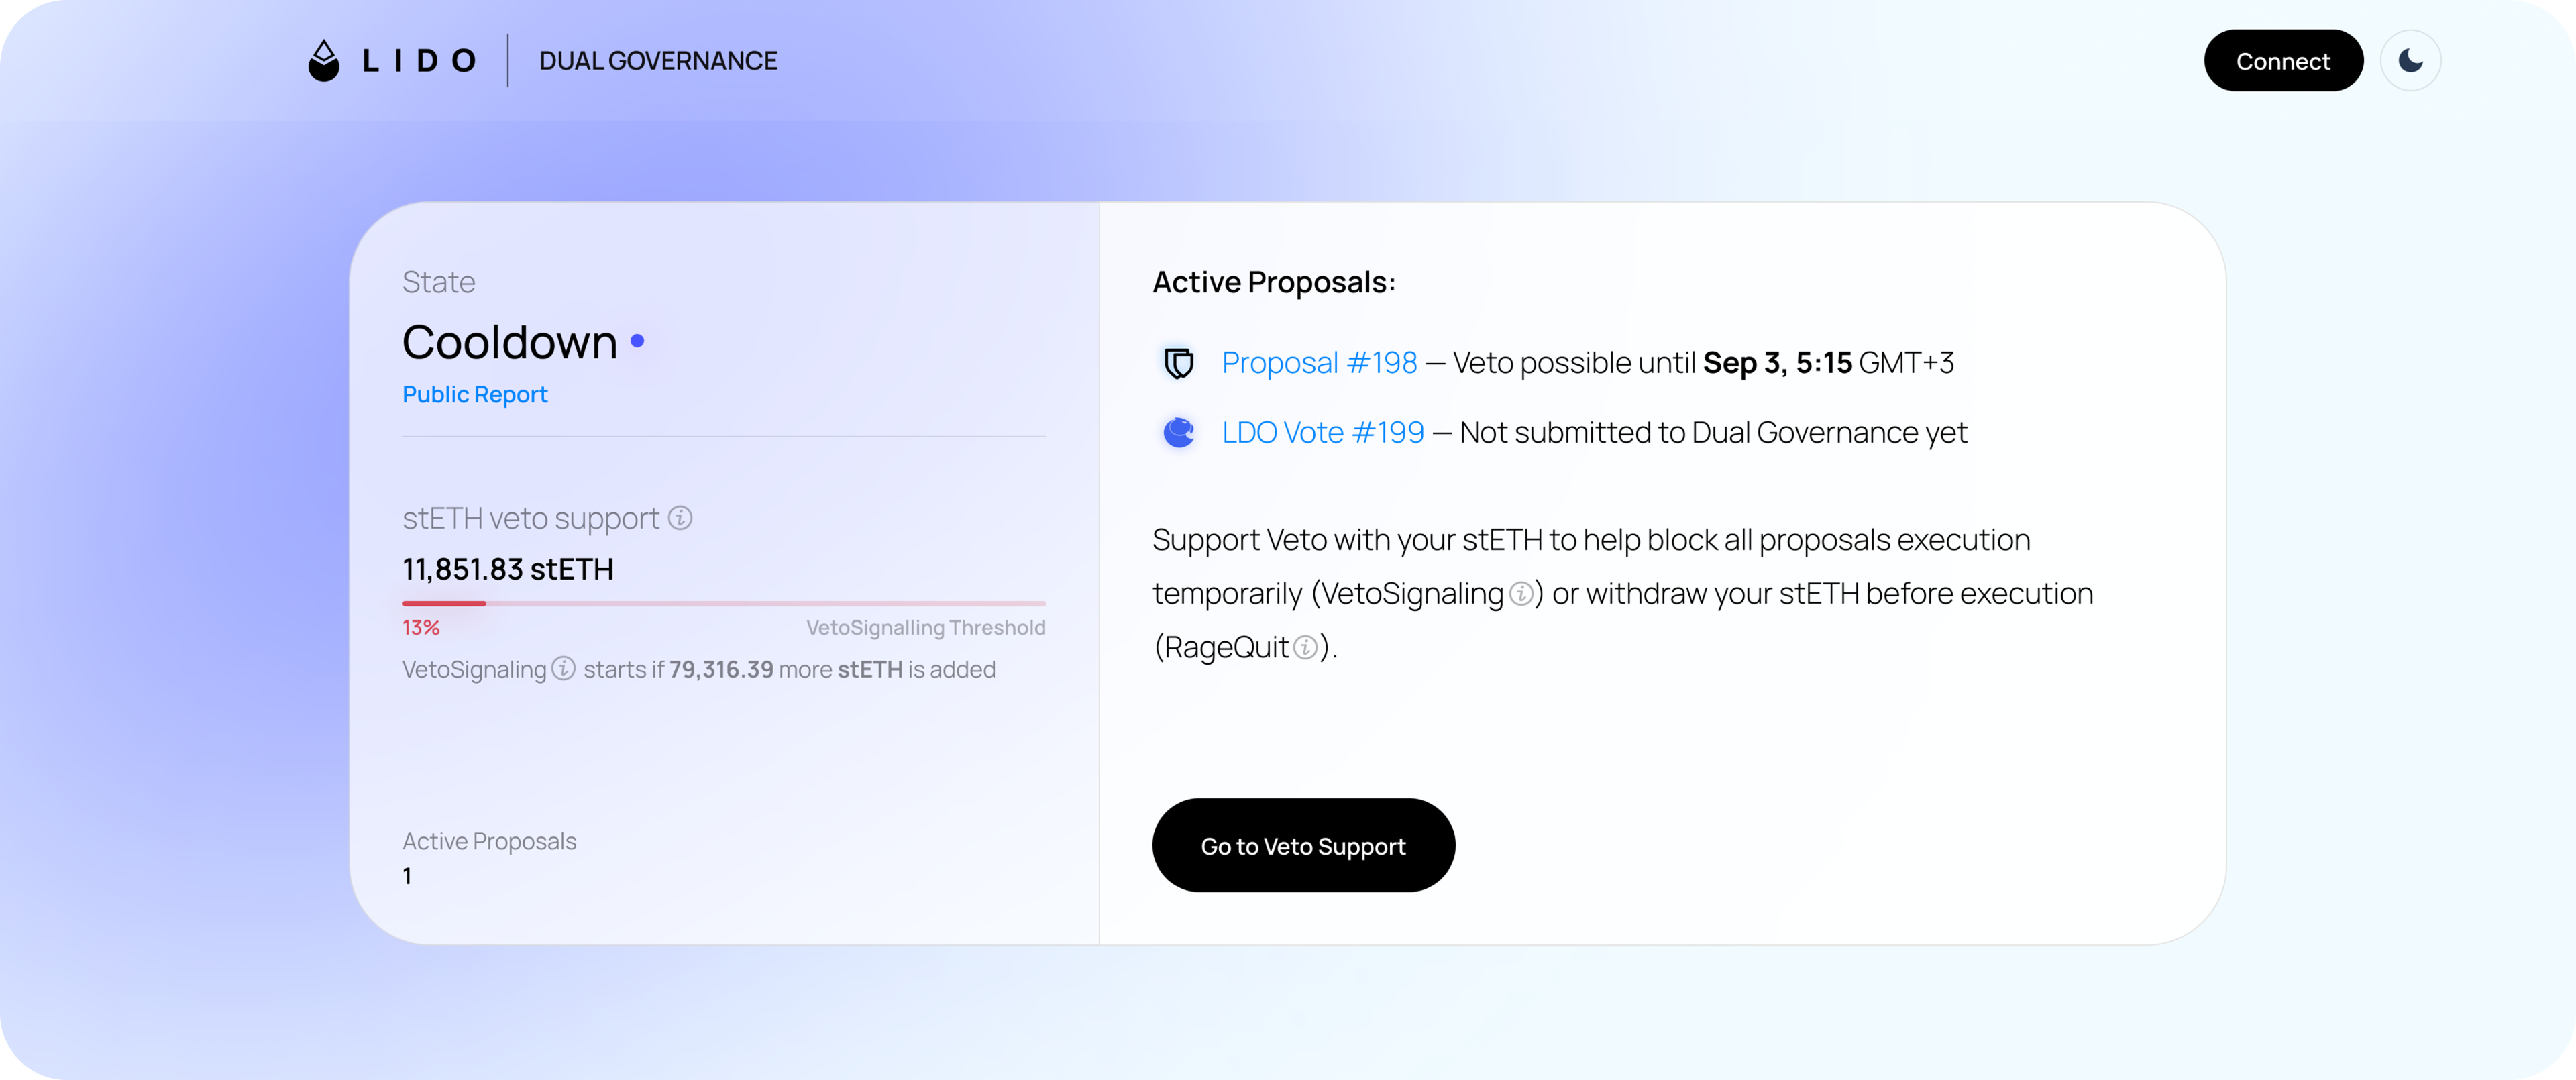
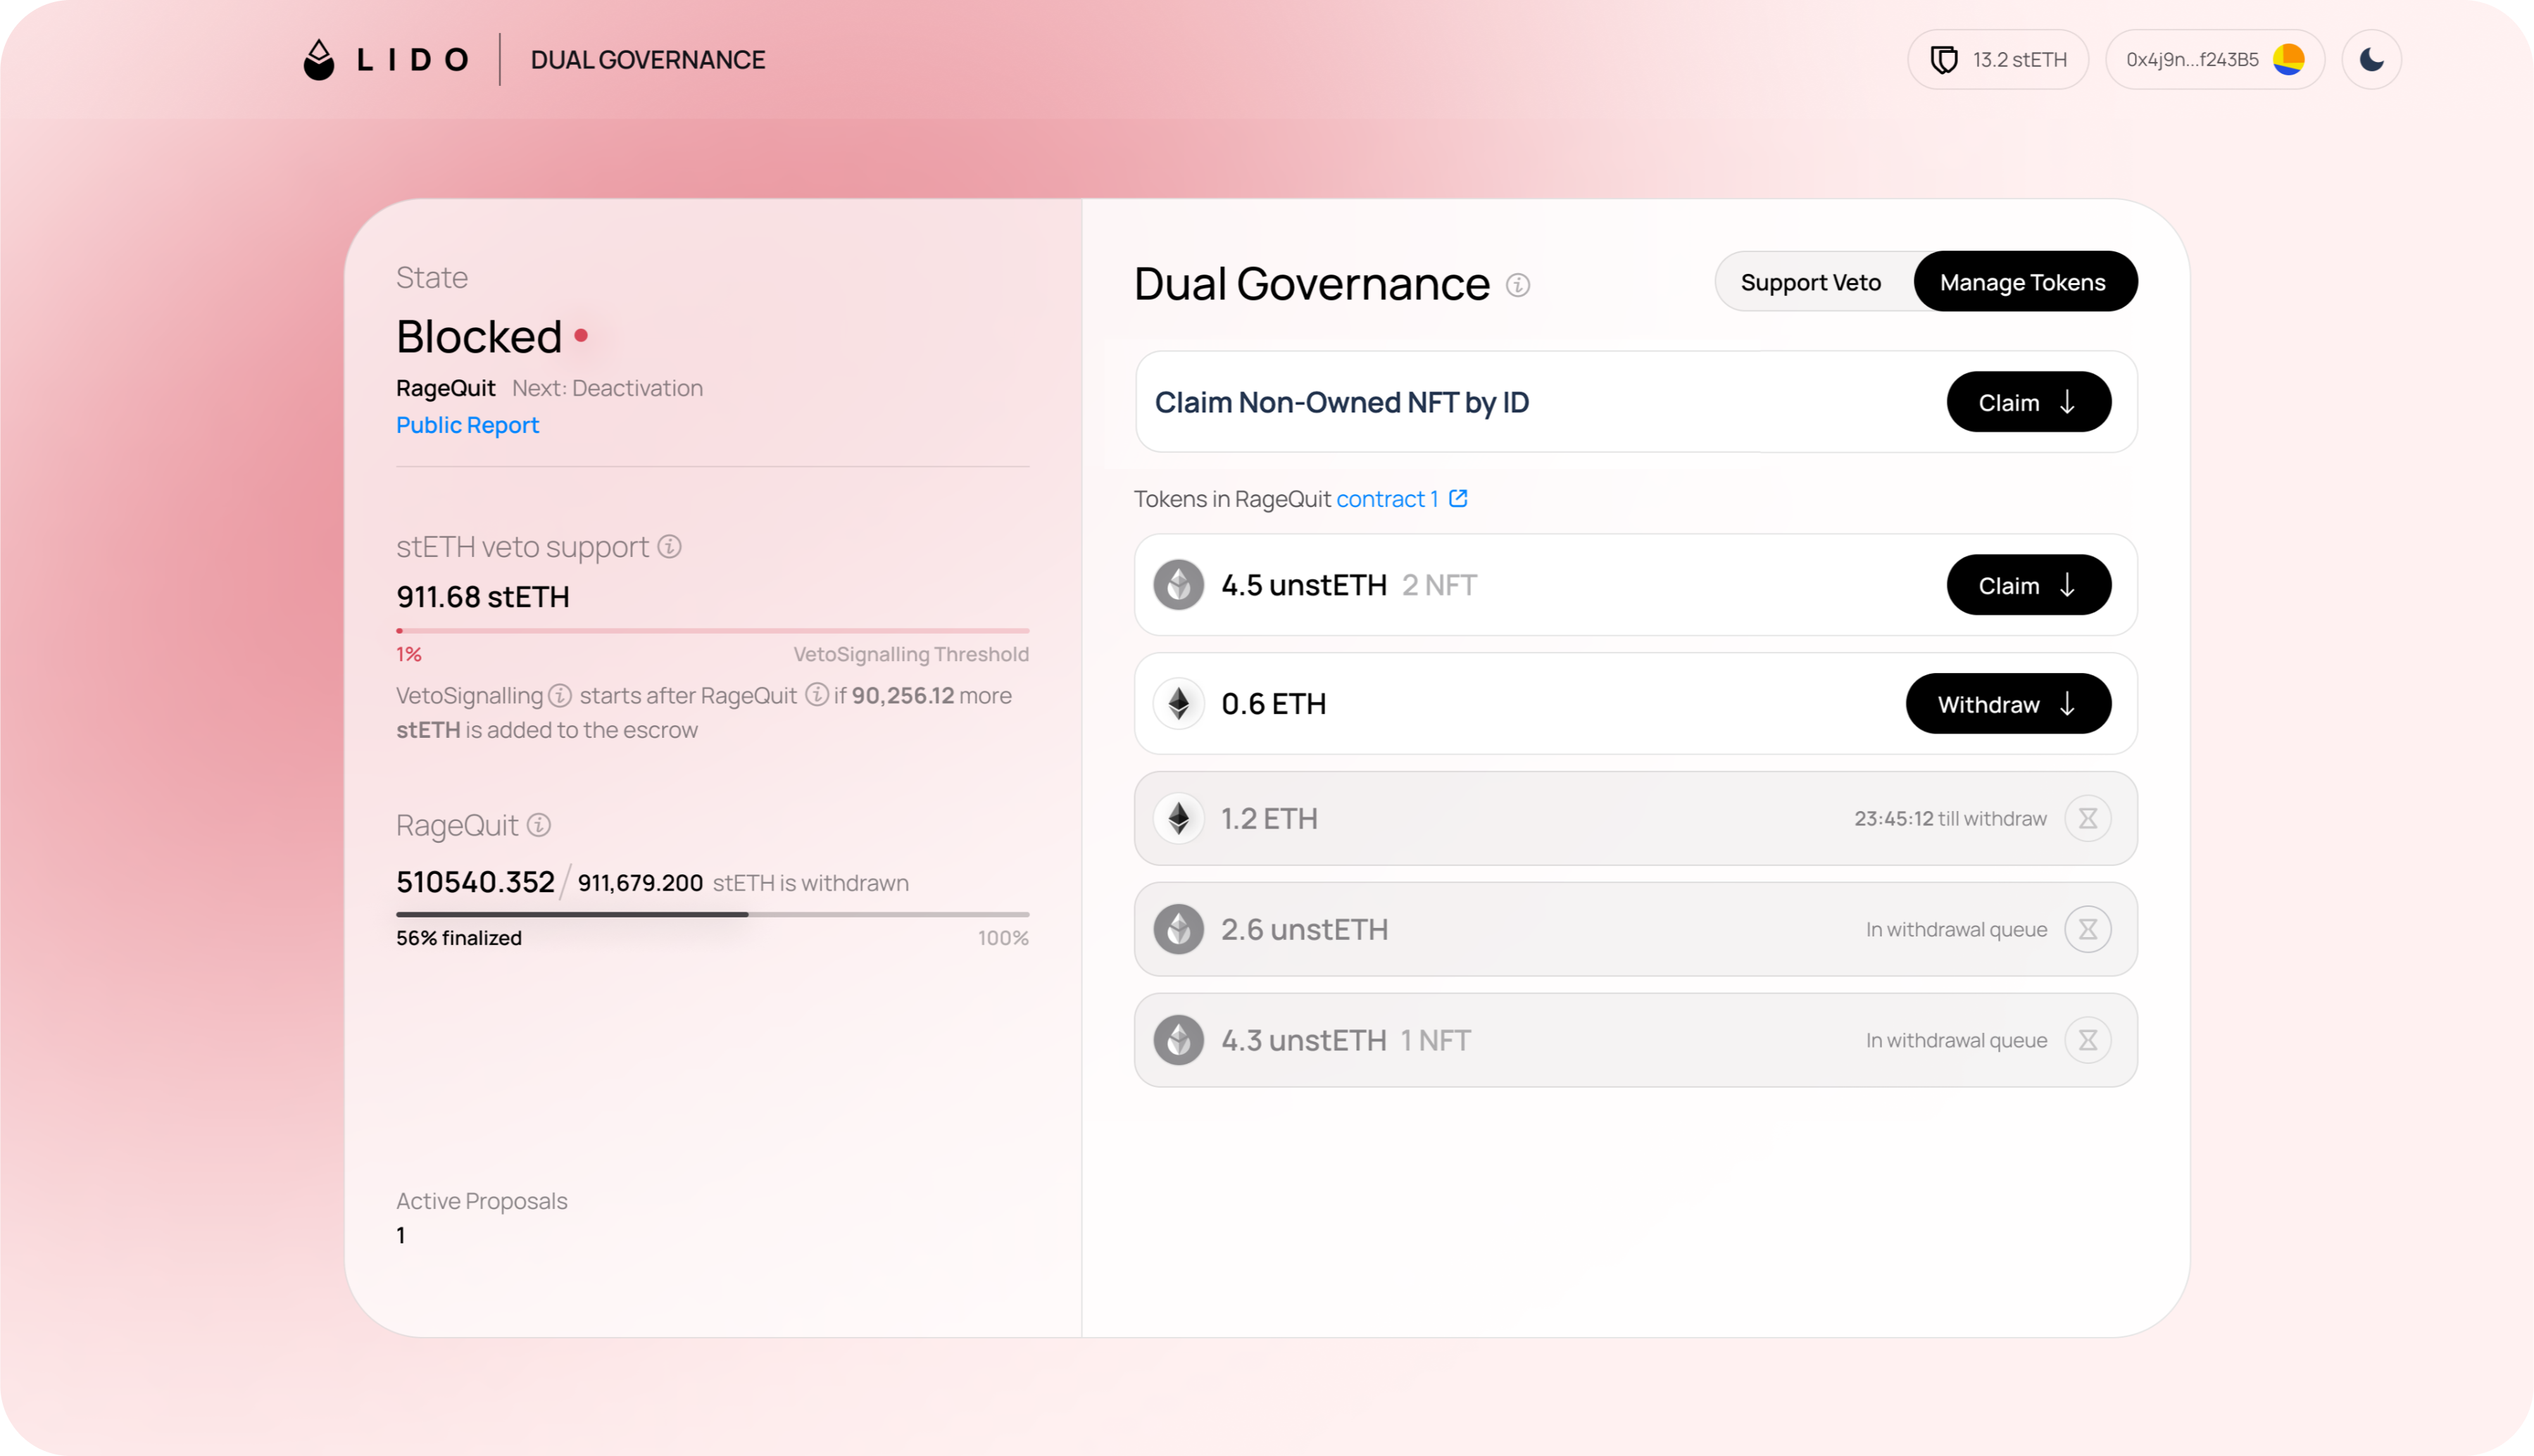
The current governance state is displayed on the left side of the block.
Normal state: A proposal can be submitted to Dual Governance. After the default 3-day timelock, the proposal becomes executable.
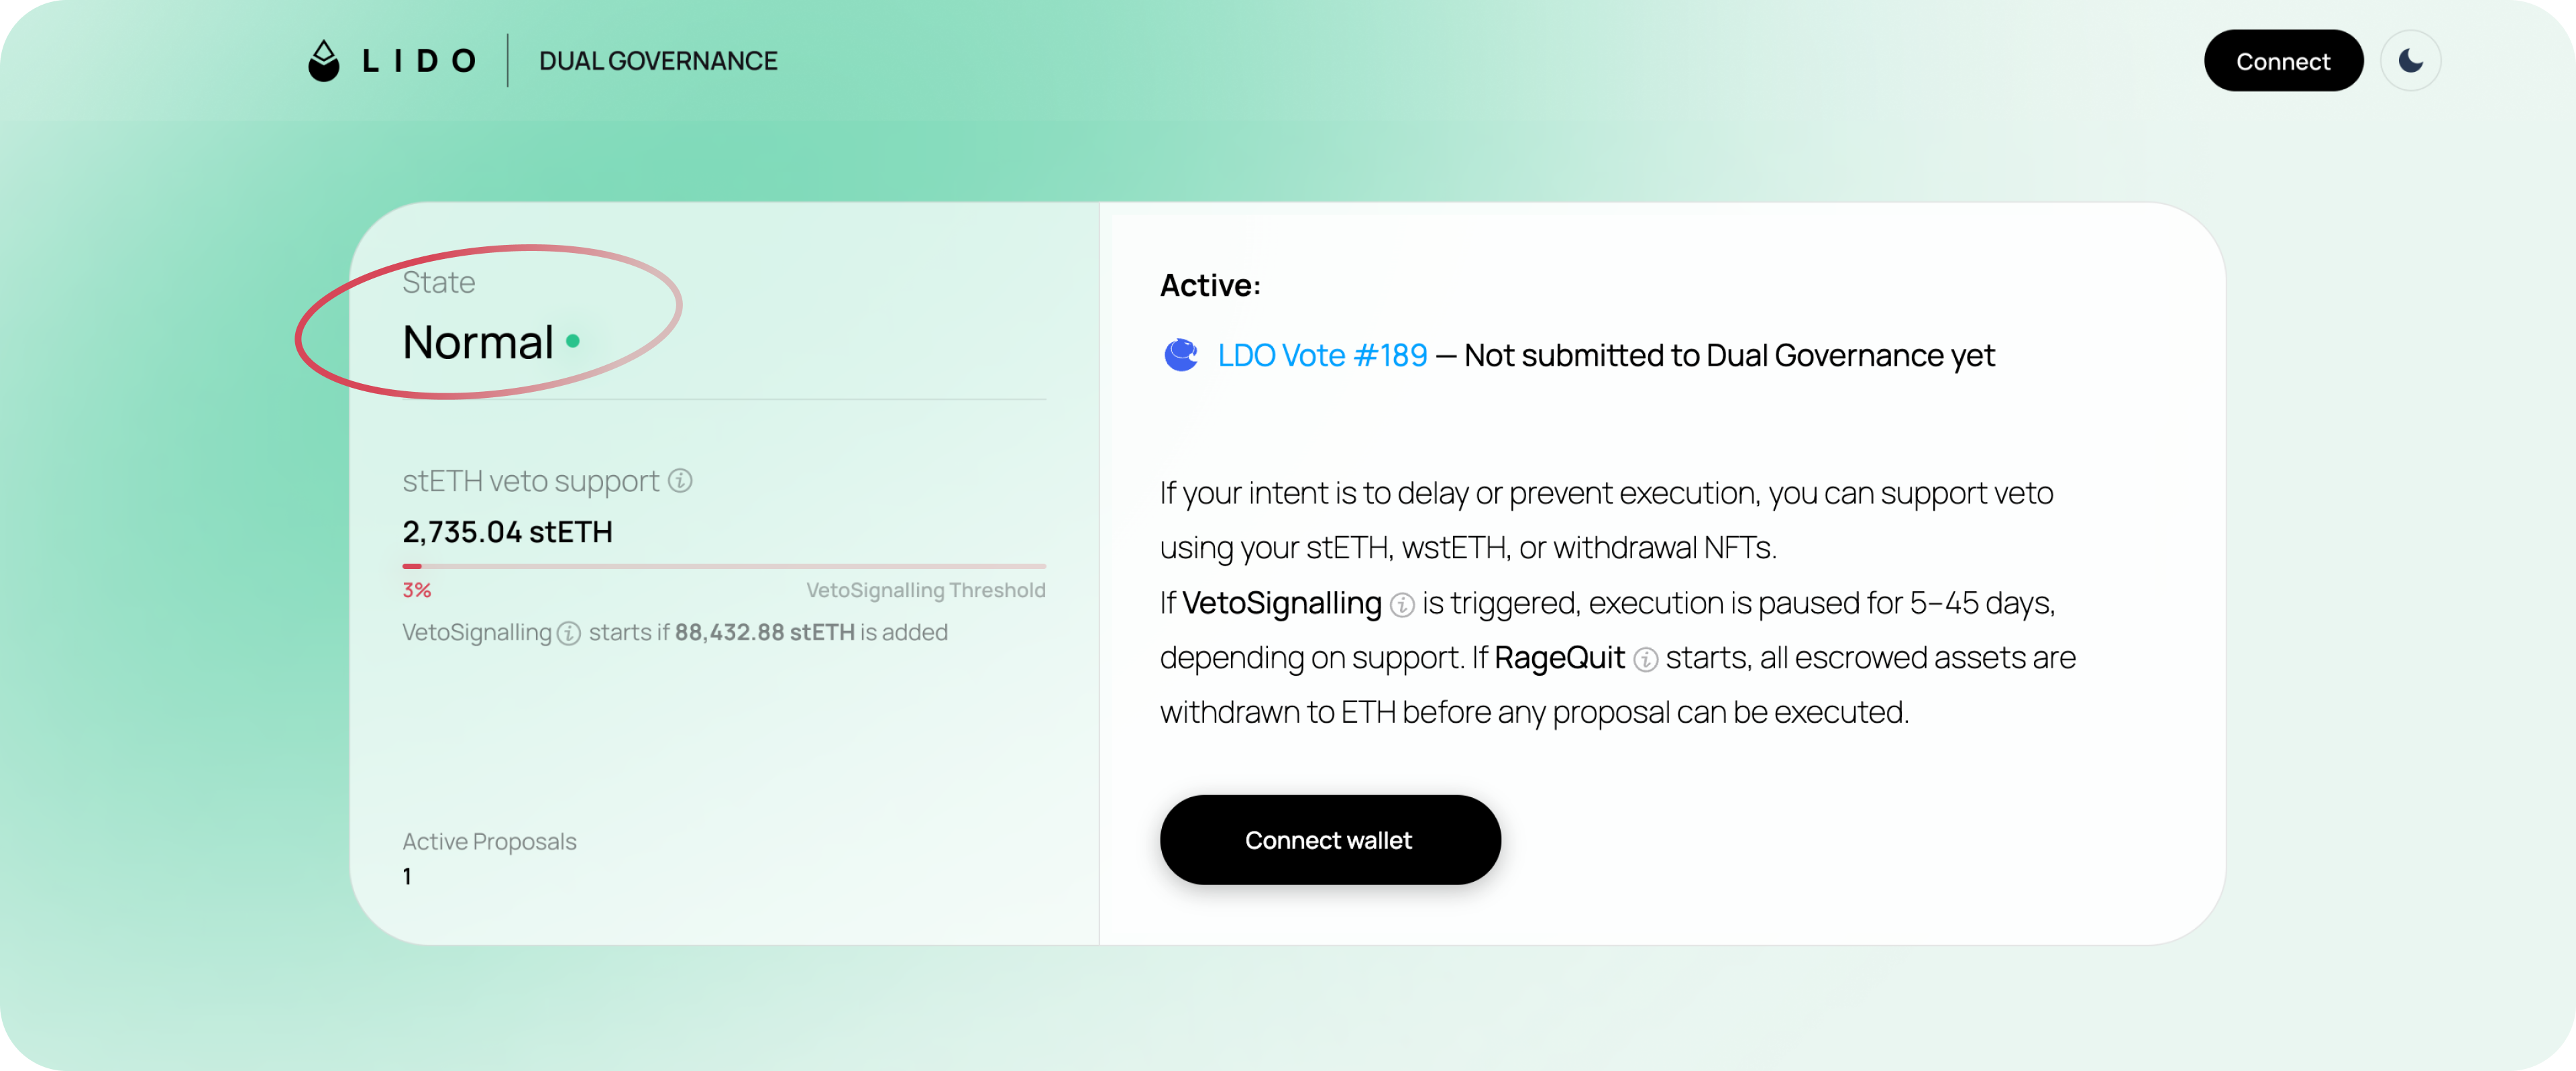
The background turns yellow when 30% of the first threshold (Veto Signalling, 1% of total stETH supply) is reached, though the governance state remains Normal.
Veto Signalling: Governance motions are blocked for 5 to 45 days, depending on the amount of opposing tokens. Submission of new proposals remains active during this period. To find out details and join the ongoing discussion, click on the Public Report link.
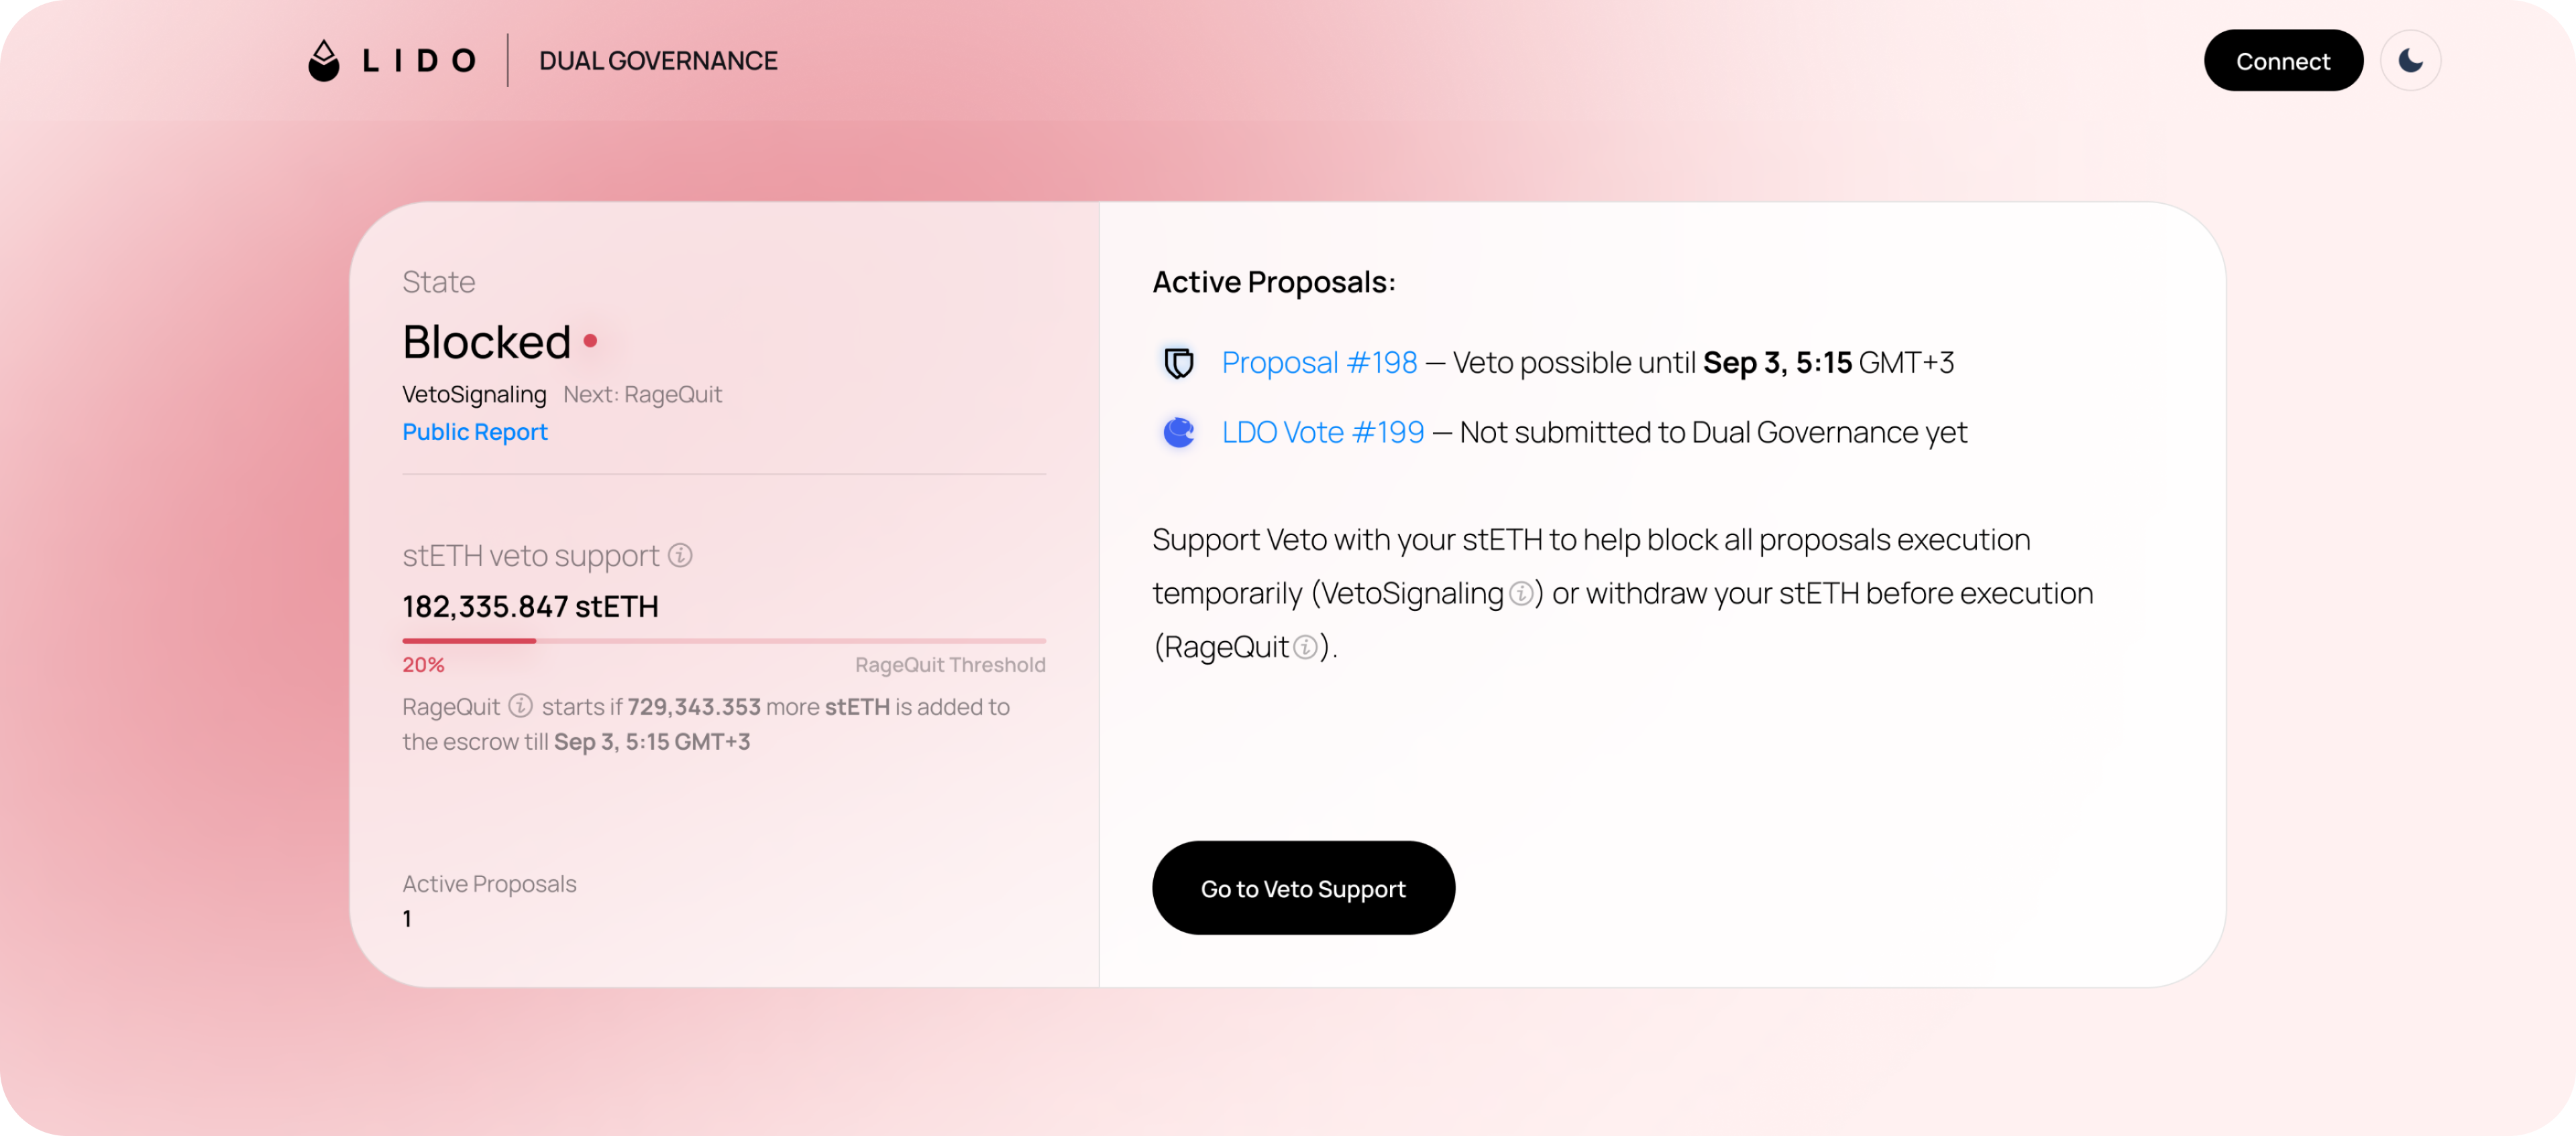
Rage Quit: Governance motions are blocked until tokens in the escrow exit the protocol. Submission of new proposals remains active during this period.
Deactivation: A brief period indicating Veto Signalling is about to end, after which non-cancelled proposals will be available for execution in the next state. Proposal submission is blocked during Deactivation.
Cooldown: Transitional state after Veto Signalling or Rage Quit when pending proposals can be executed even if the opposition is higher than 1% of the total stETH supply.
-
Check the progress bar to see how much stETH has been added to the escrow and how much remains before the threshold is reached and the governance state changes:

How to signal your opposition
Step 1: Connect your wallet
-
Go to Dual Governance page https://dao.lido.fi/dg
-
Click
Connect walletbutton in the upper right corner or under the proposal listing block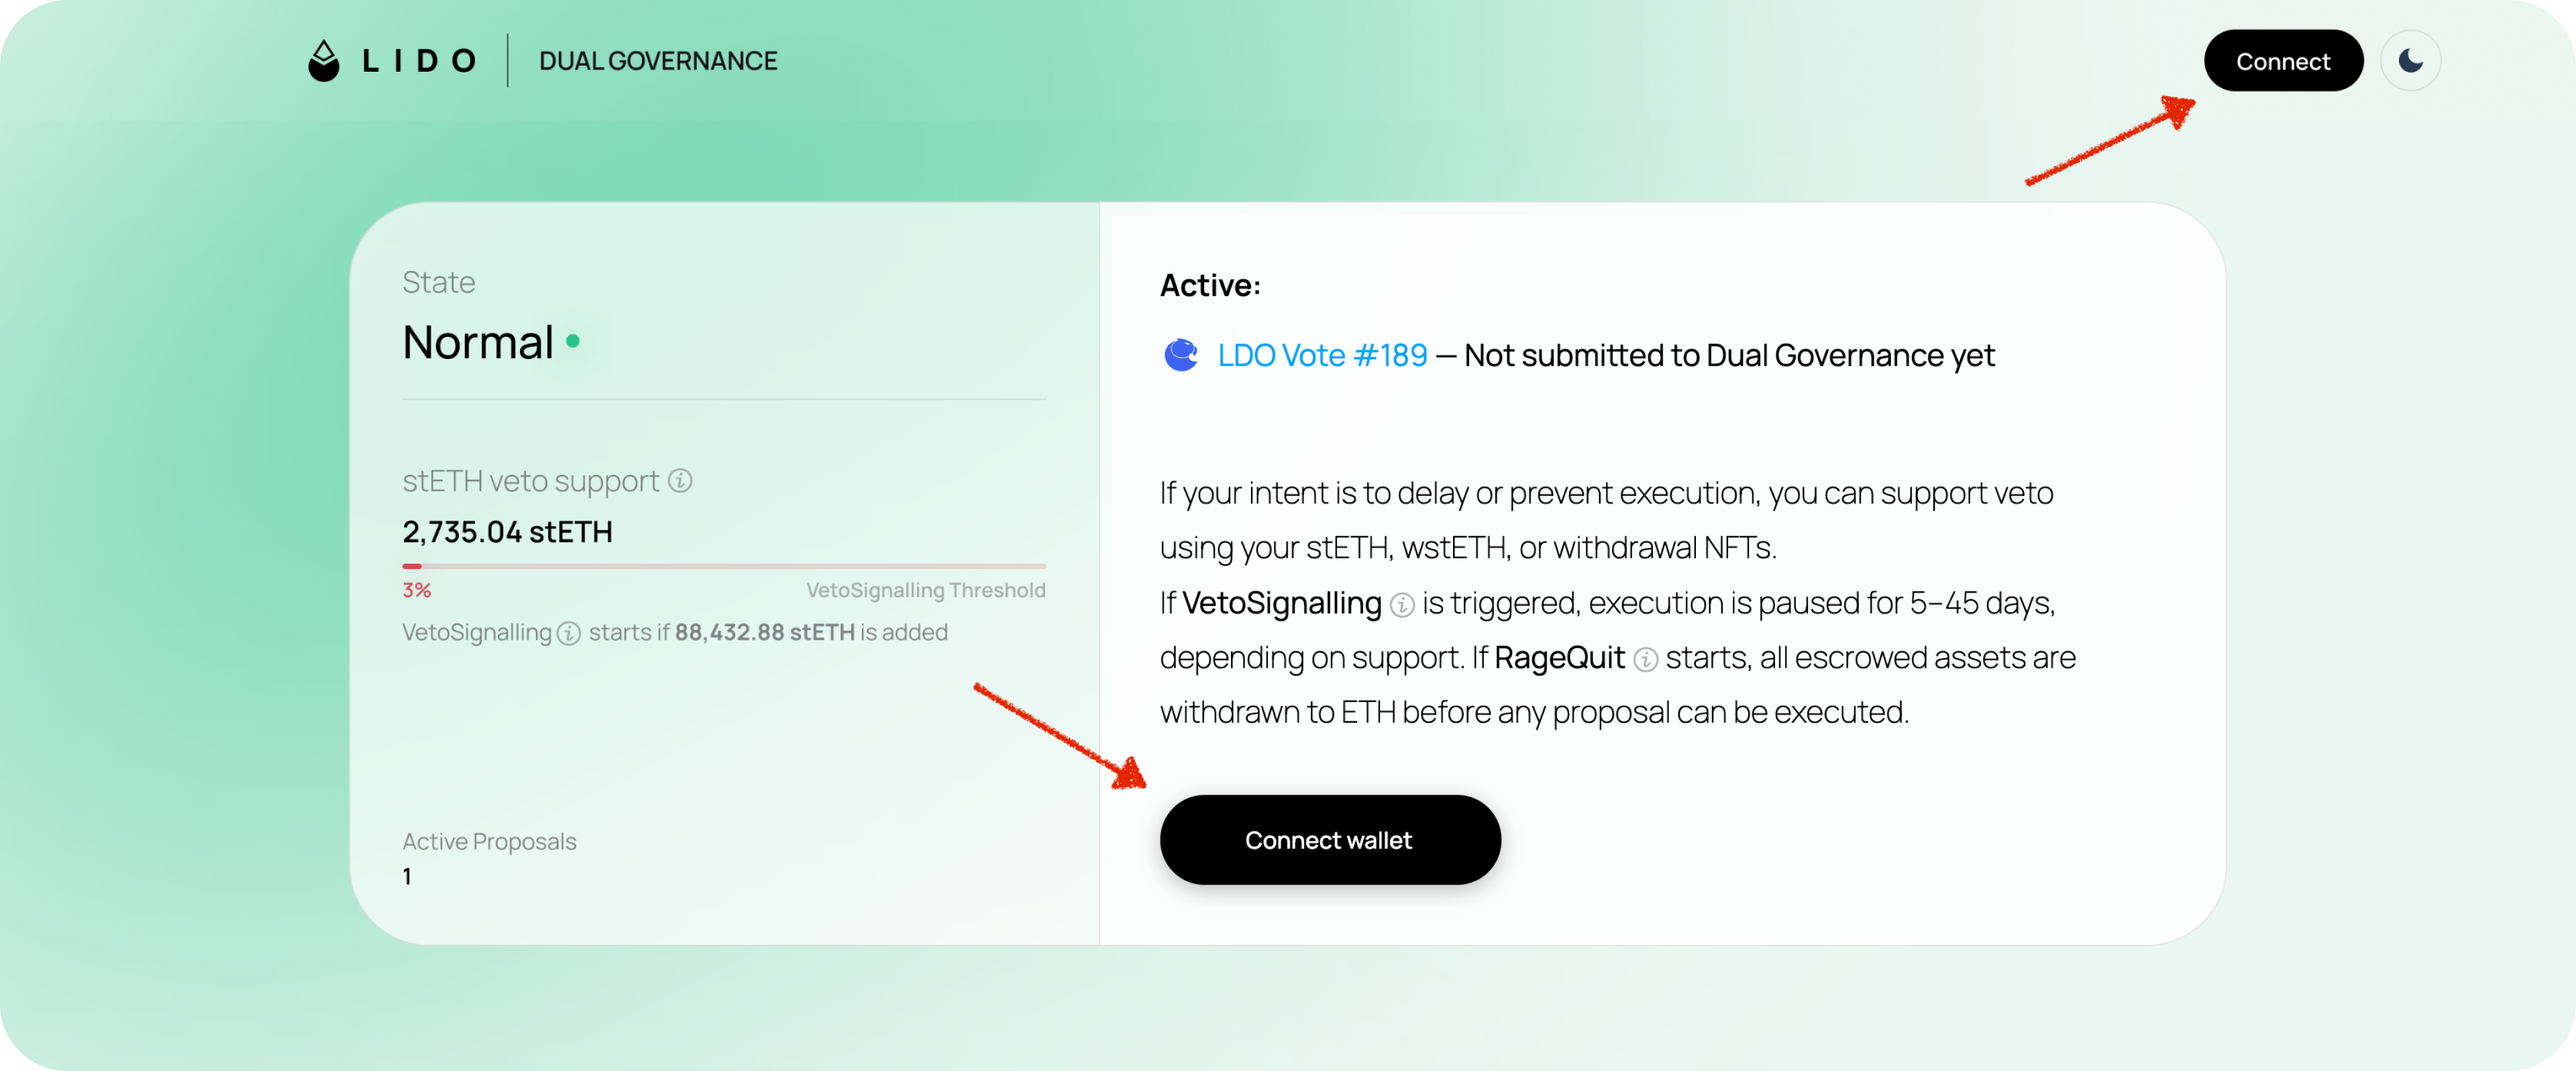
Step 2a: Select the amount of stETH
-
Click
Go to Veto Supportbutton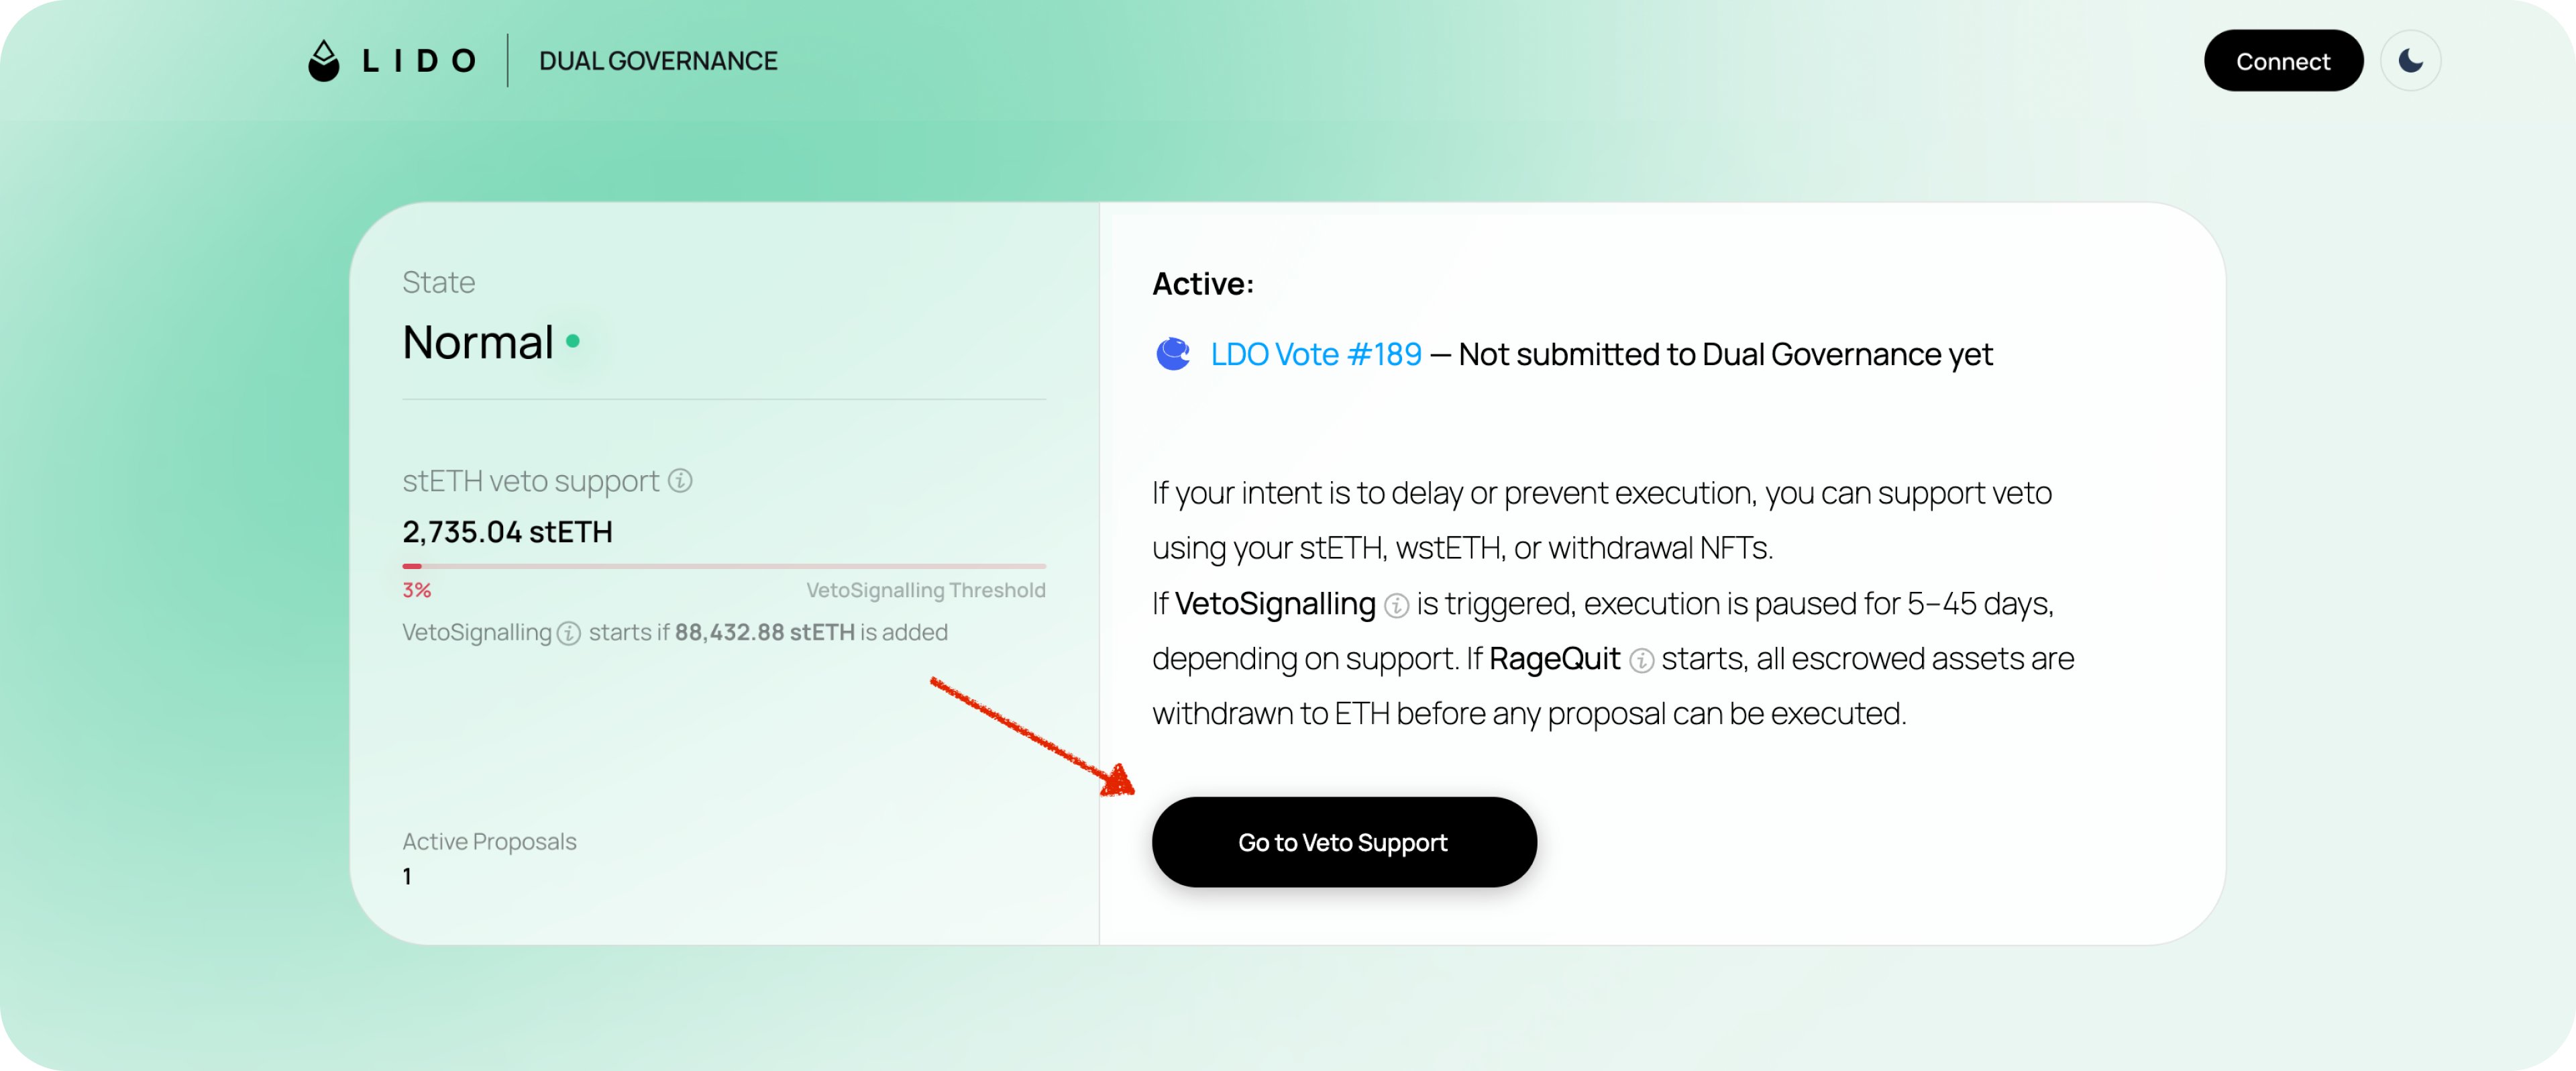
-
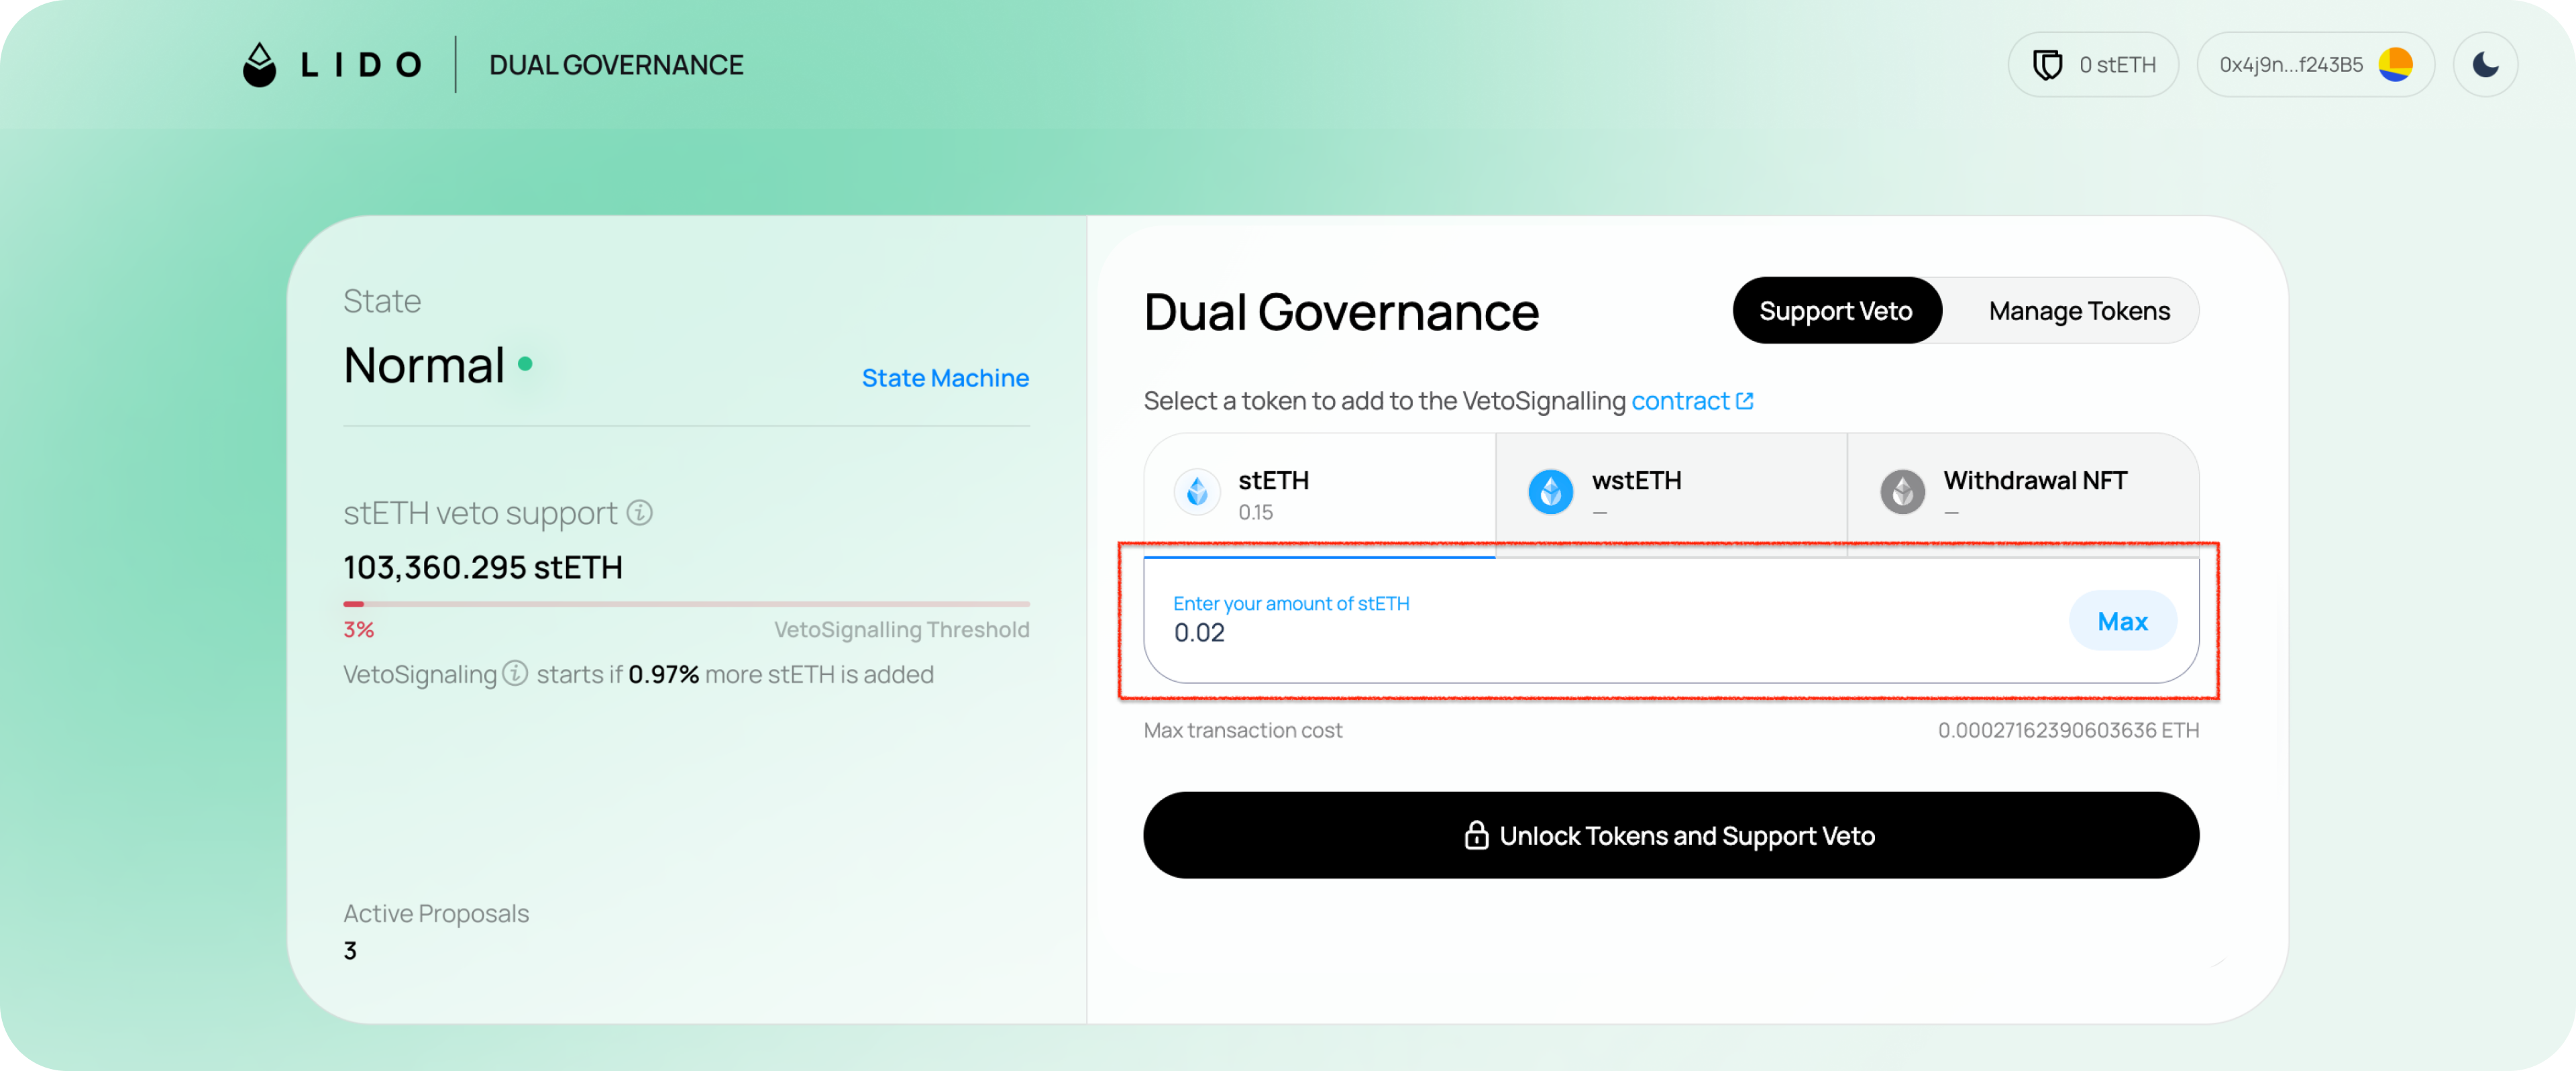
Select the amount of stETH tokens you want to add to the escrow for signaling your opposition to LDO governance decisions
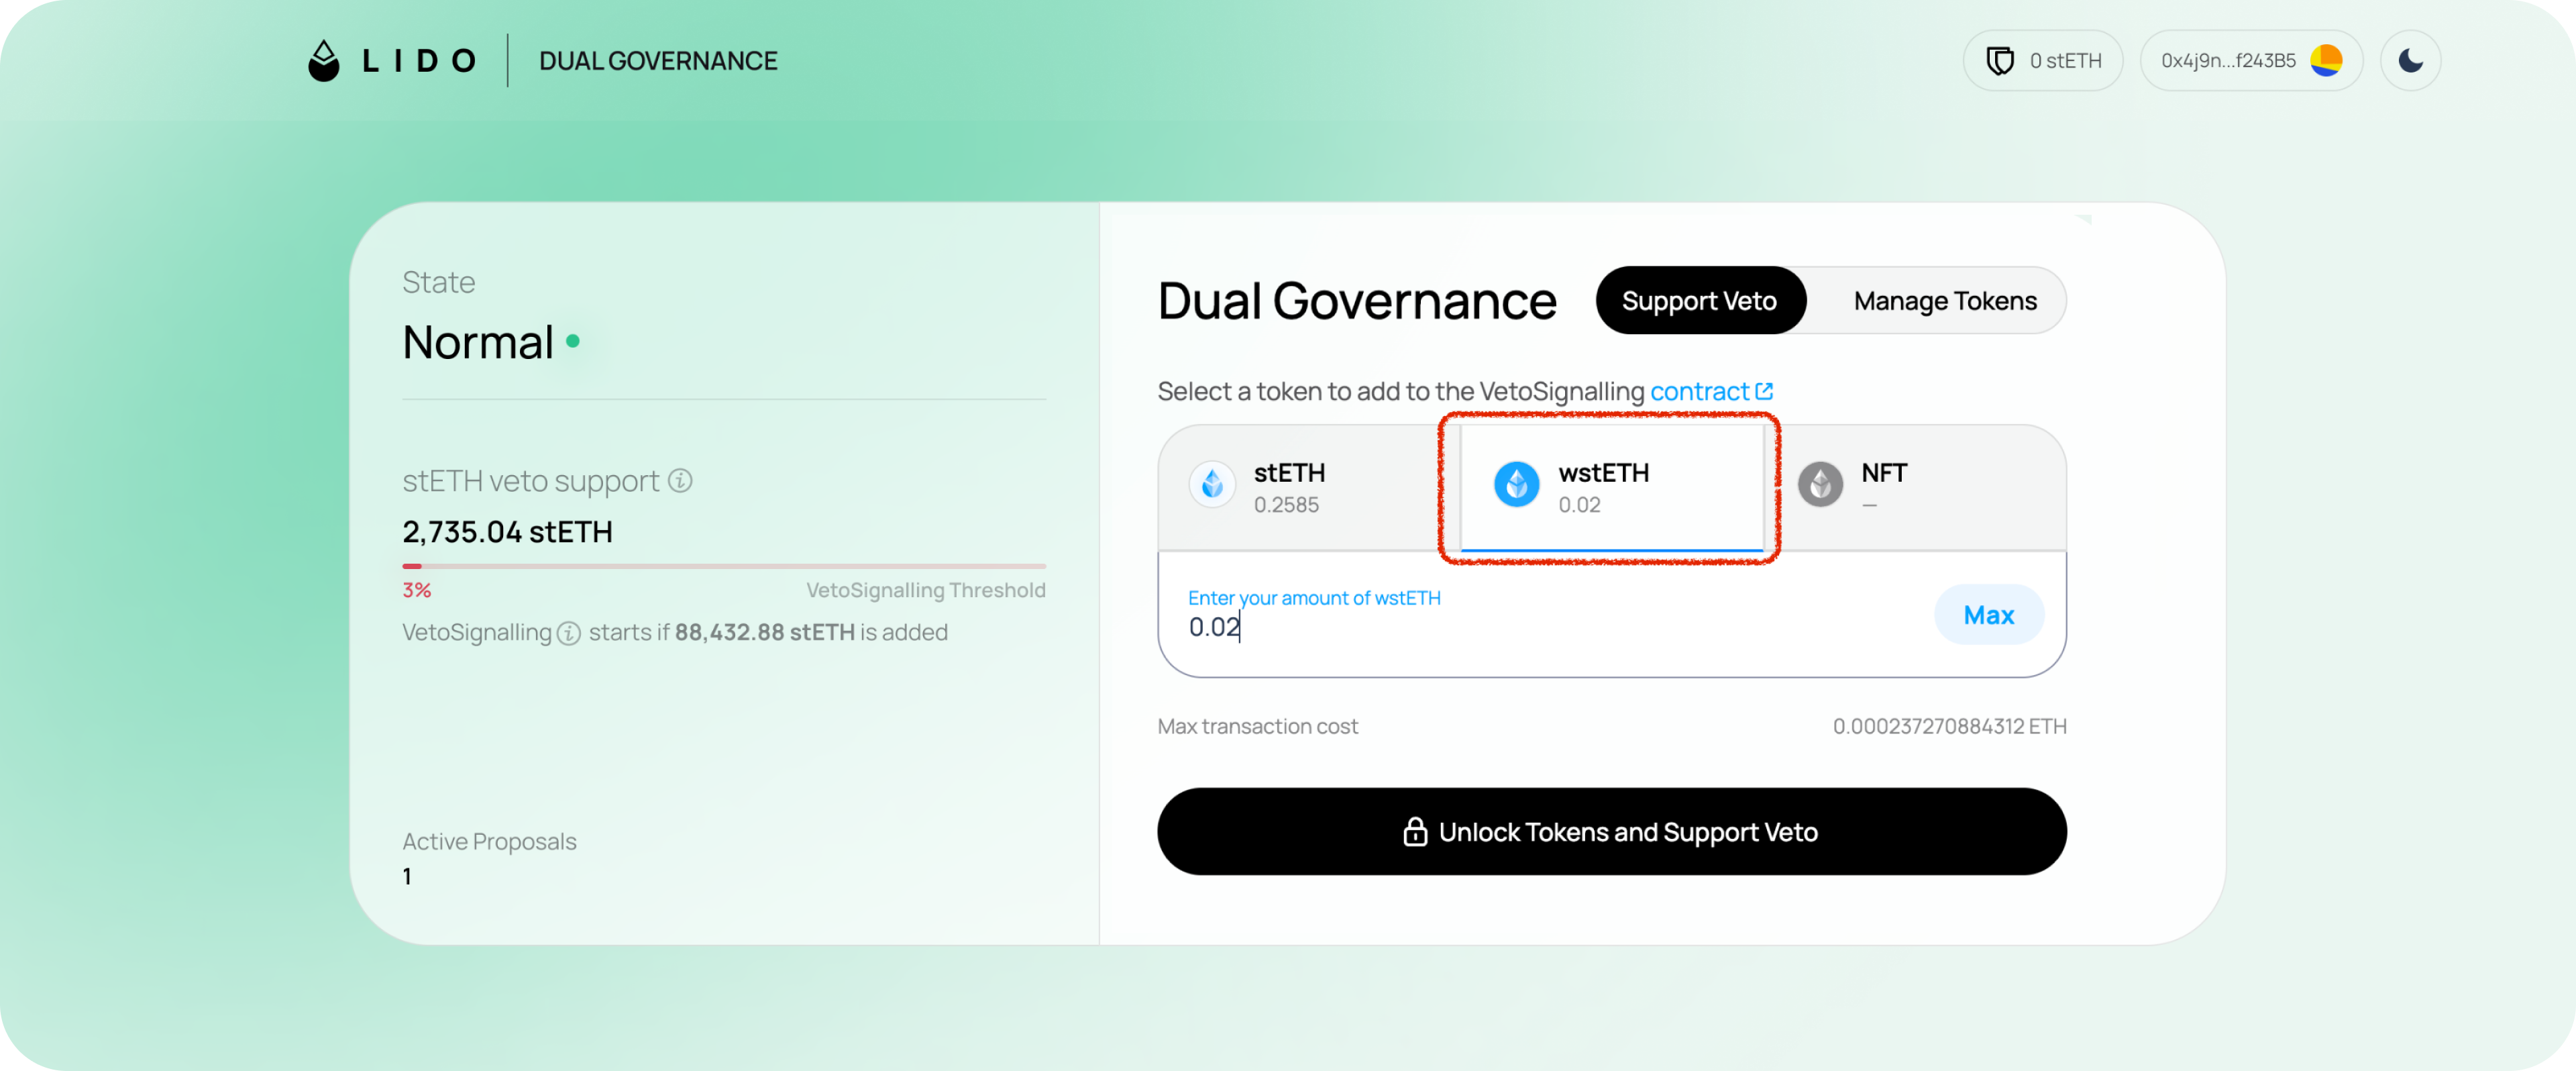
To select wstETH, click the second tab and select the amount to deposit. Inside the Dual Governance, deposited wstETH will be converted to stETH at a 1:1 ratio.
-
Press
Unlock tokens and support Veto -
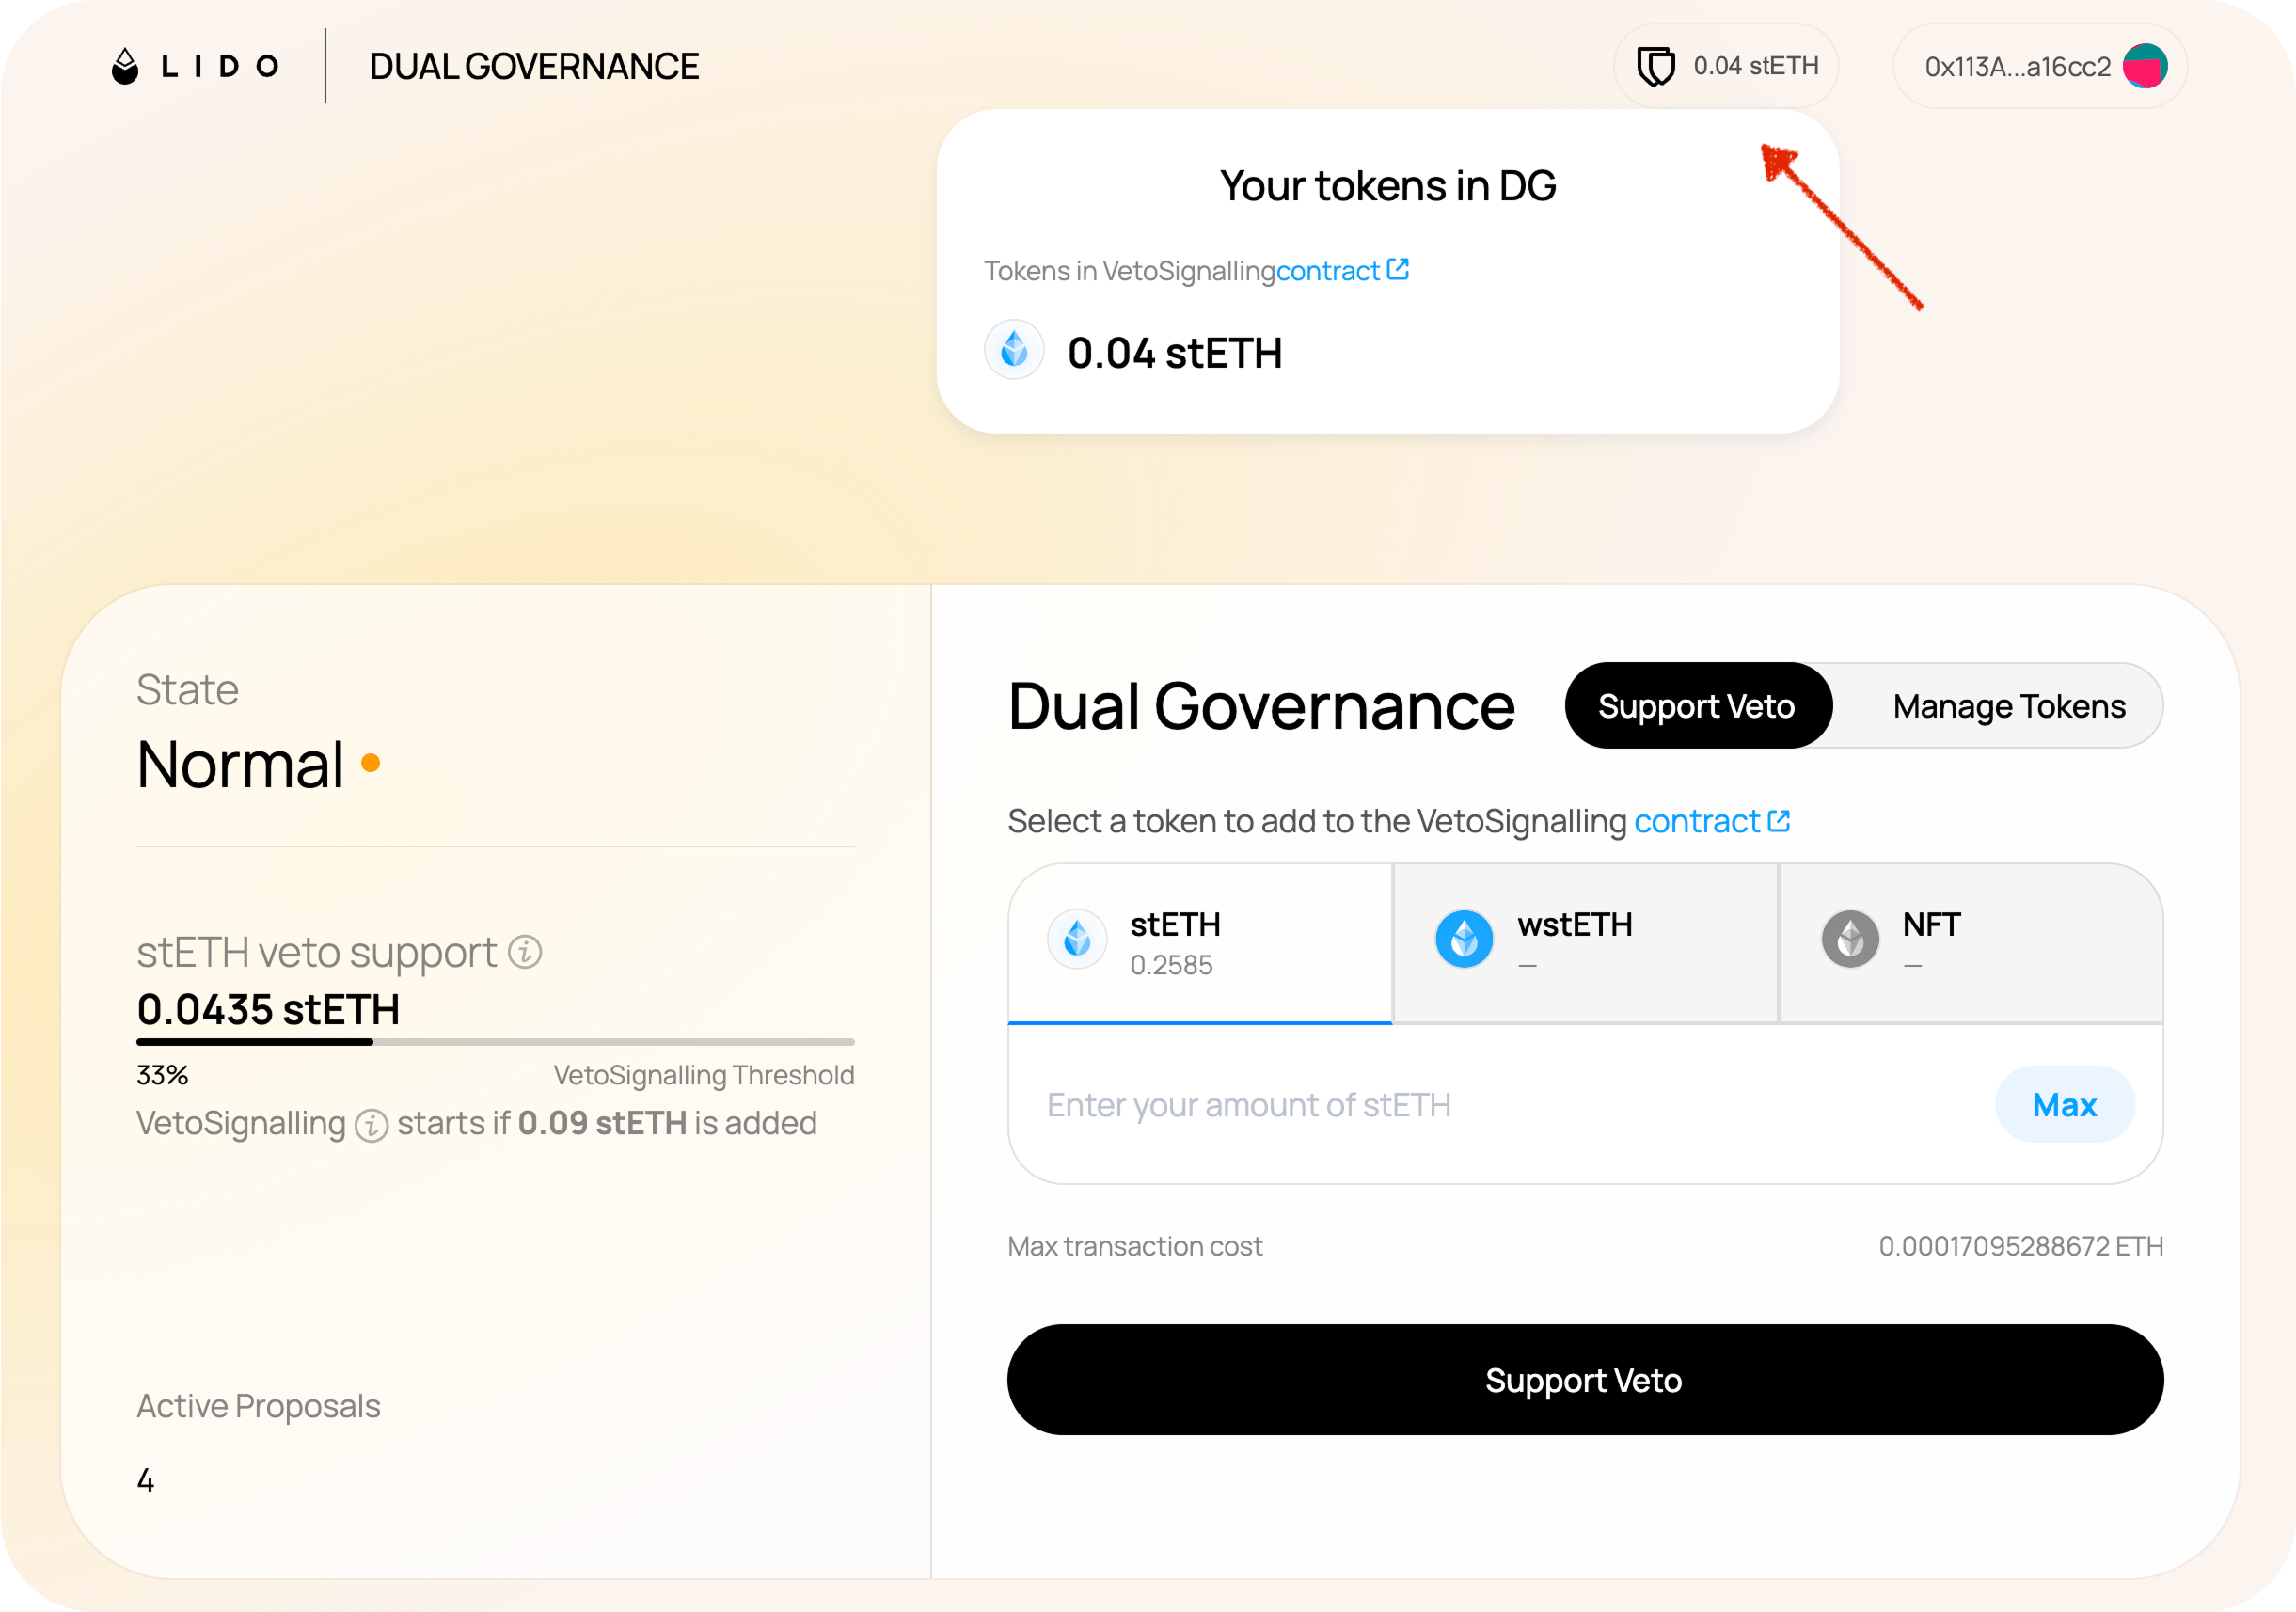
To check your tokens in Dual Governance, click the double shield icon in the upper right corner:
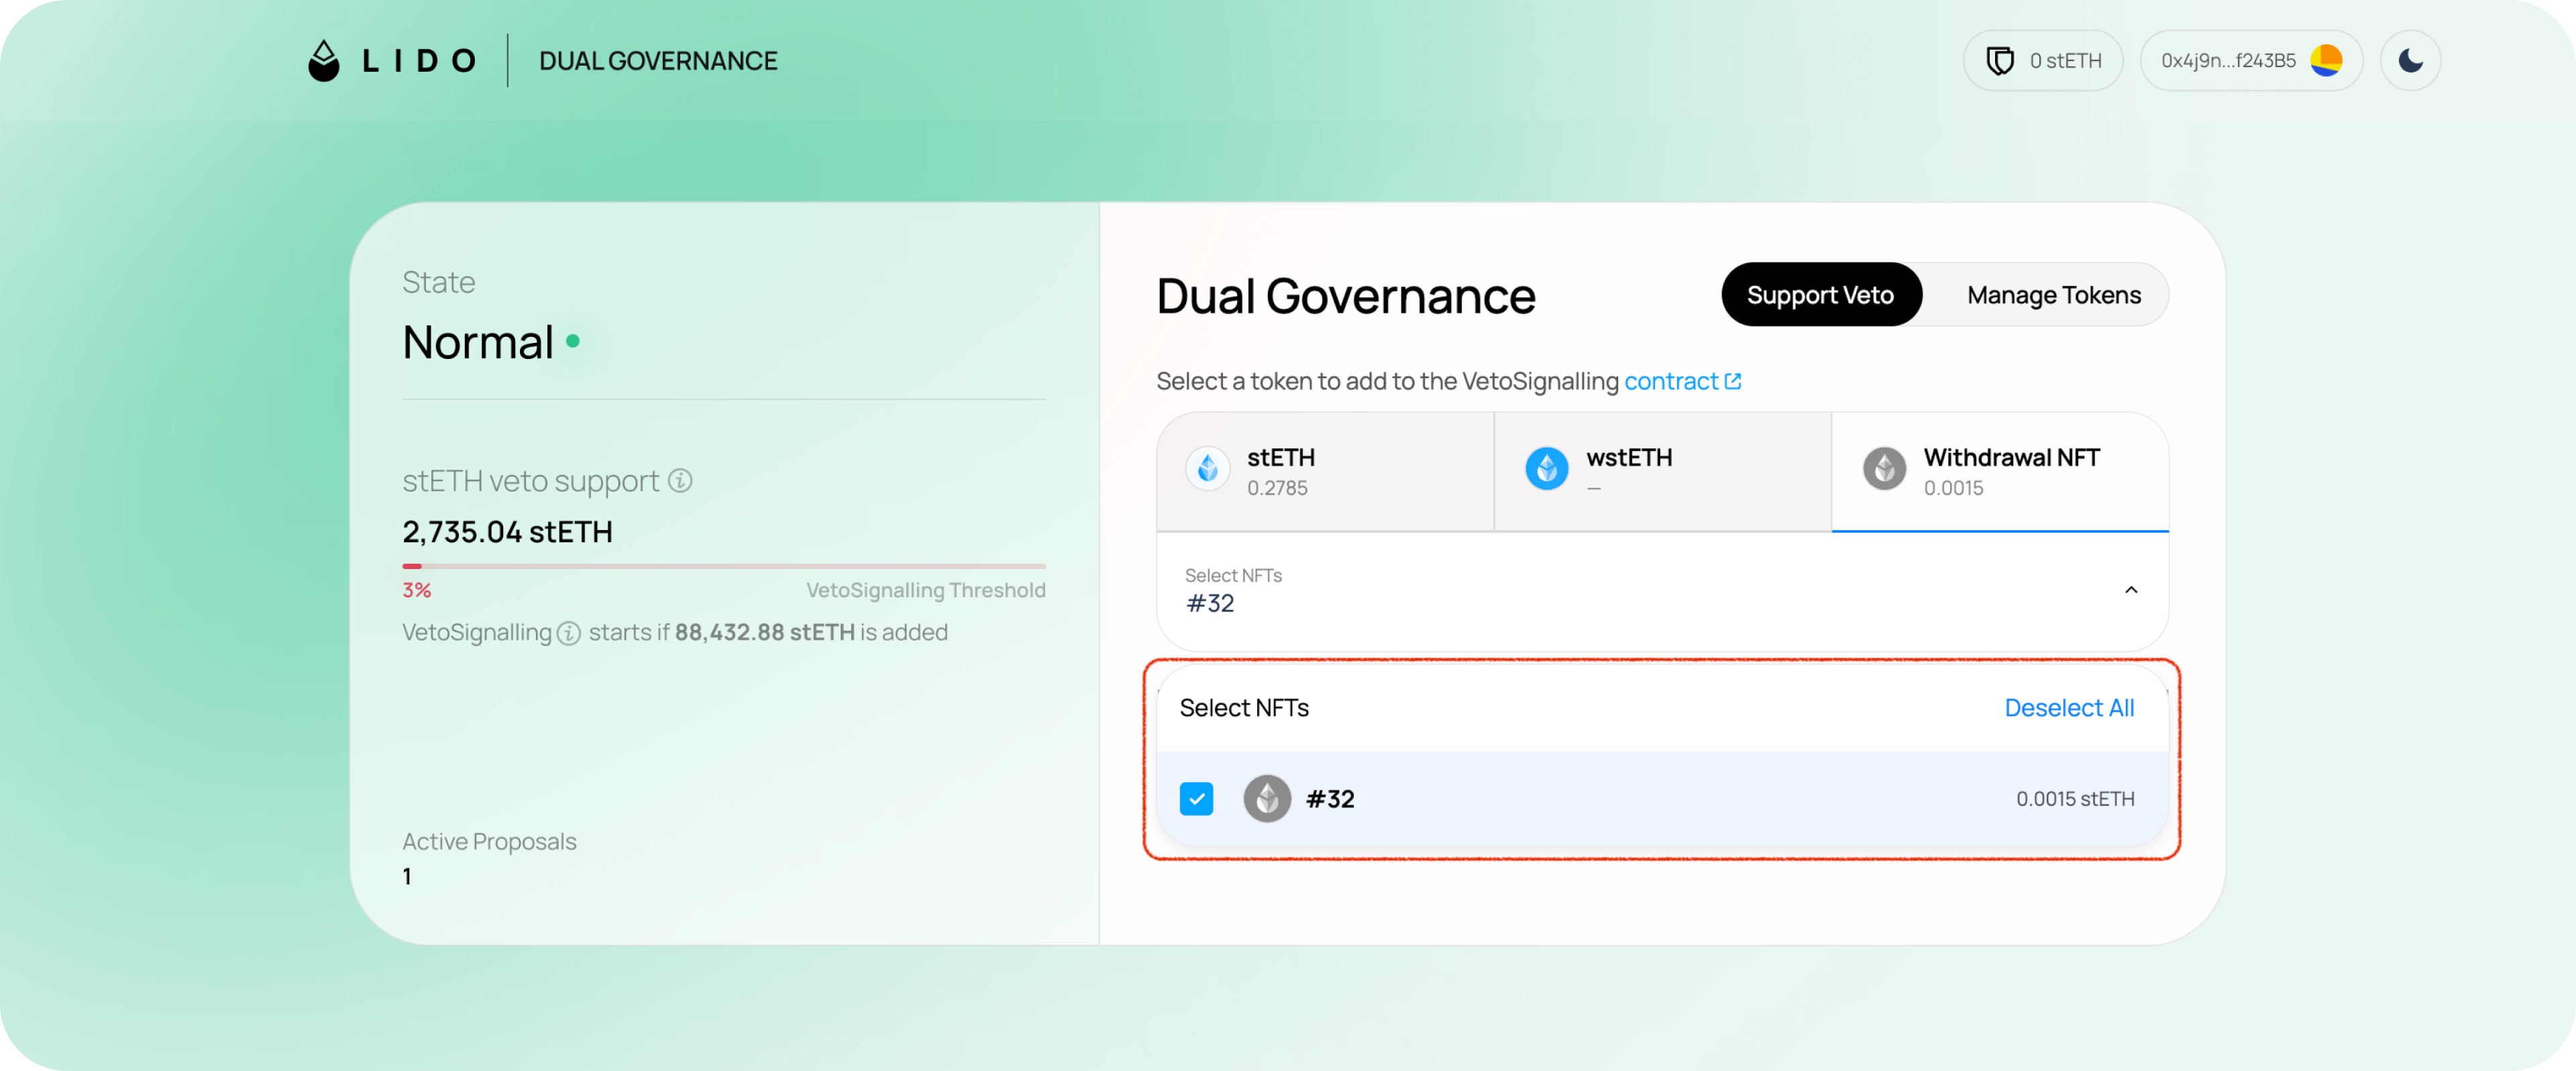
Step 2b: Select the withdrawal NFT
If you have already requested a withdrawal in the Lido staking widget, you can use your withdrawal NFT to support Veto Signalling. This helps delay proposal execution until your ETH has exited the protocol.
-
Click
Go to Veto Supportbutton -
Select the third tab Withdrawal NFT
-
Select the NFT you want to use to support Veto Signalling by its ID
How to manage tokens within the Dual Governance
Unless Rage Quit is triggered, you can deposit and revoke tokens from the Veto Signalling escrow at any time (subject to a minimum 5-hour timelock). Once Rage Quit is activated, all (w)stETH tokens in the escrow are automatically queued for exit.
Step 1: Switch to Manage tokens tab
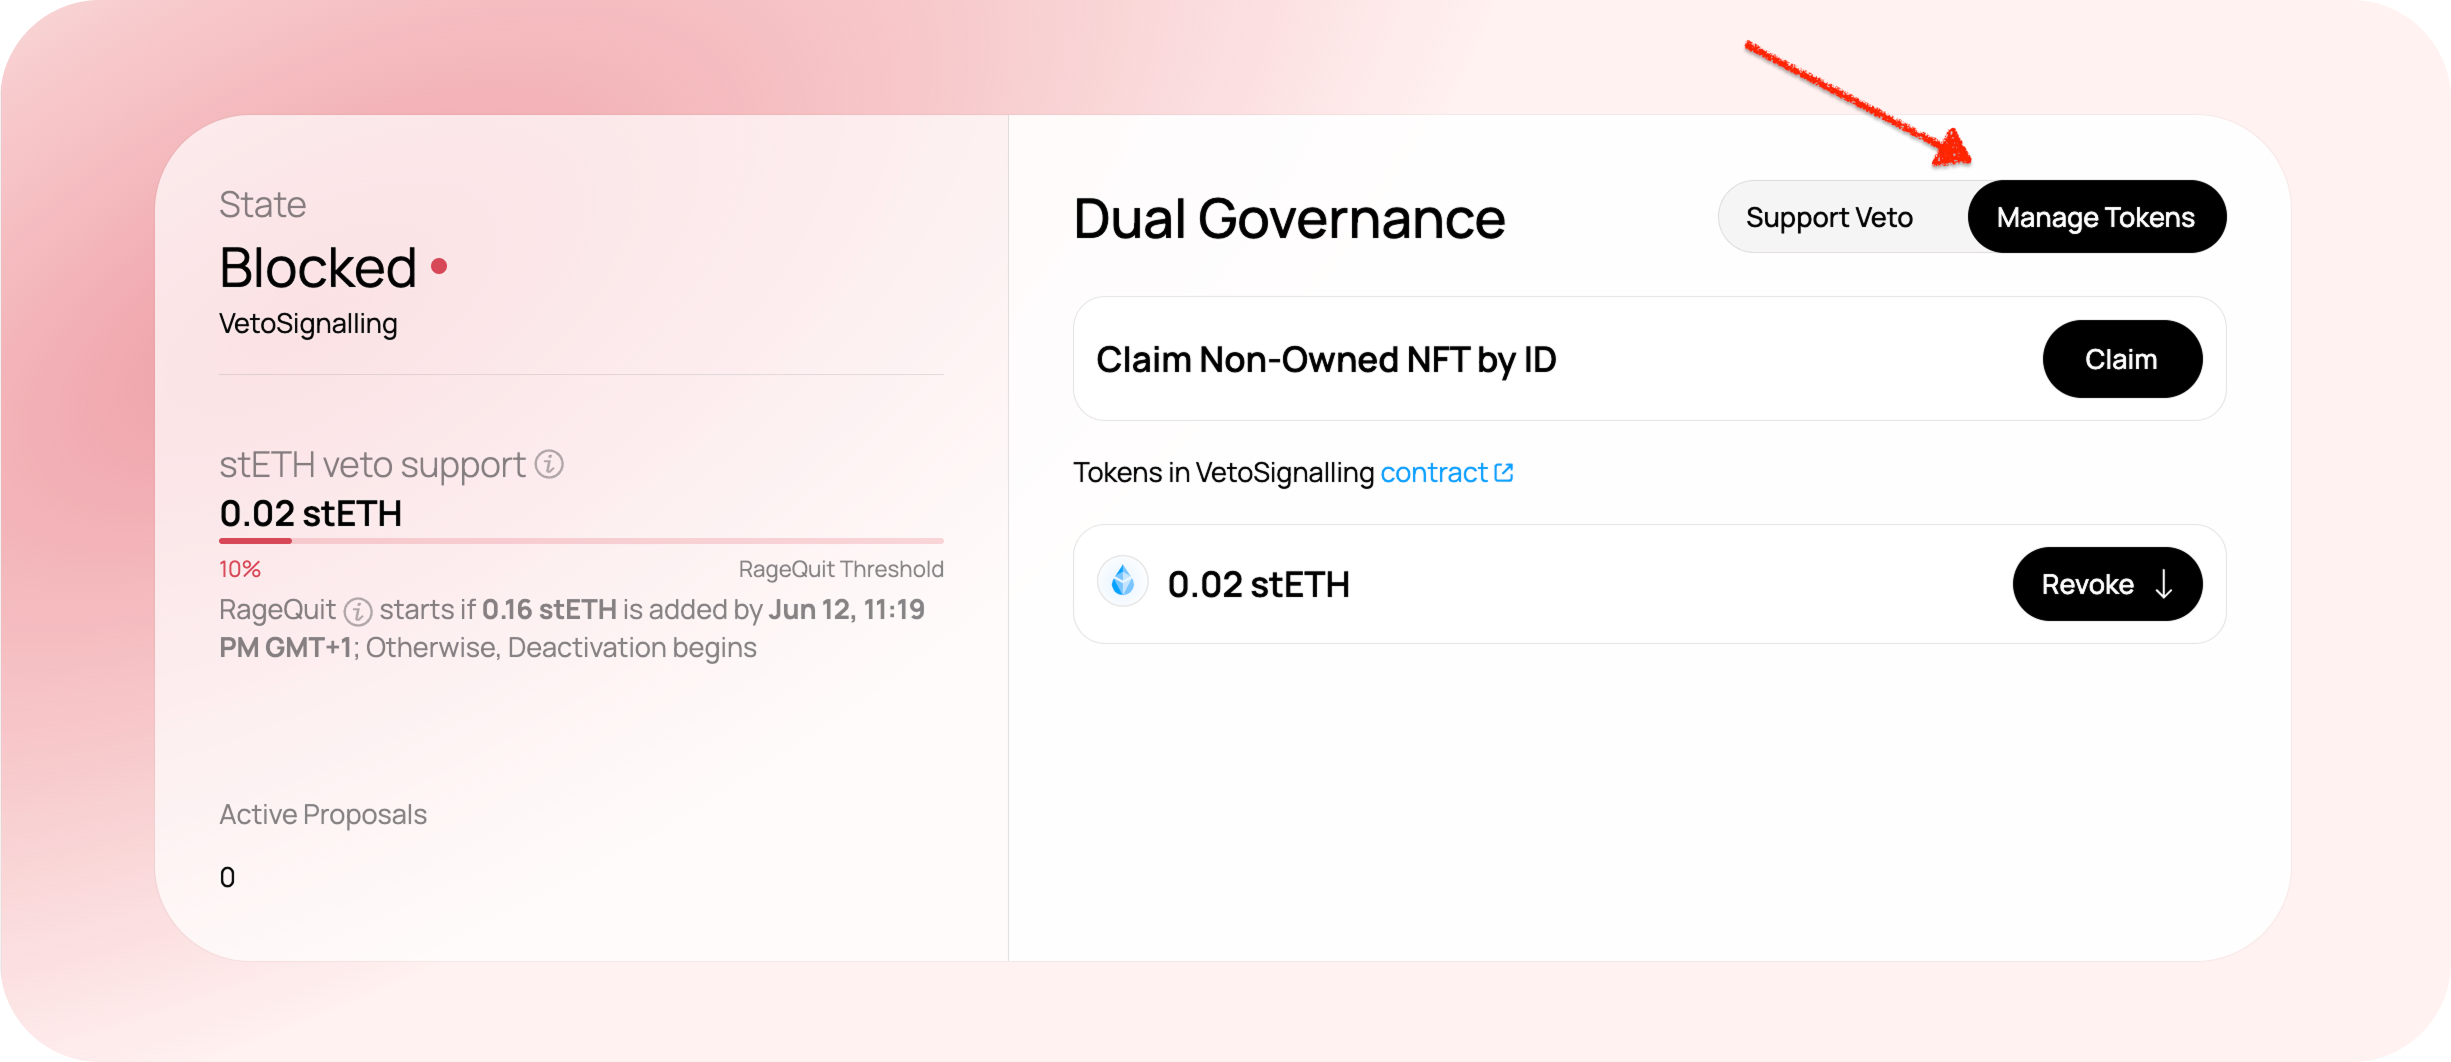
Step 2: Revoke tokens from the escrow
-
Choose the amount of tokens you want to revoke from the Veto Signalling contract
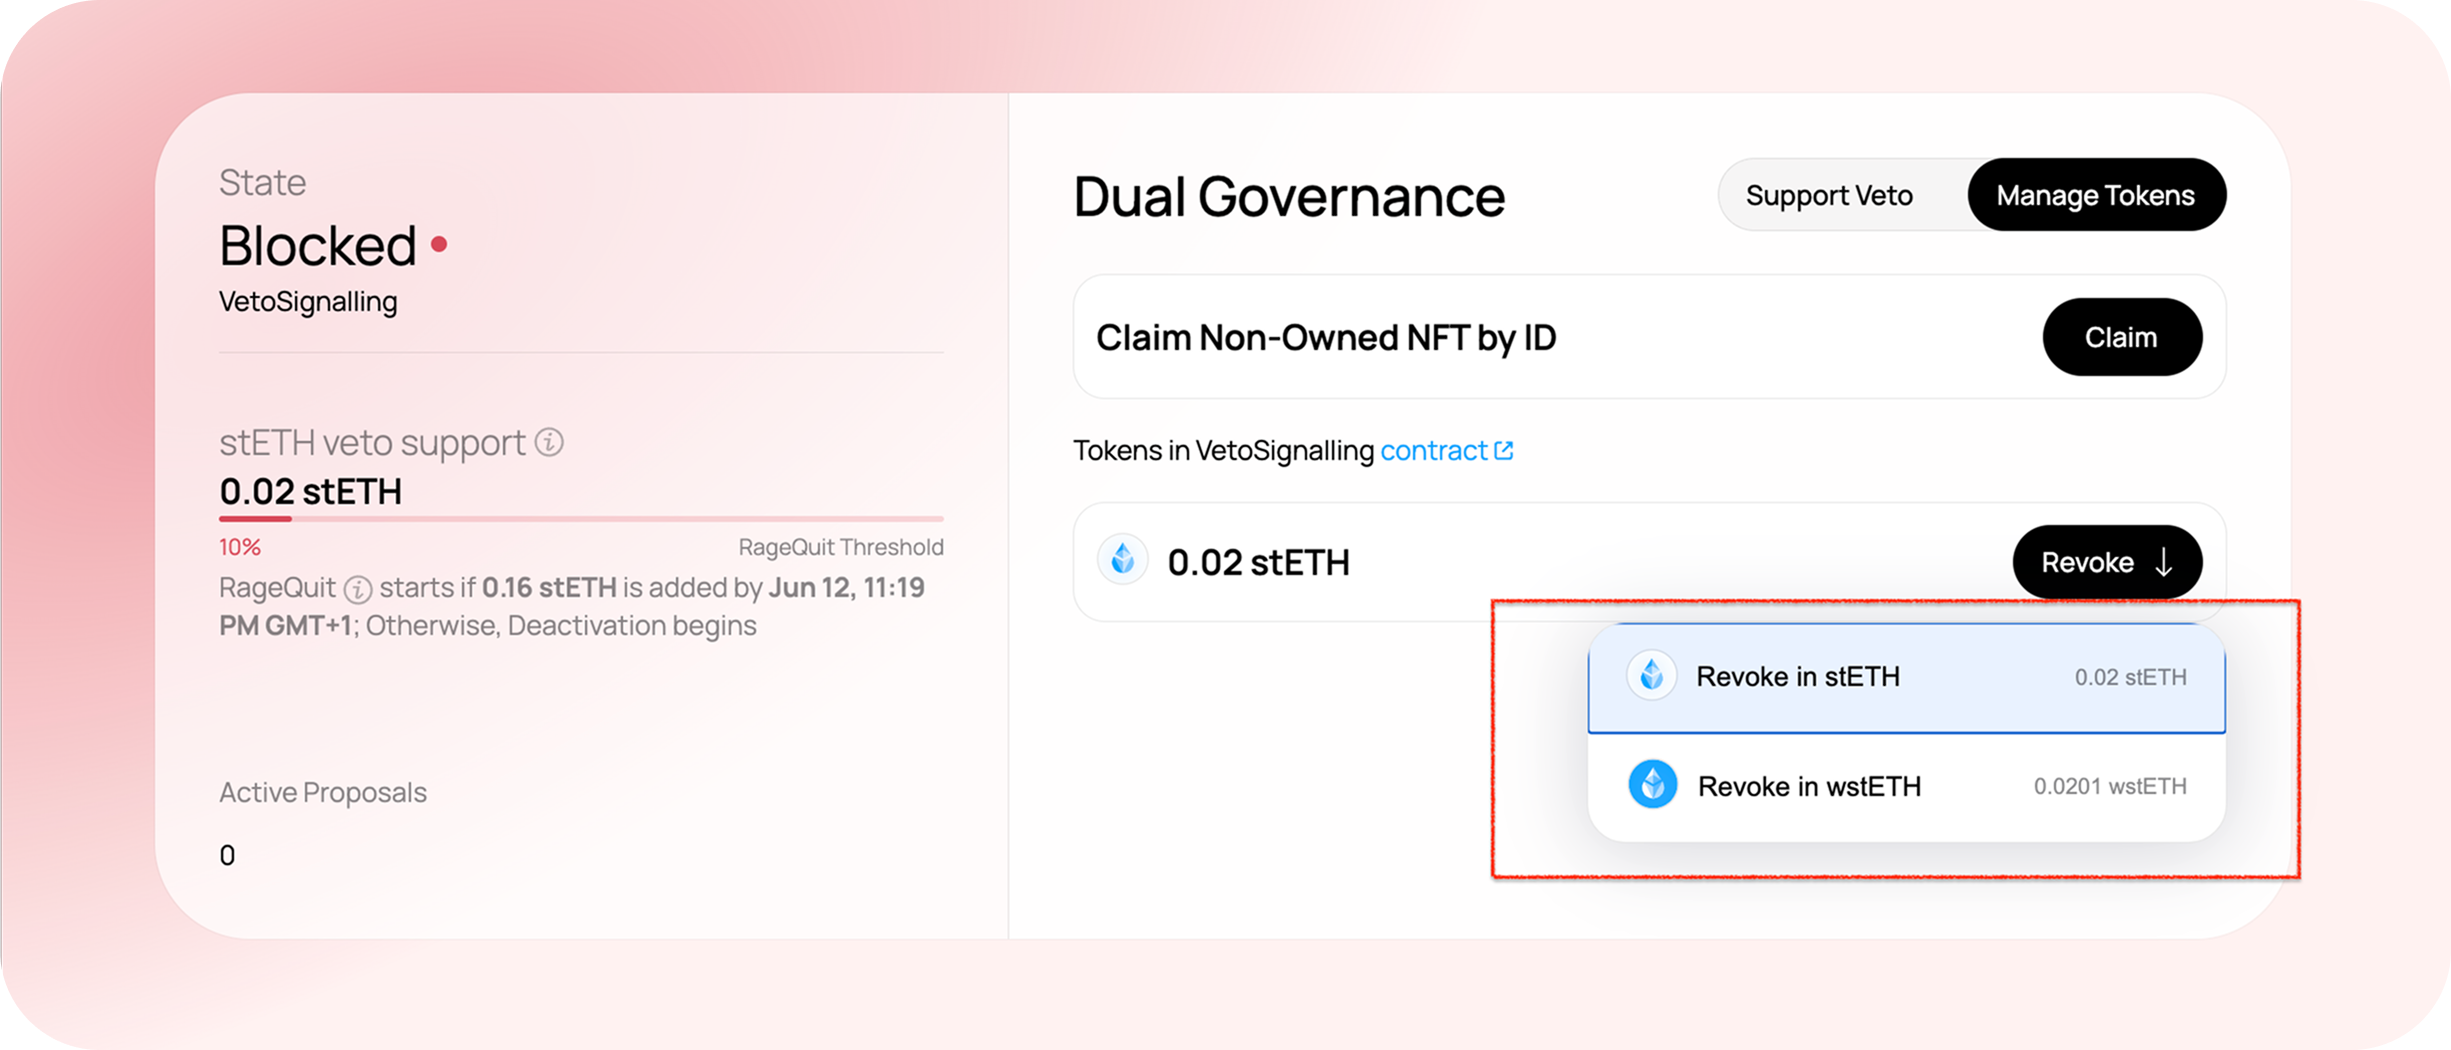
or select withdrawal NFT ID
-
Sign the transaction
Note that if your NFT finalizes during Veto Signaling, you must first revoke the NFT from the Veto Signalling escrow, then claim your ETH in the Lido staking widget.
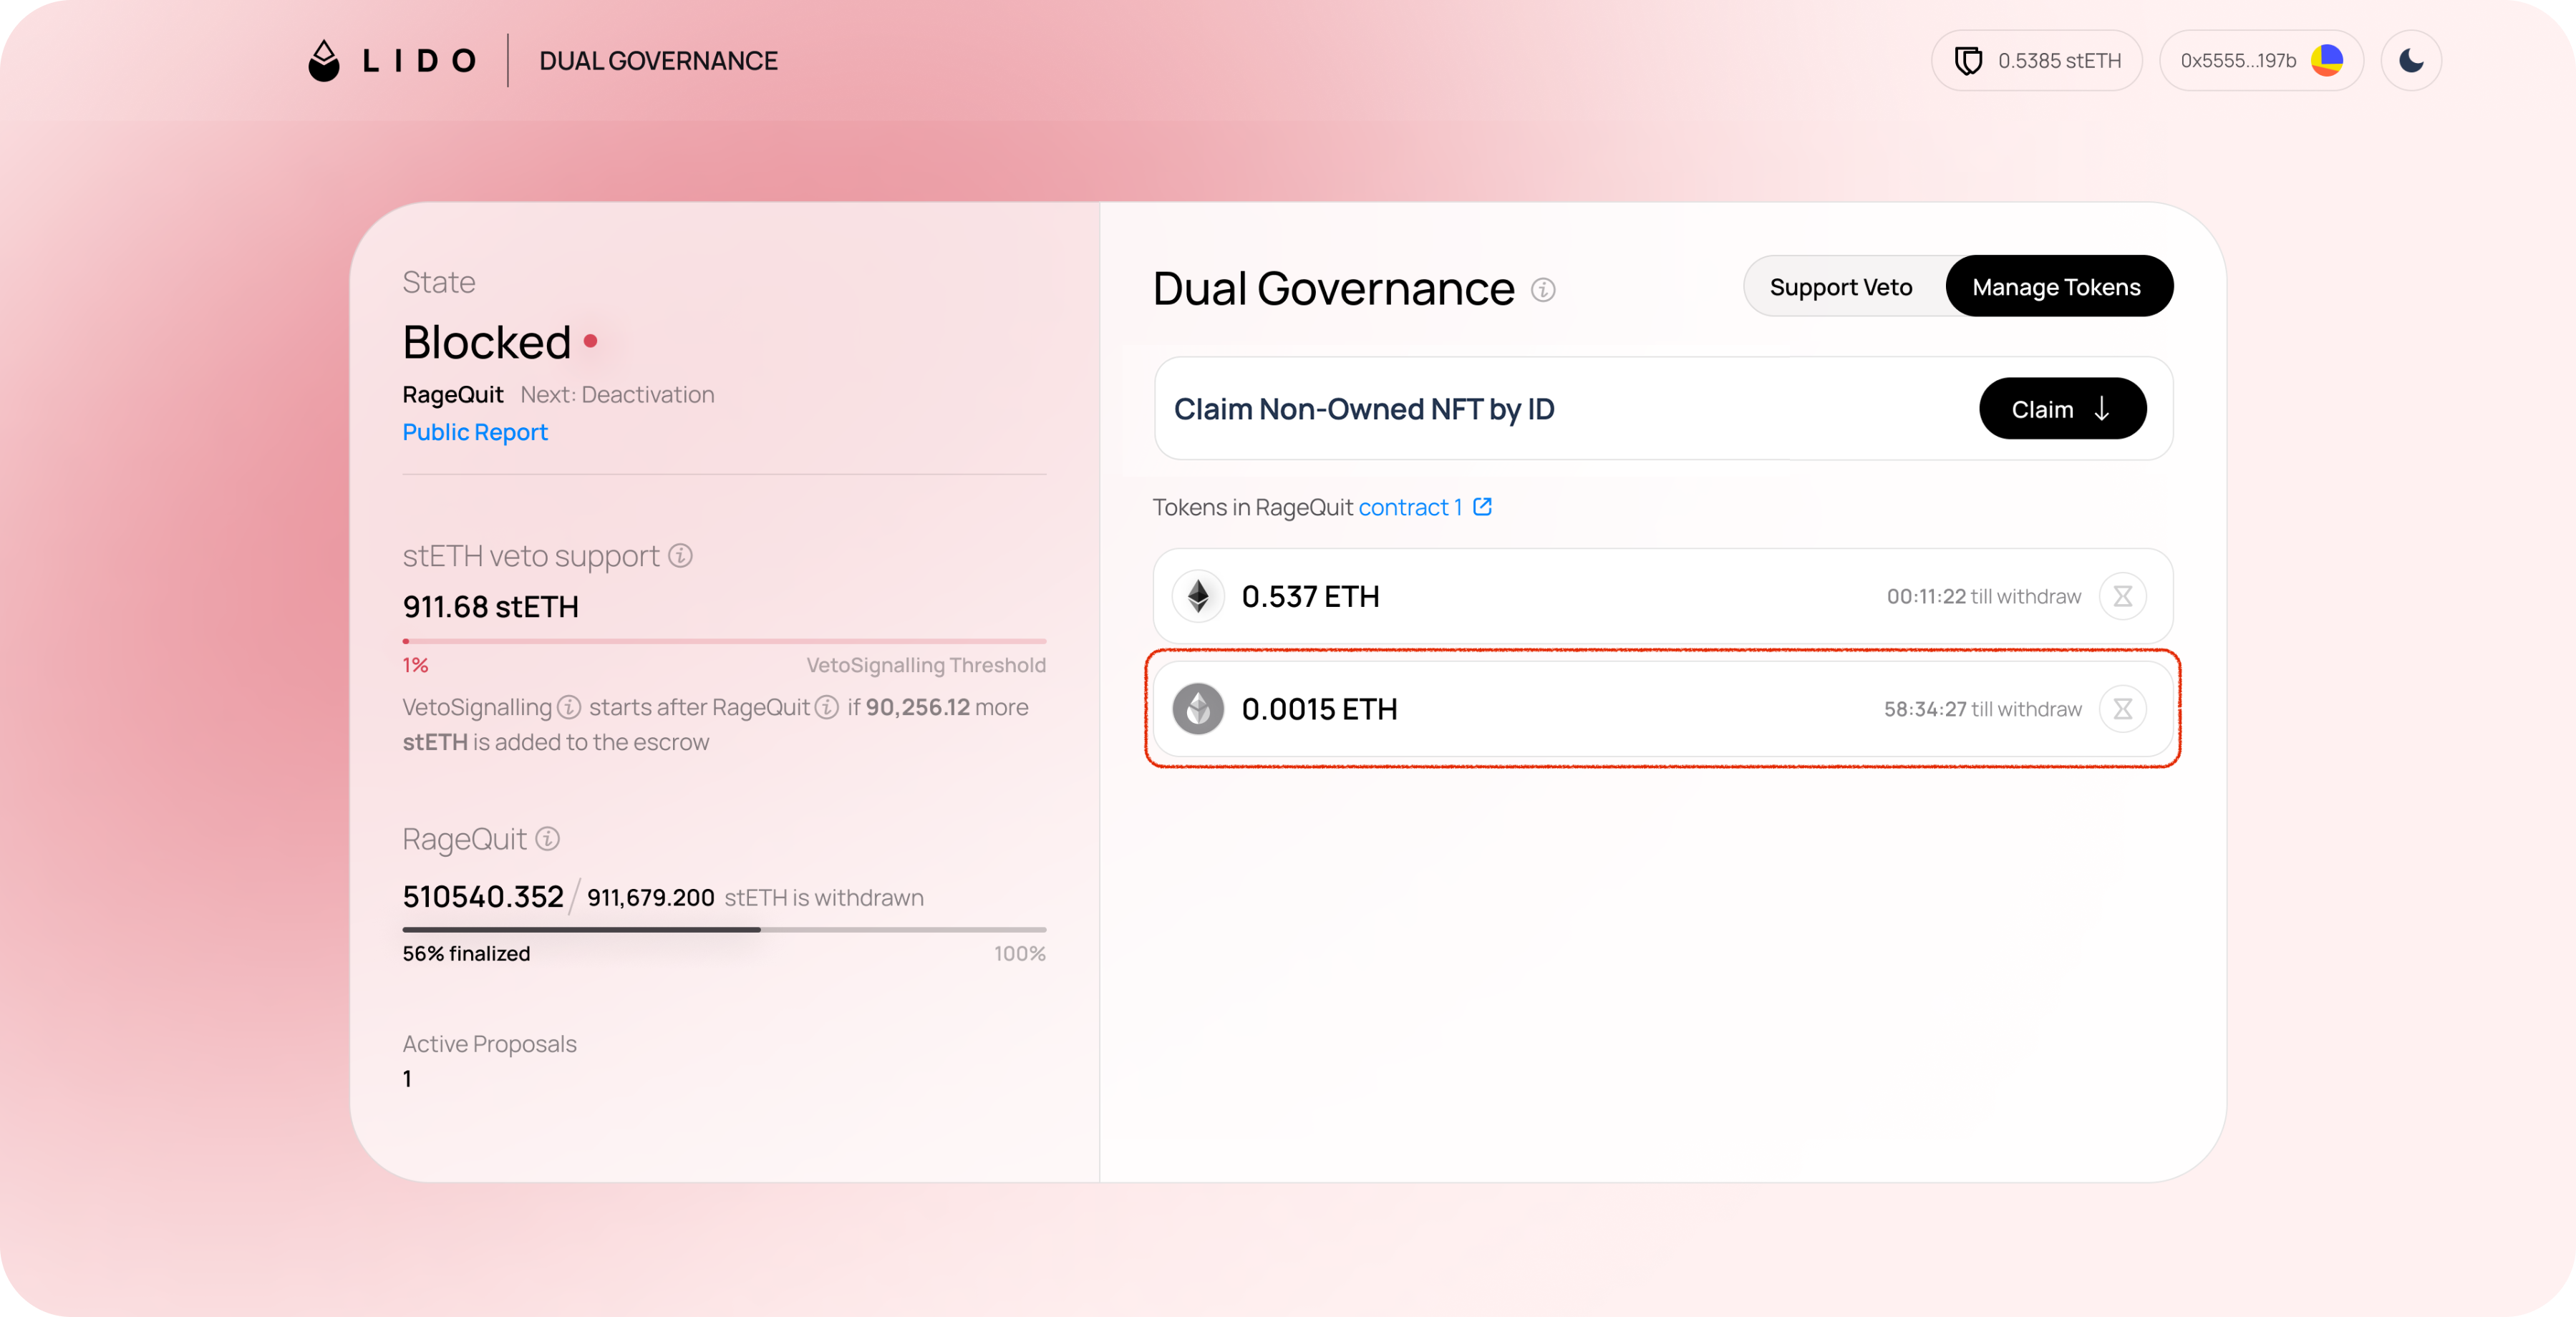
How to withdraw tokens after the Rage Quit
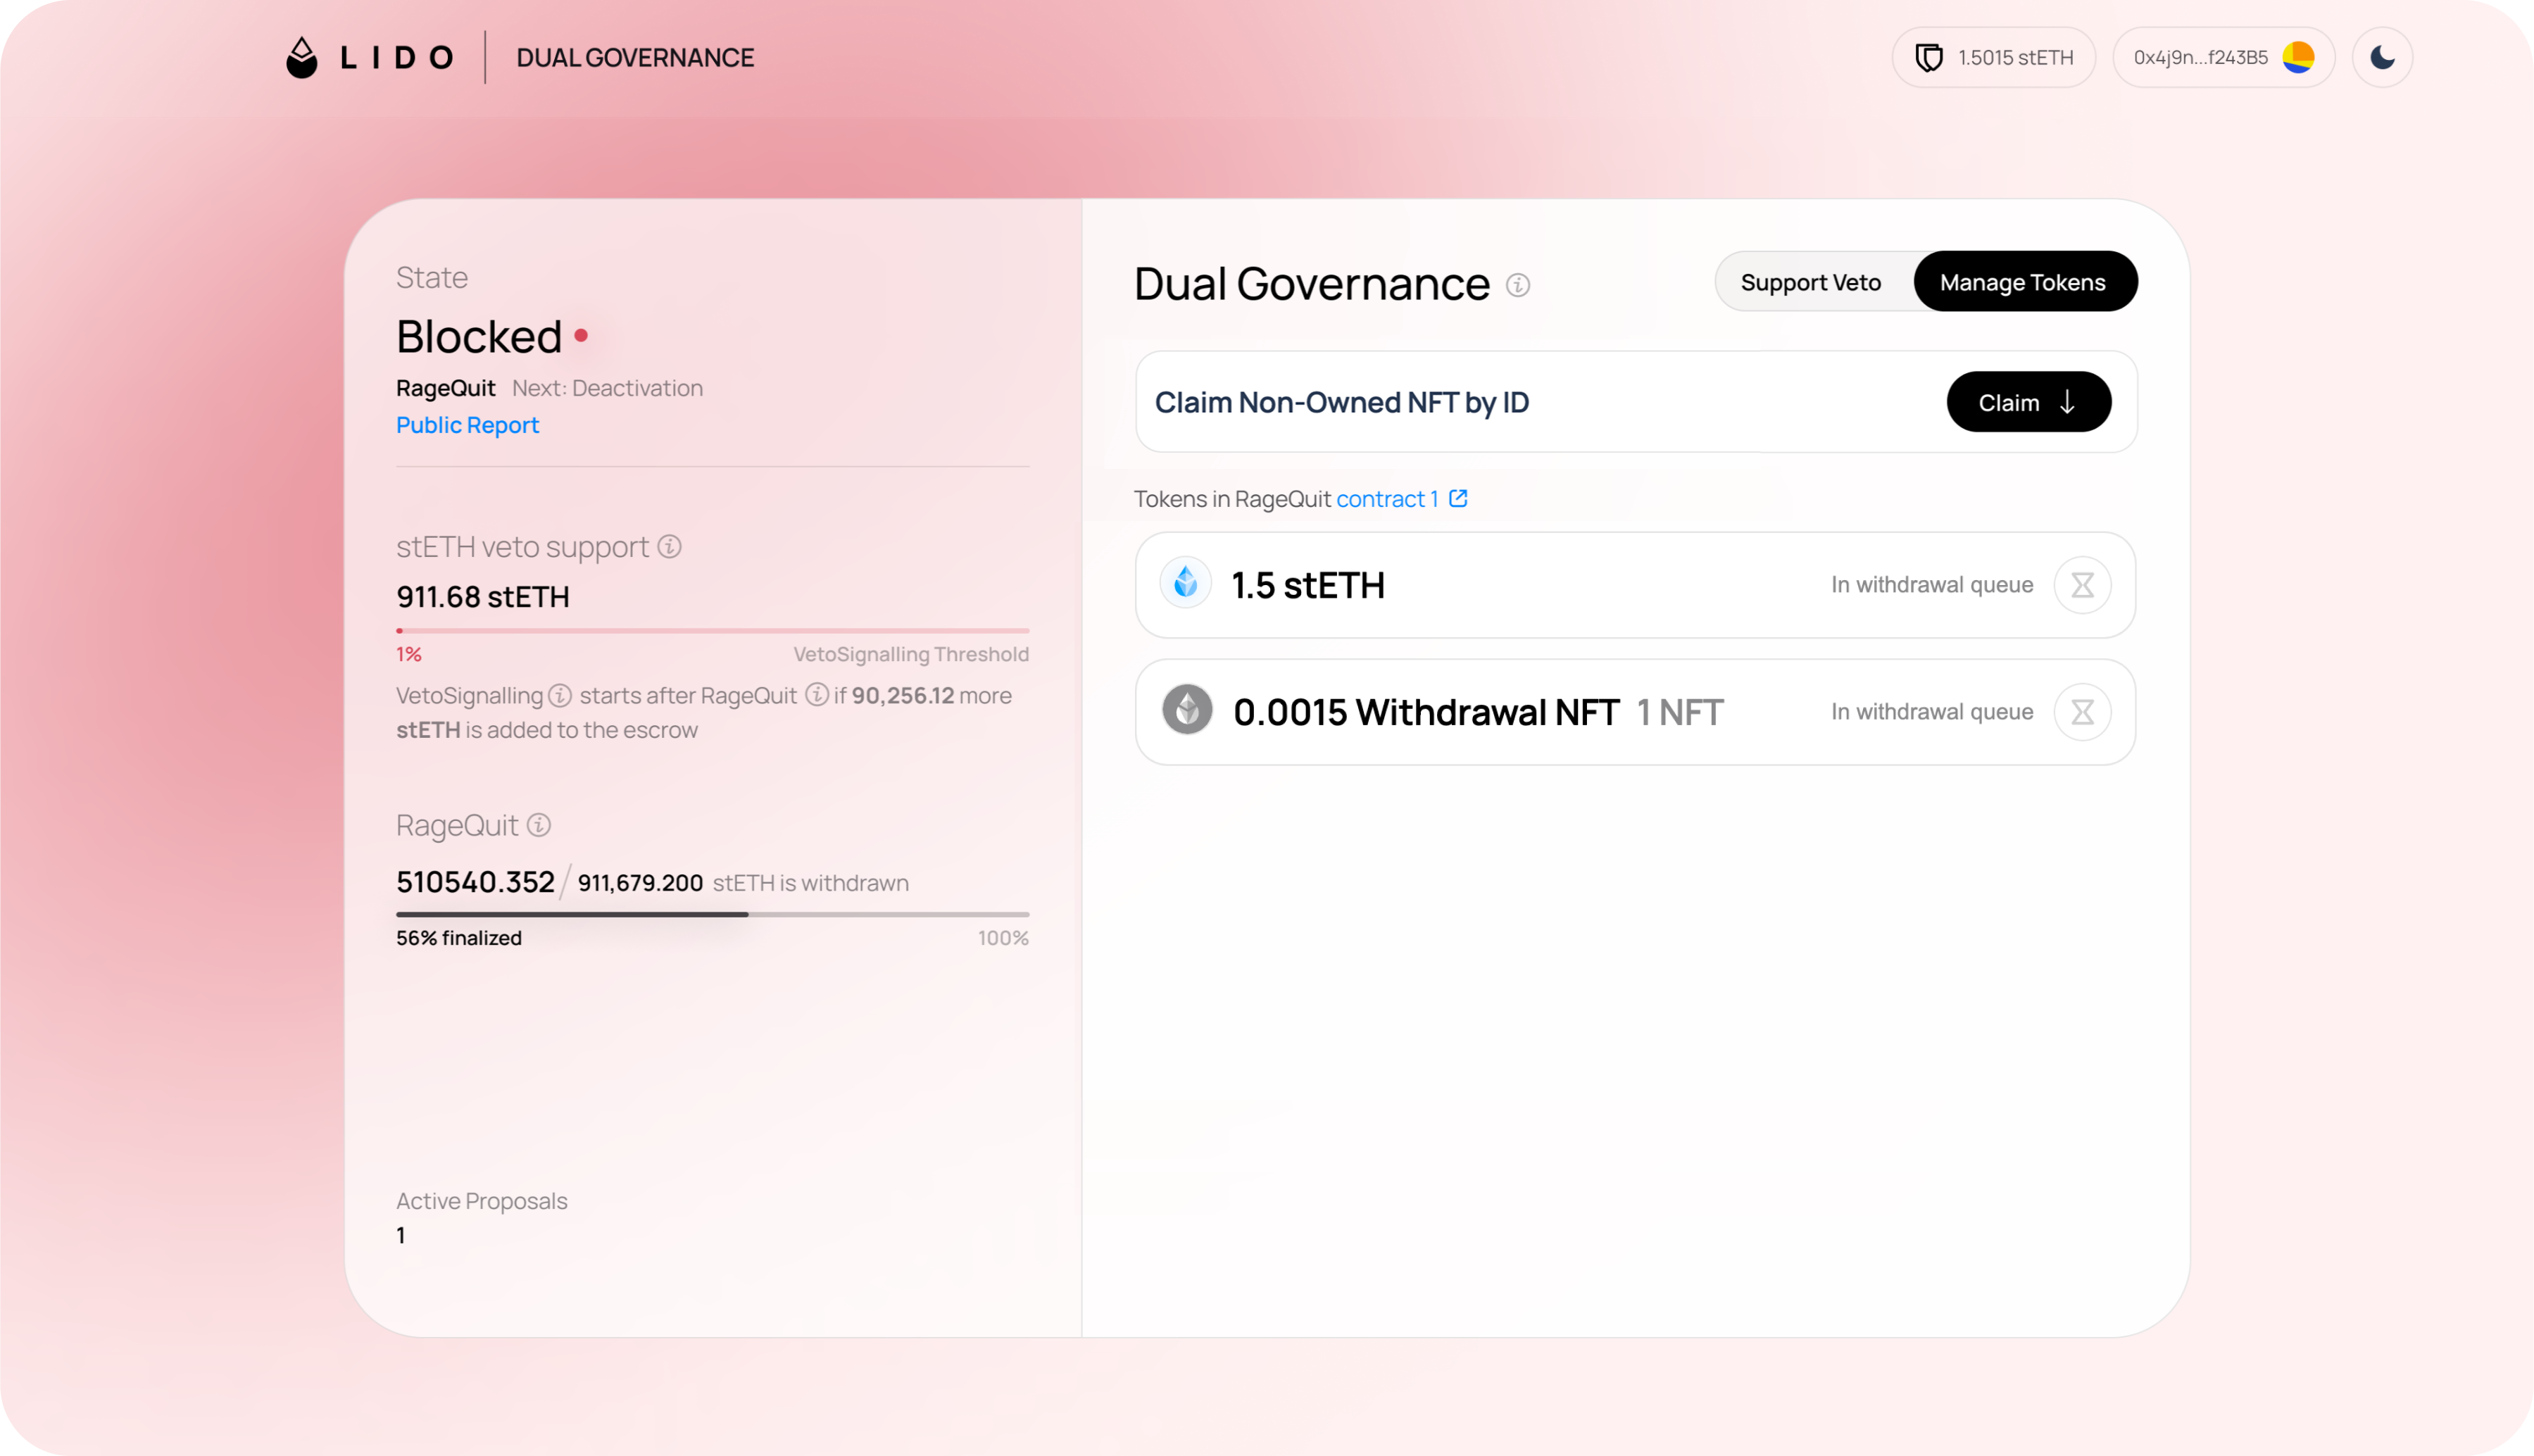
If Rage Quit is activated, all tokens deposited in the Veto Signalling escrow will be queued for exit. (w)stETH tokens cannot be revoked from the escrow, nor can the exit process be stopped until the Rage Quit is finished and the tokens are withdrawn.
After the Rage Quit batch of tokens is finalized, they are processed as follows:
- (w)stETH tokens are claimed automatically;
- withdrawal NFTs must be claimed manually.
Once claimed, all ETH remains in contract where LDO governance has no control over it. However, it is subject to an additional timelock of 60-180 days before ETH becomes available for final withdrawal.
The current status of your tokens and remaining timelock are indicated on the Manage tokens tab.
Step 1: Switch to the Manage tokens tab
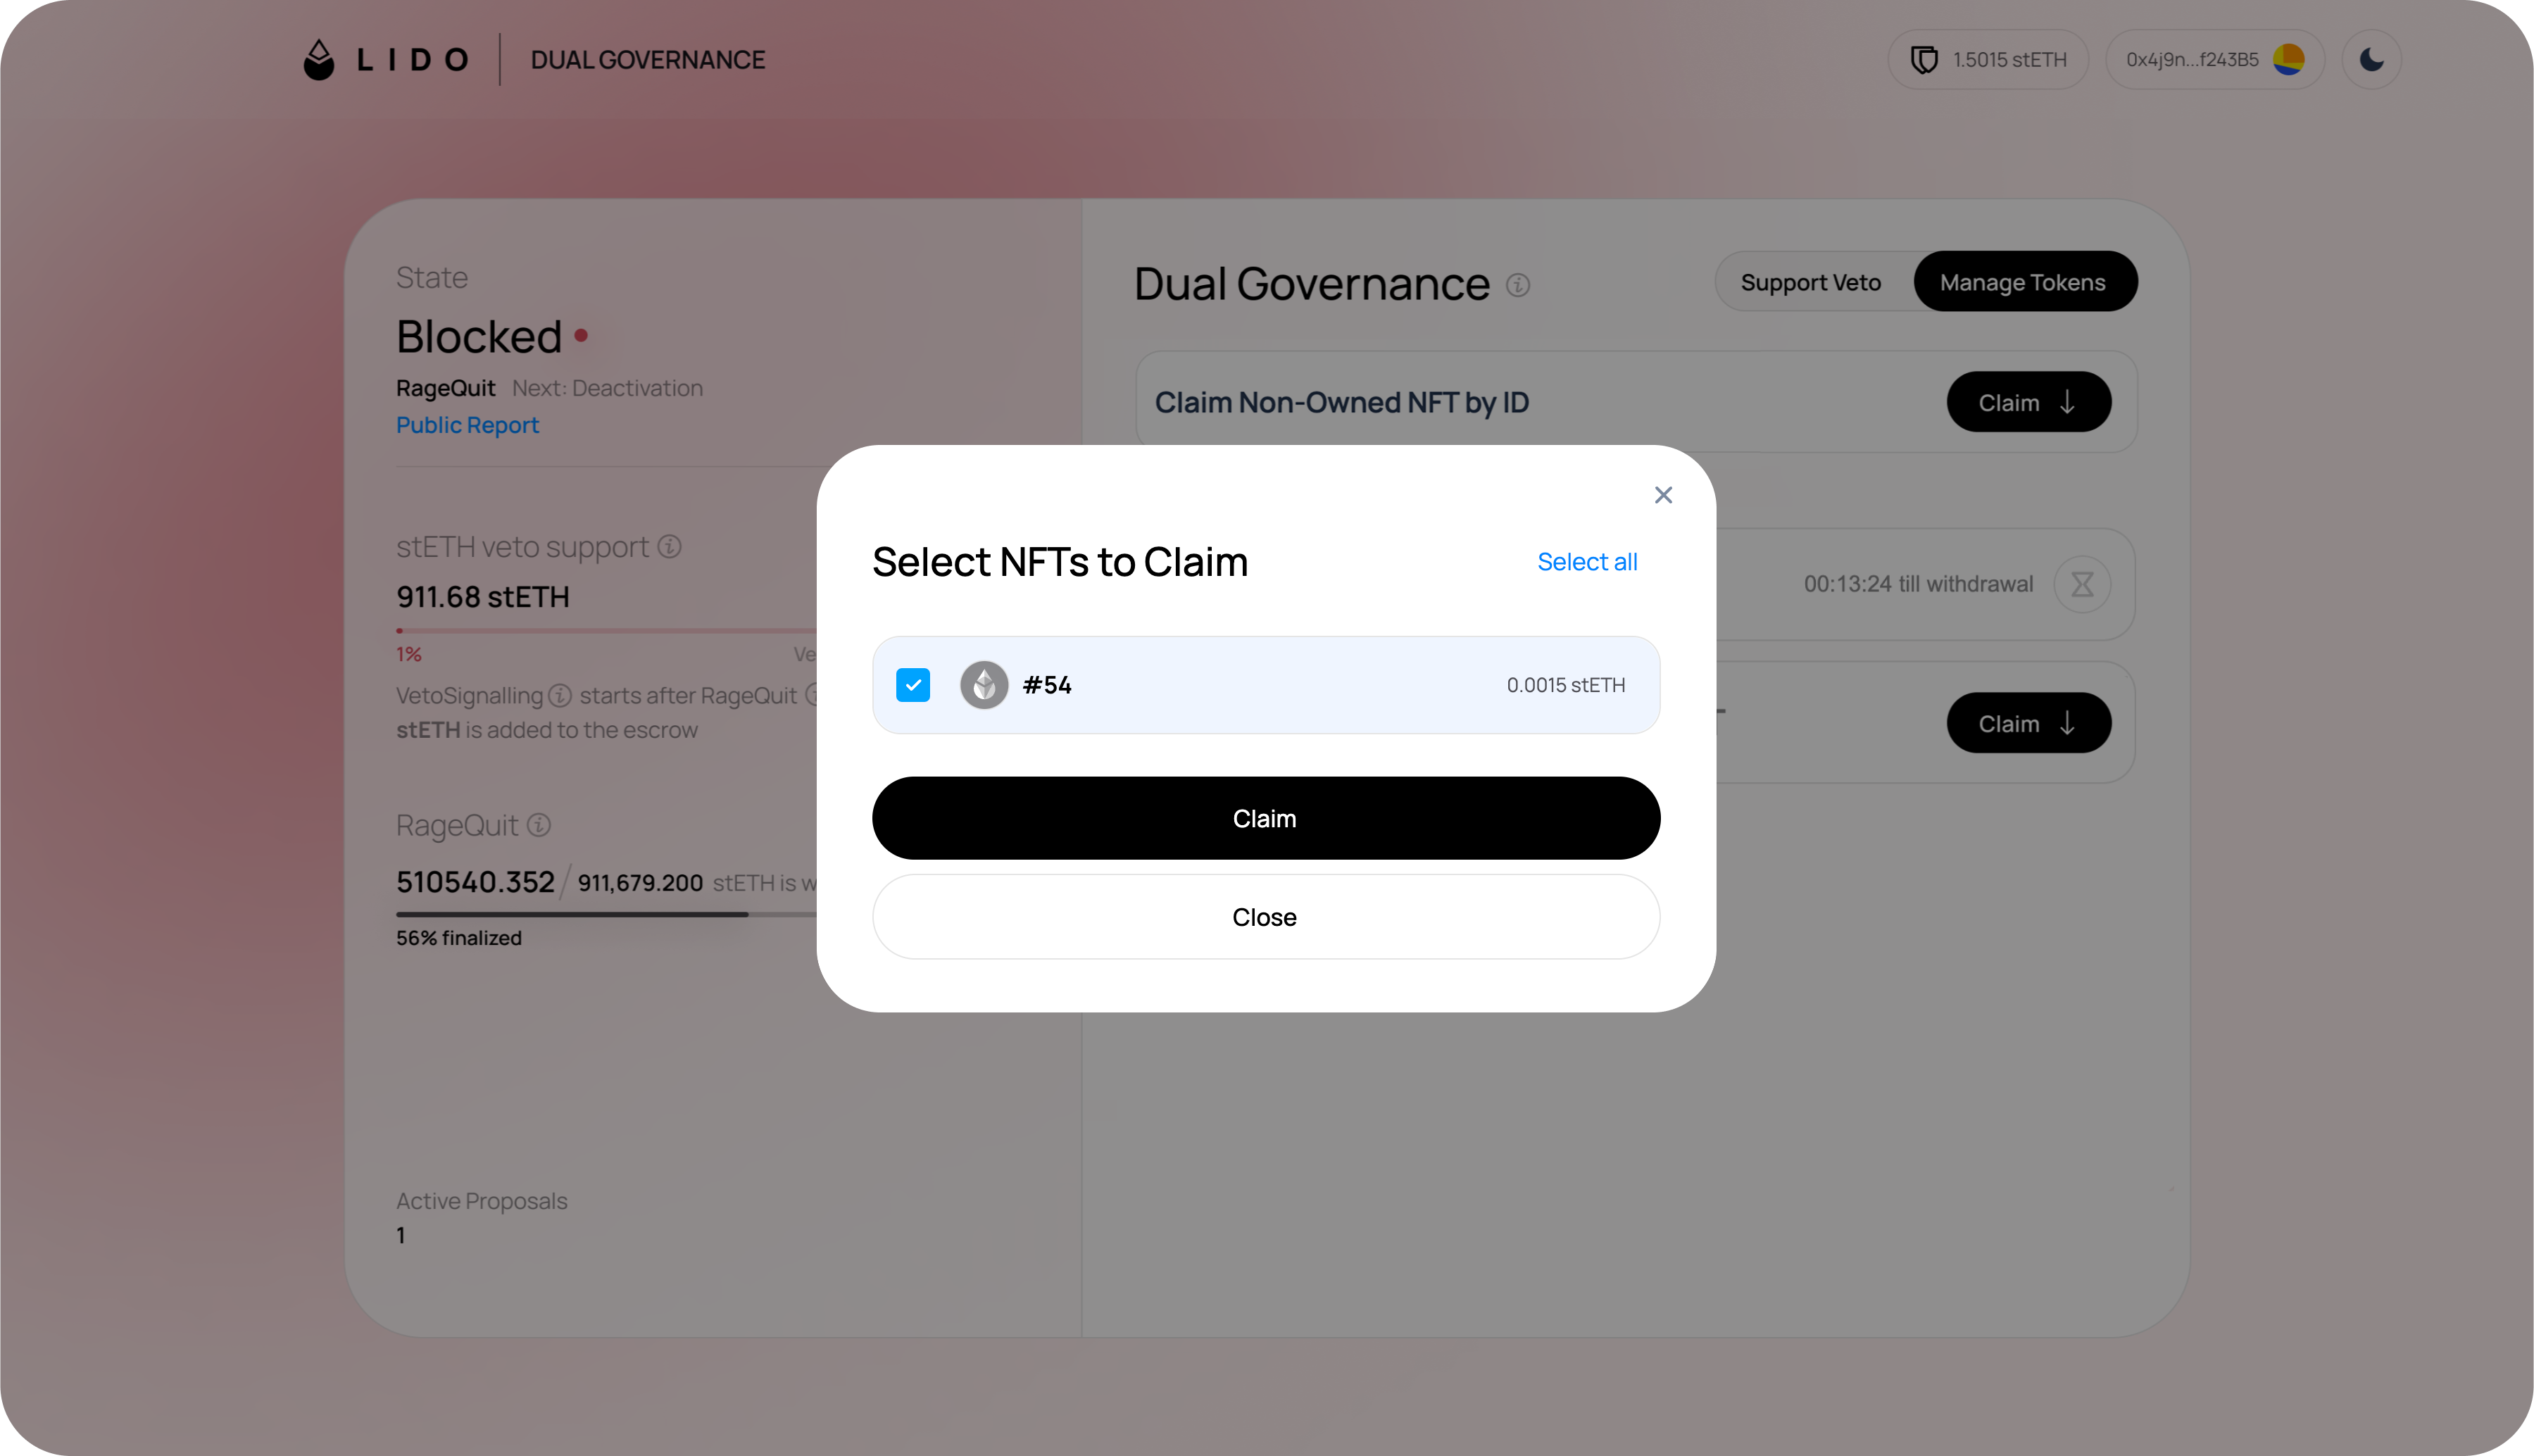
Step 2a: Claim your withdrawal NFT
Once your NFT is finalized, you can immediately claim it. There is a 60-day window after the Rage Quit is finalized to claim NFT before execution is unblocked.
-
Click
Claimbutton next to the NFT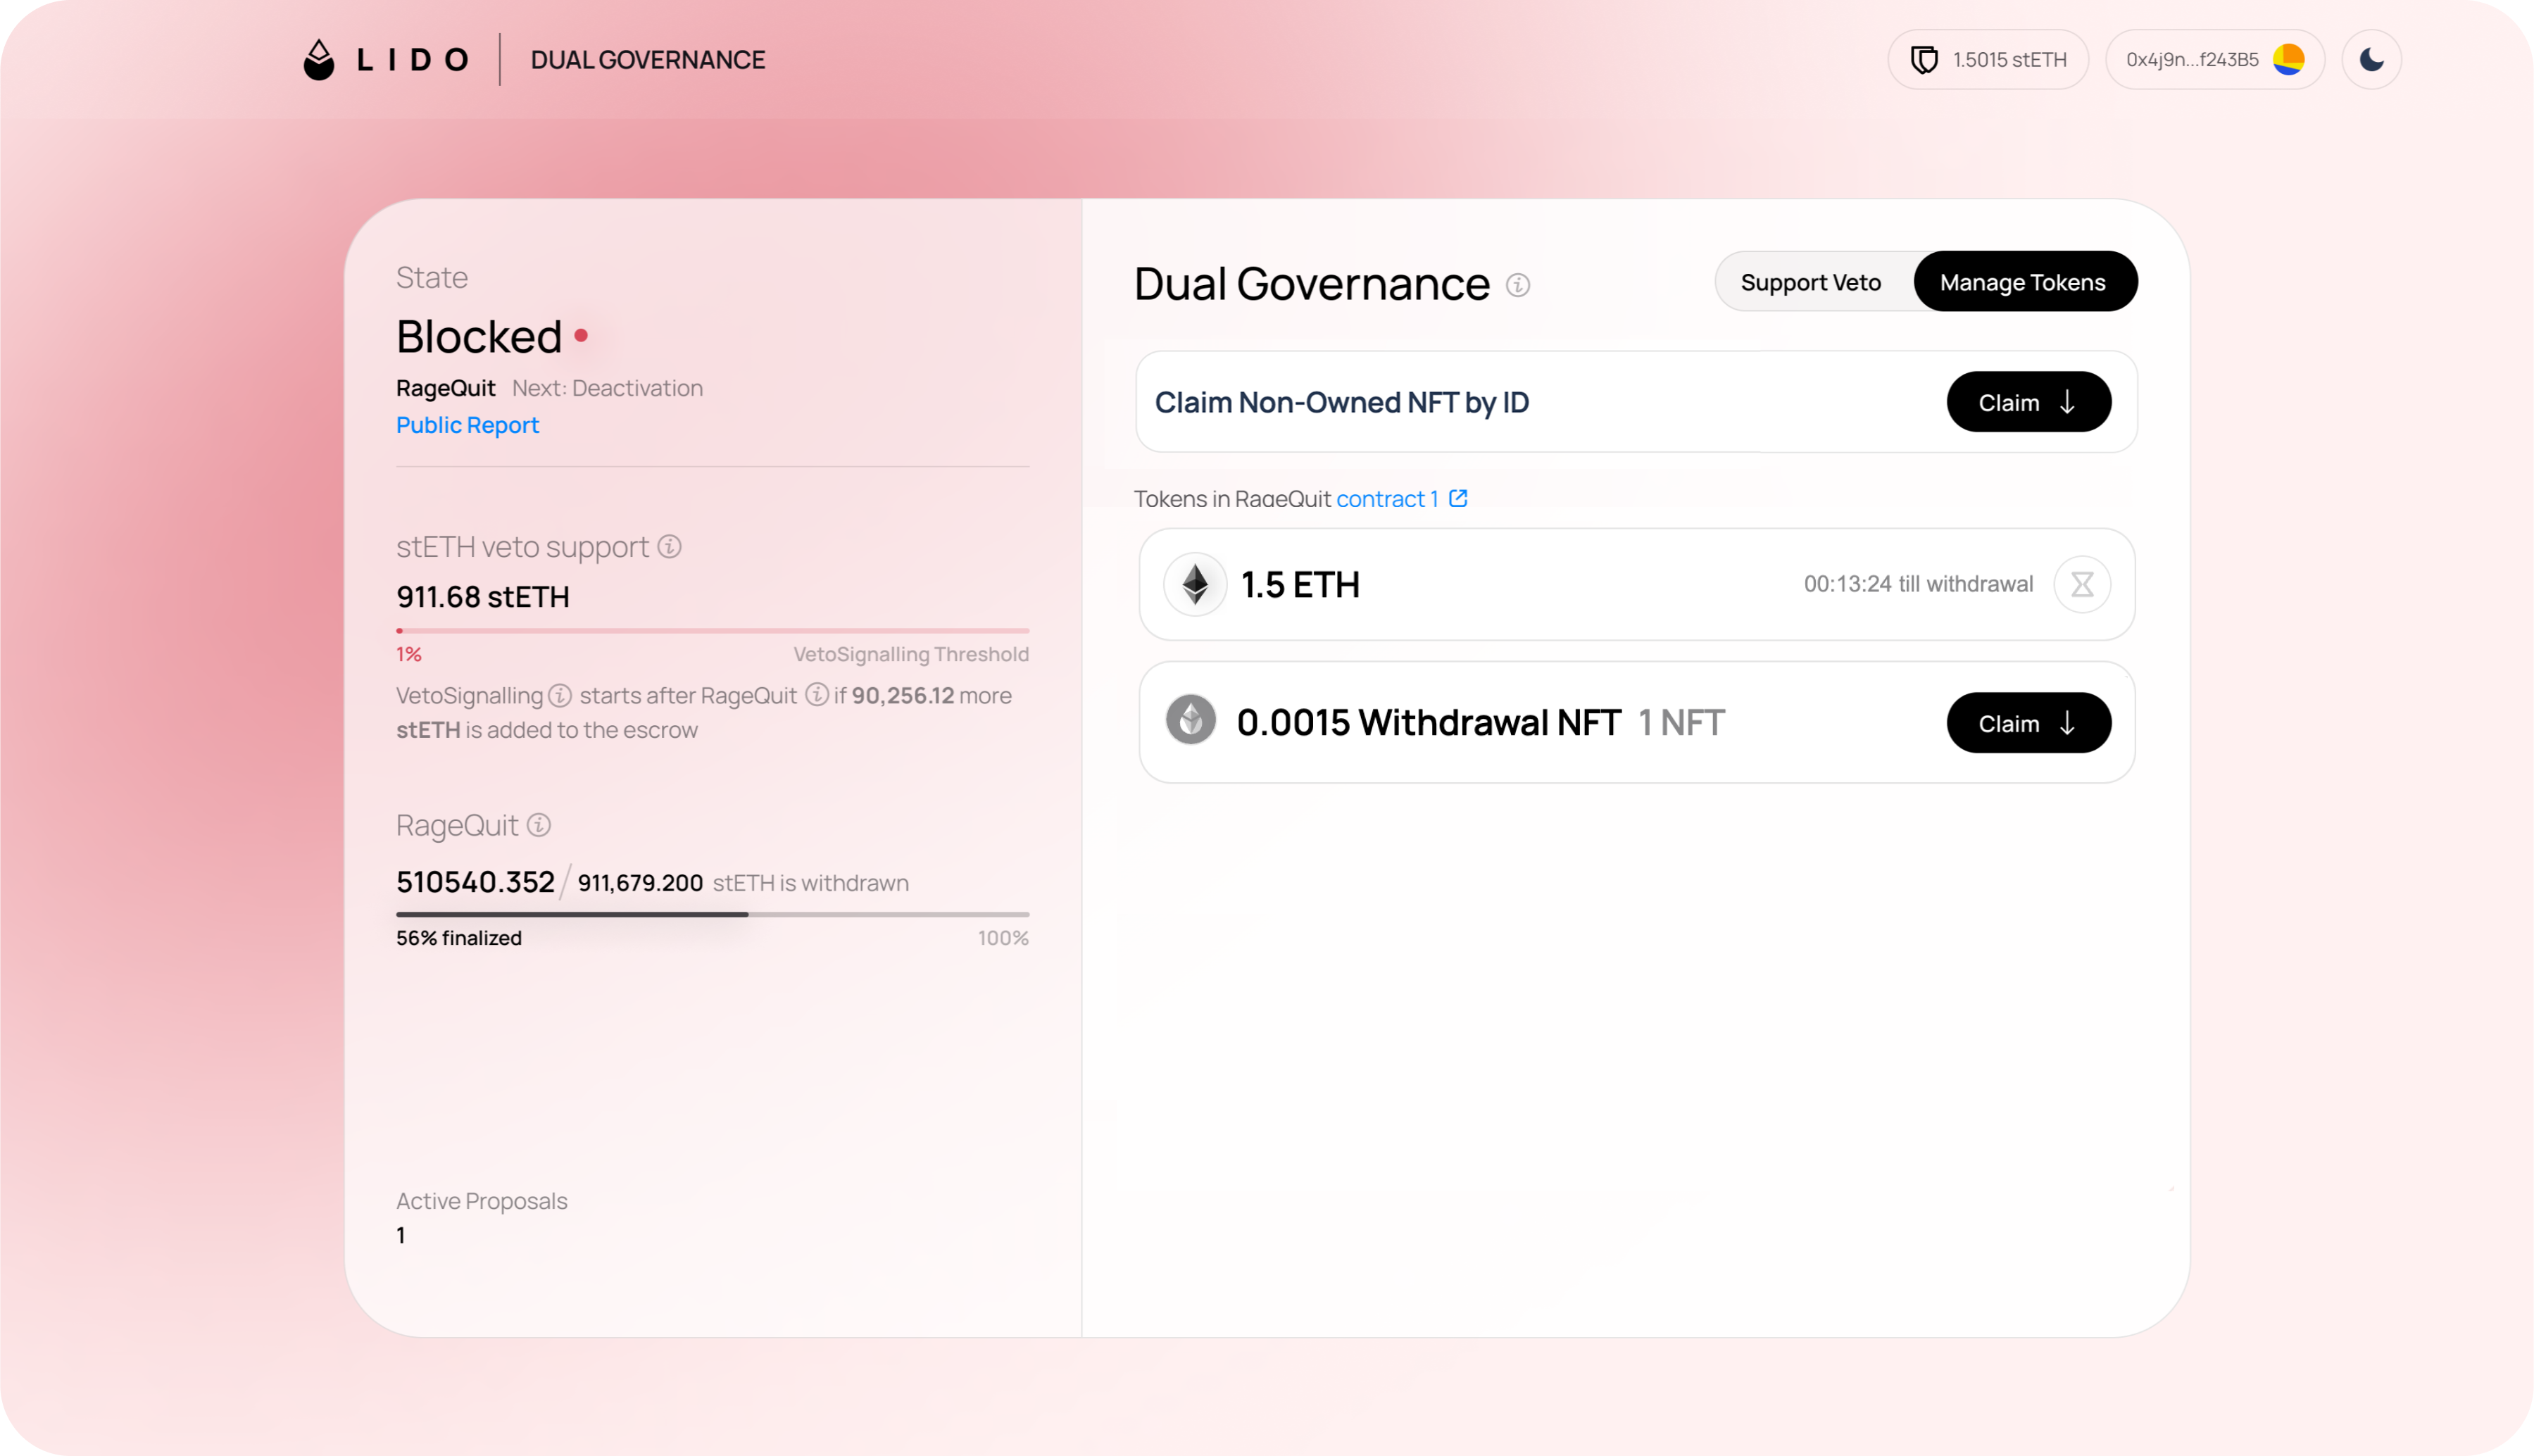
-
Select the NFT by its ID
-
After claiming, your ETH will be locked for 60-180 days before becoming available for withdrawal. The remaining time will be indicated on the Manage tokens tab
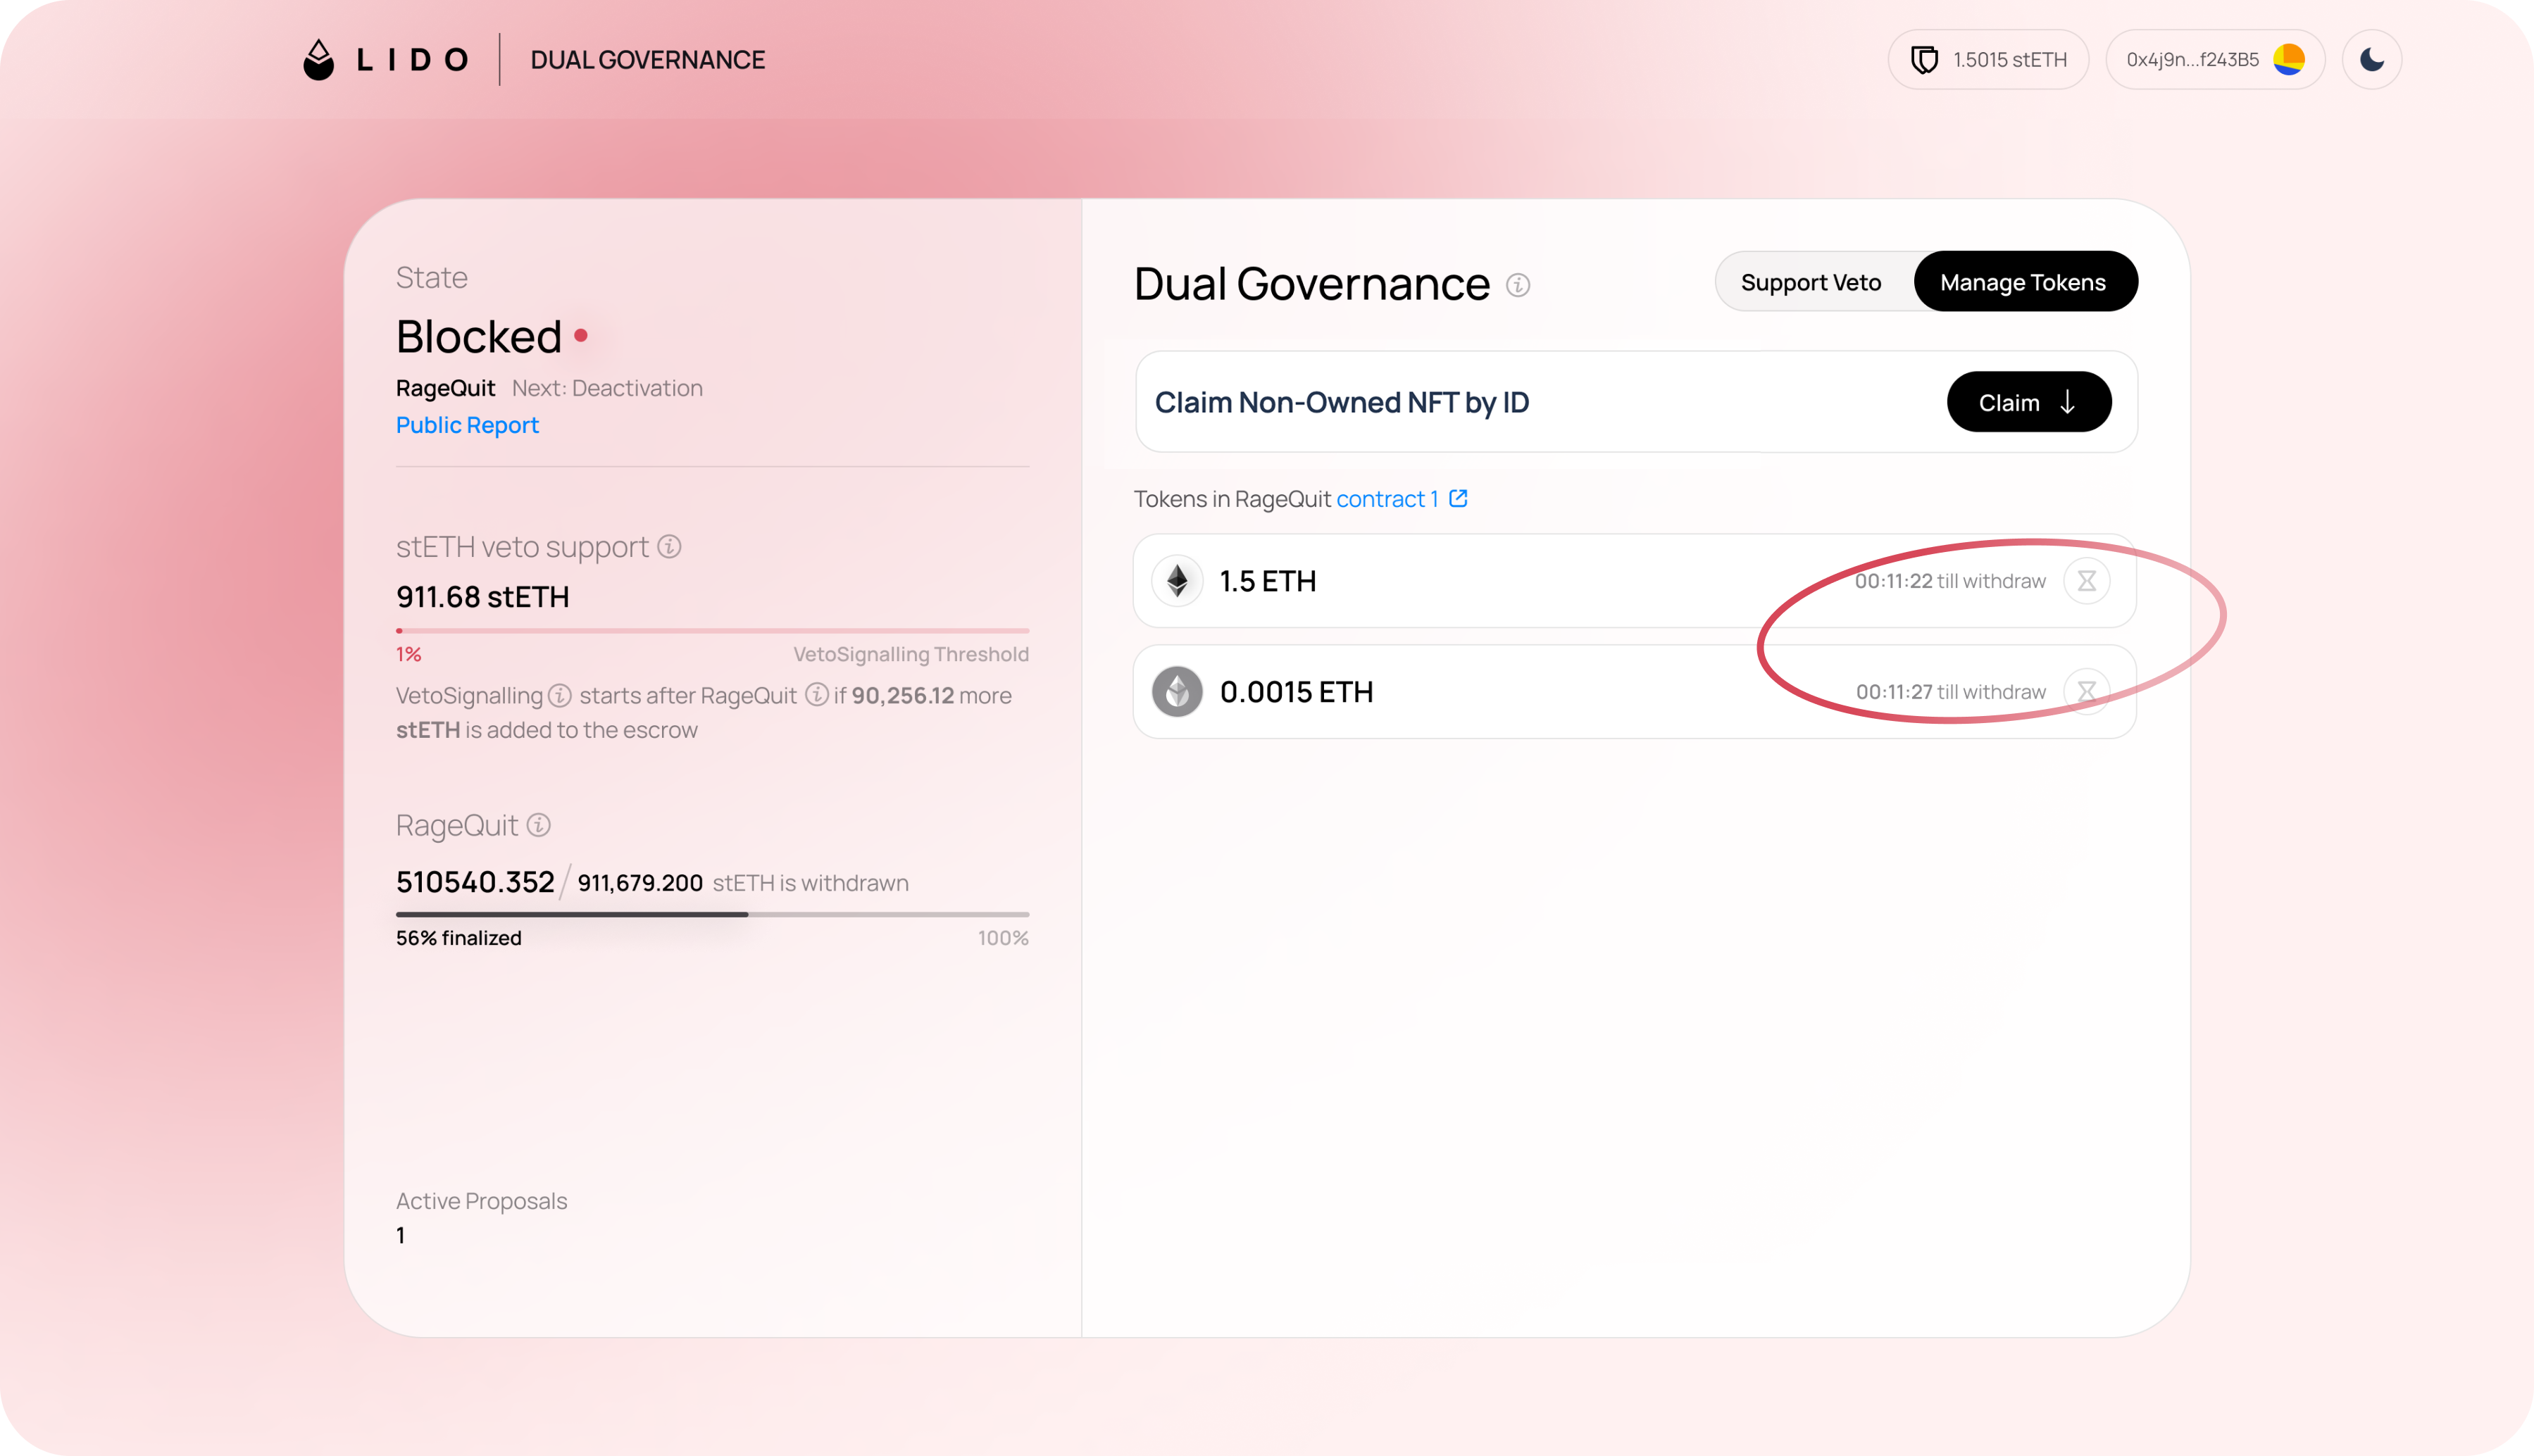
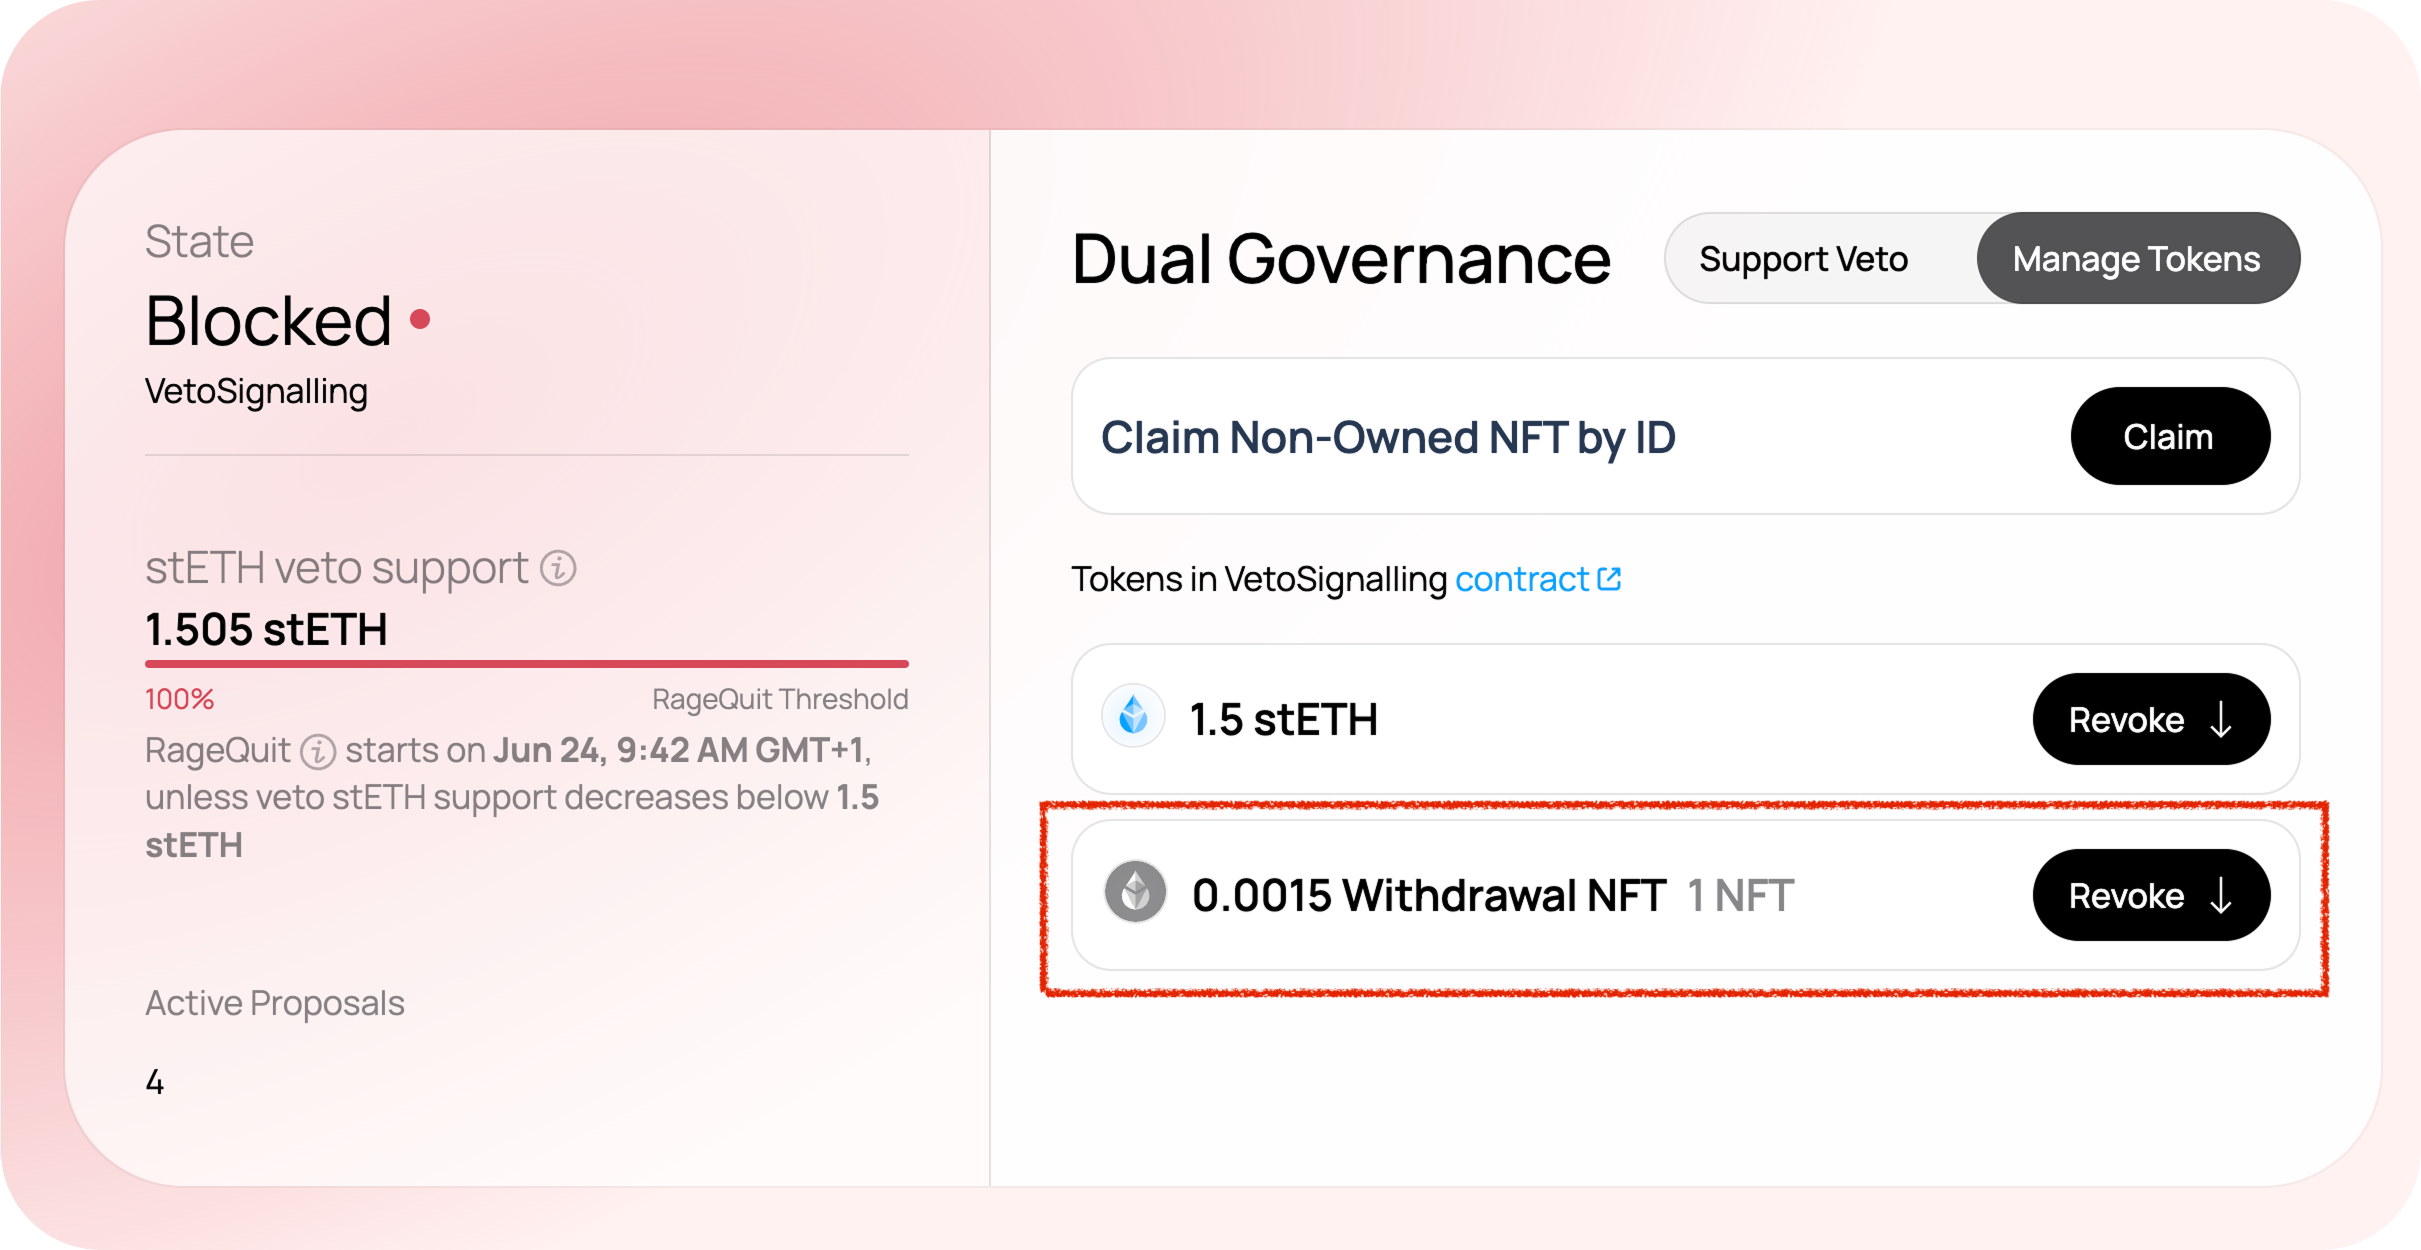
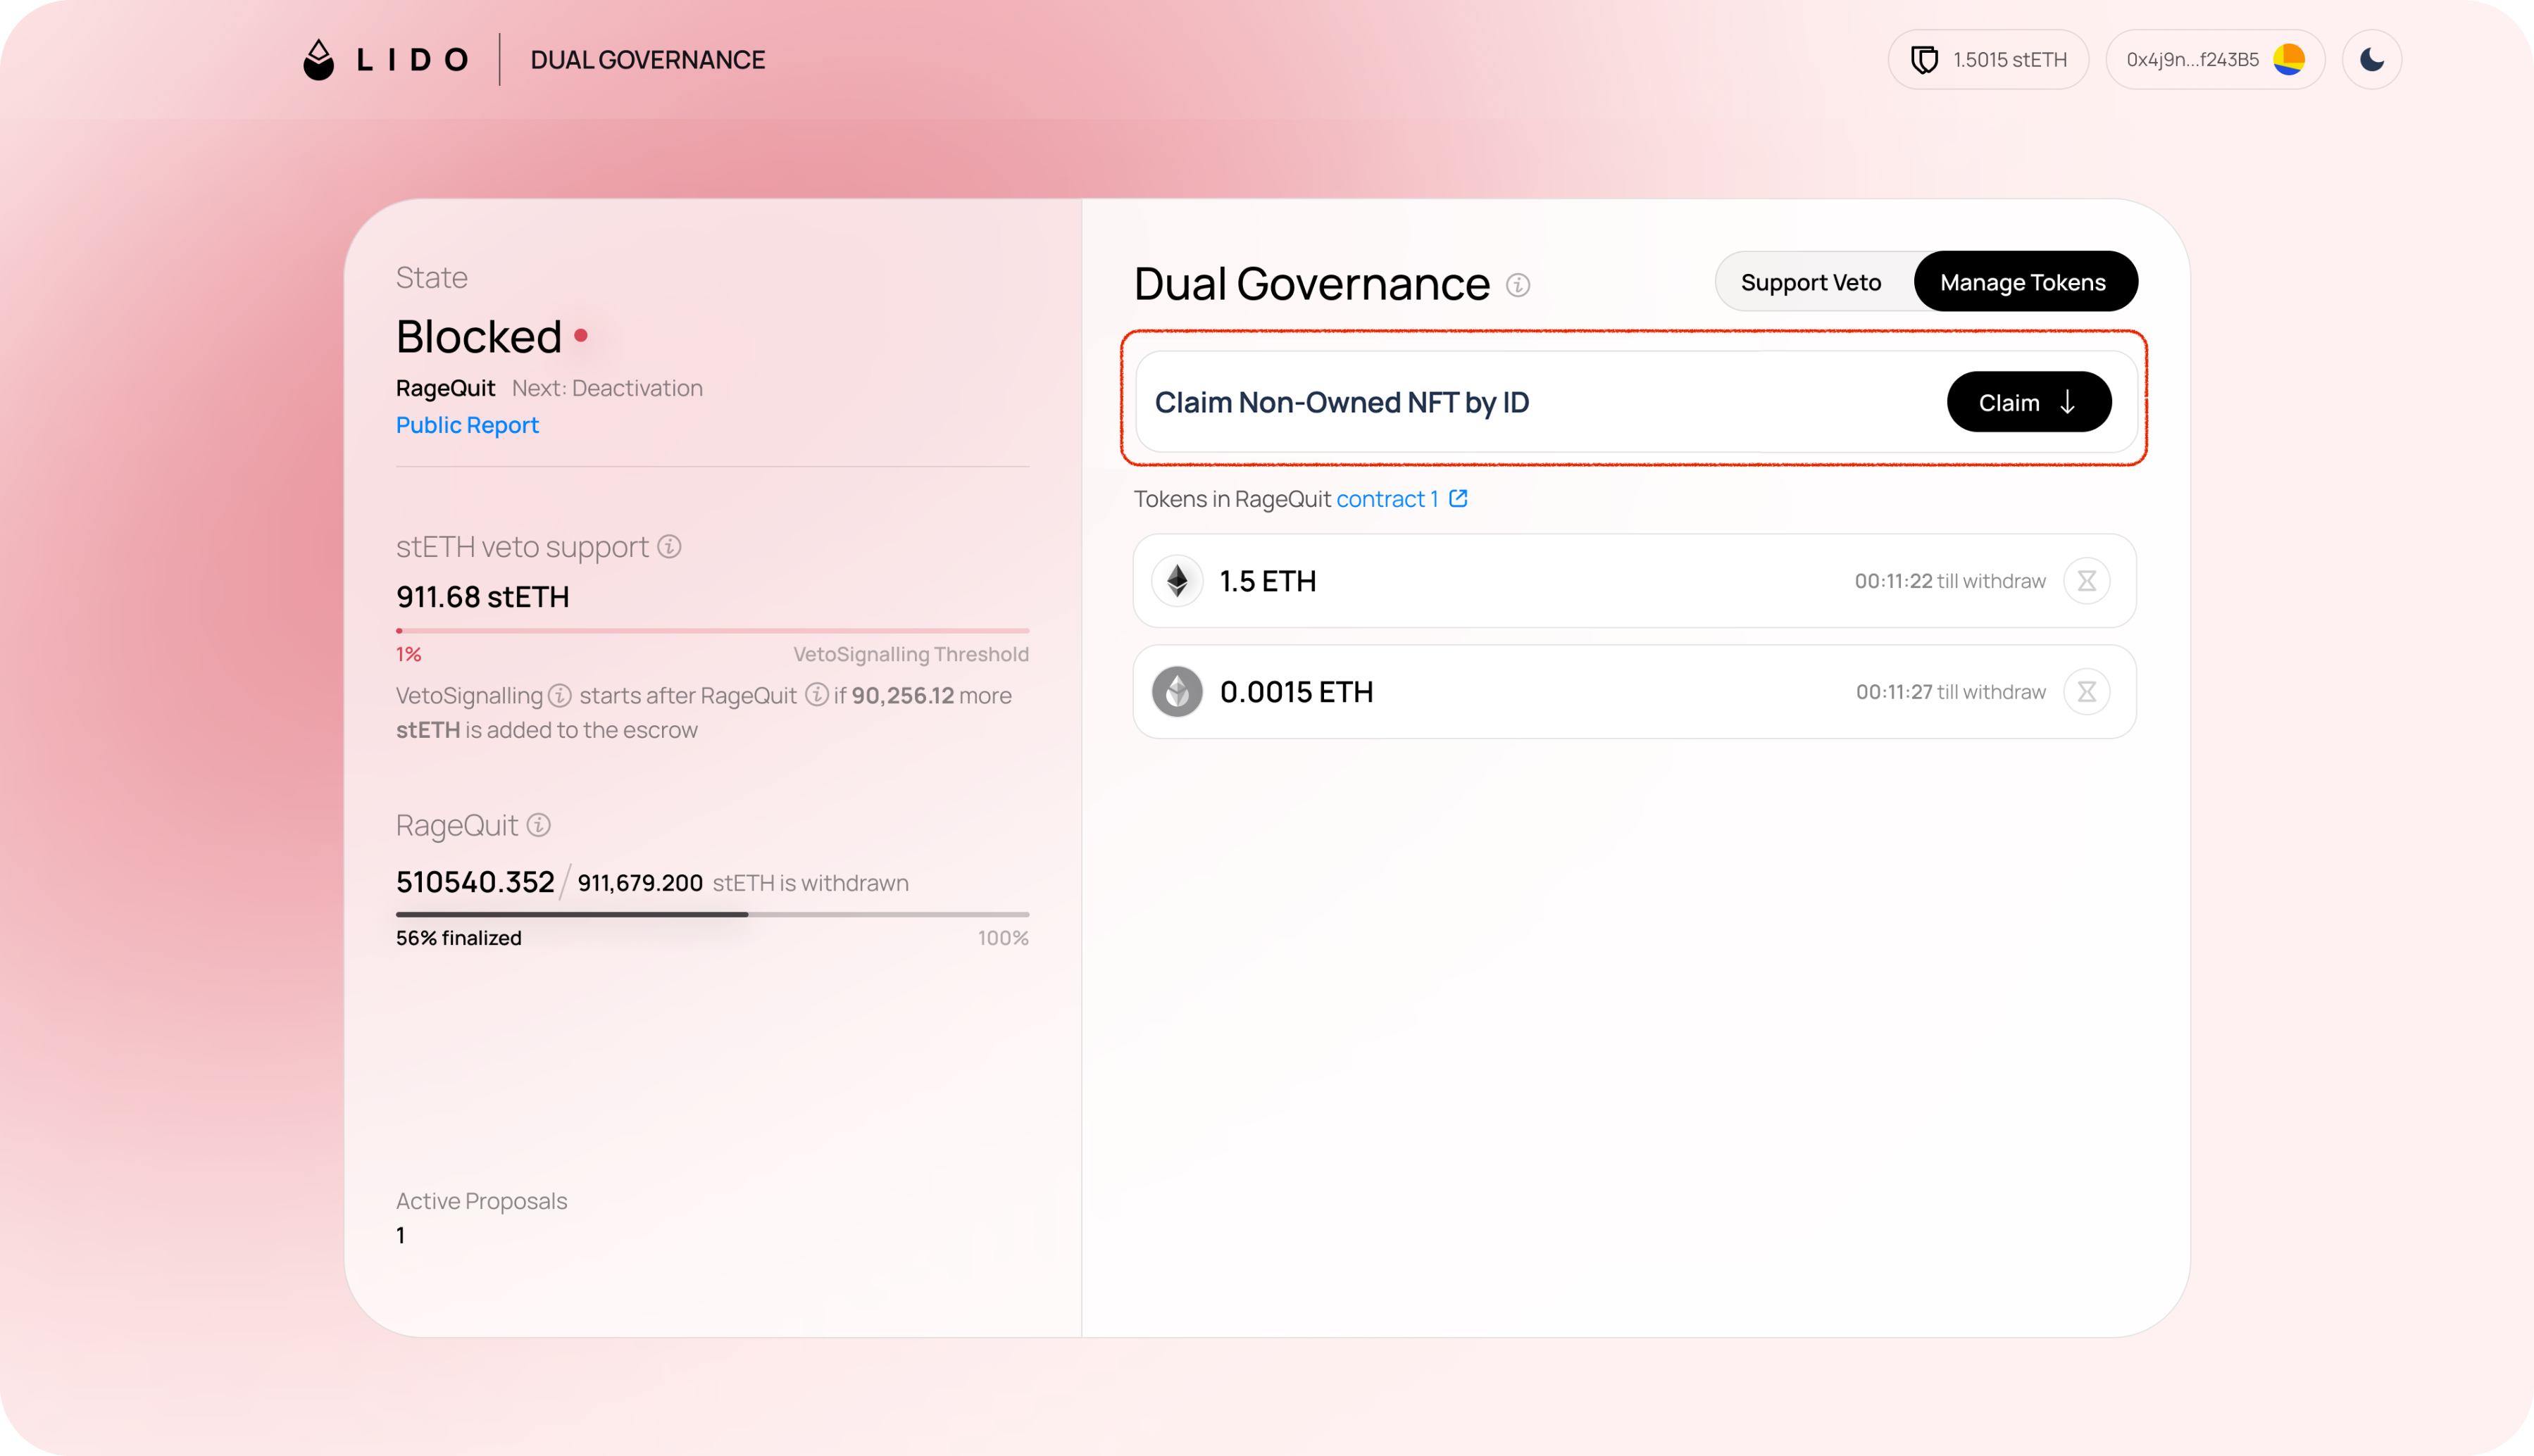
Step 2b: Claim a withdrawal NFT you don’t own by its ID.
If you don't currently have access to the wallet that owns the withdrawal NFT (for example, if you're managing operations from a different address), you can claim a withdrawal NFT using its ID.
Note that claiming the NFT does not transfer ownership. It locks the corresponding ETH in the Dual Governance. Only the NFT owner will be able to withdraw the tokens once the lock period ends.
-
Go to the Claim Non-Owned NFT section
-
Enter the NFT ID and click
Claim
-
The NFT owner will see the updated status in the UI when they connect their wallet
Step 3: Withdraw your ETH when available
-
Visit the Manage tokens tab
-
After the 60-180 days timelock expires, click the
Withdrawbutton for available tokens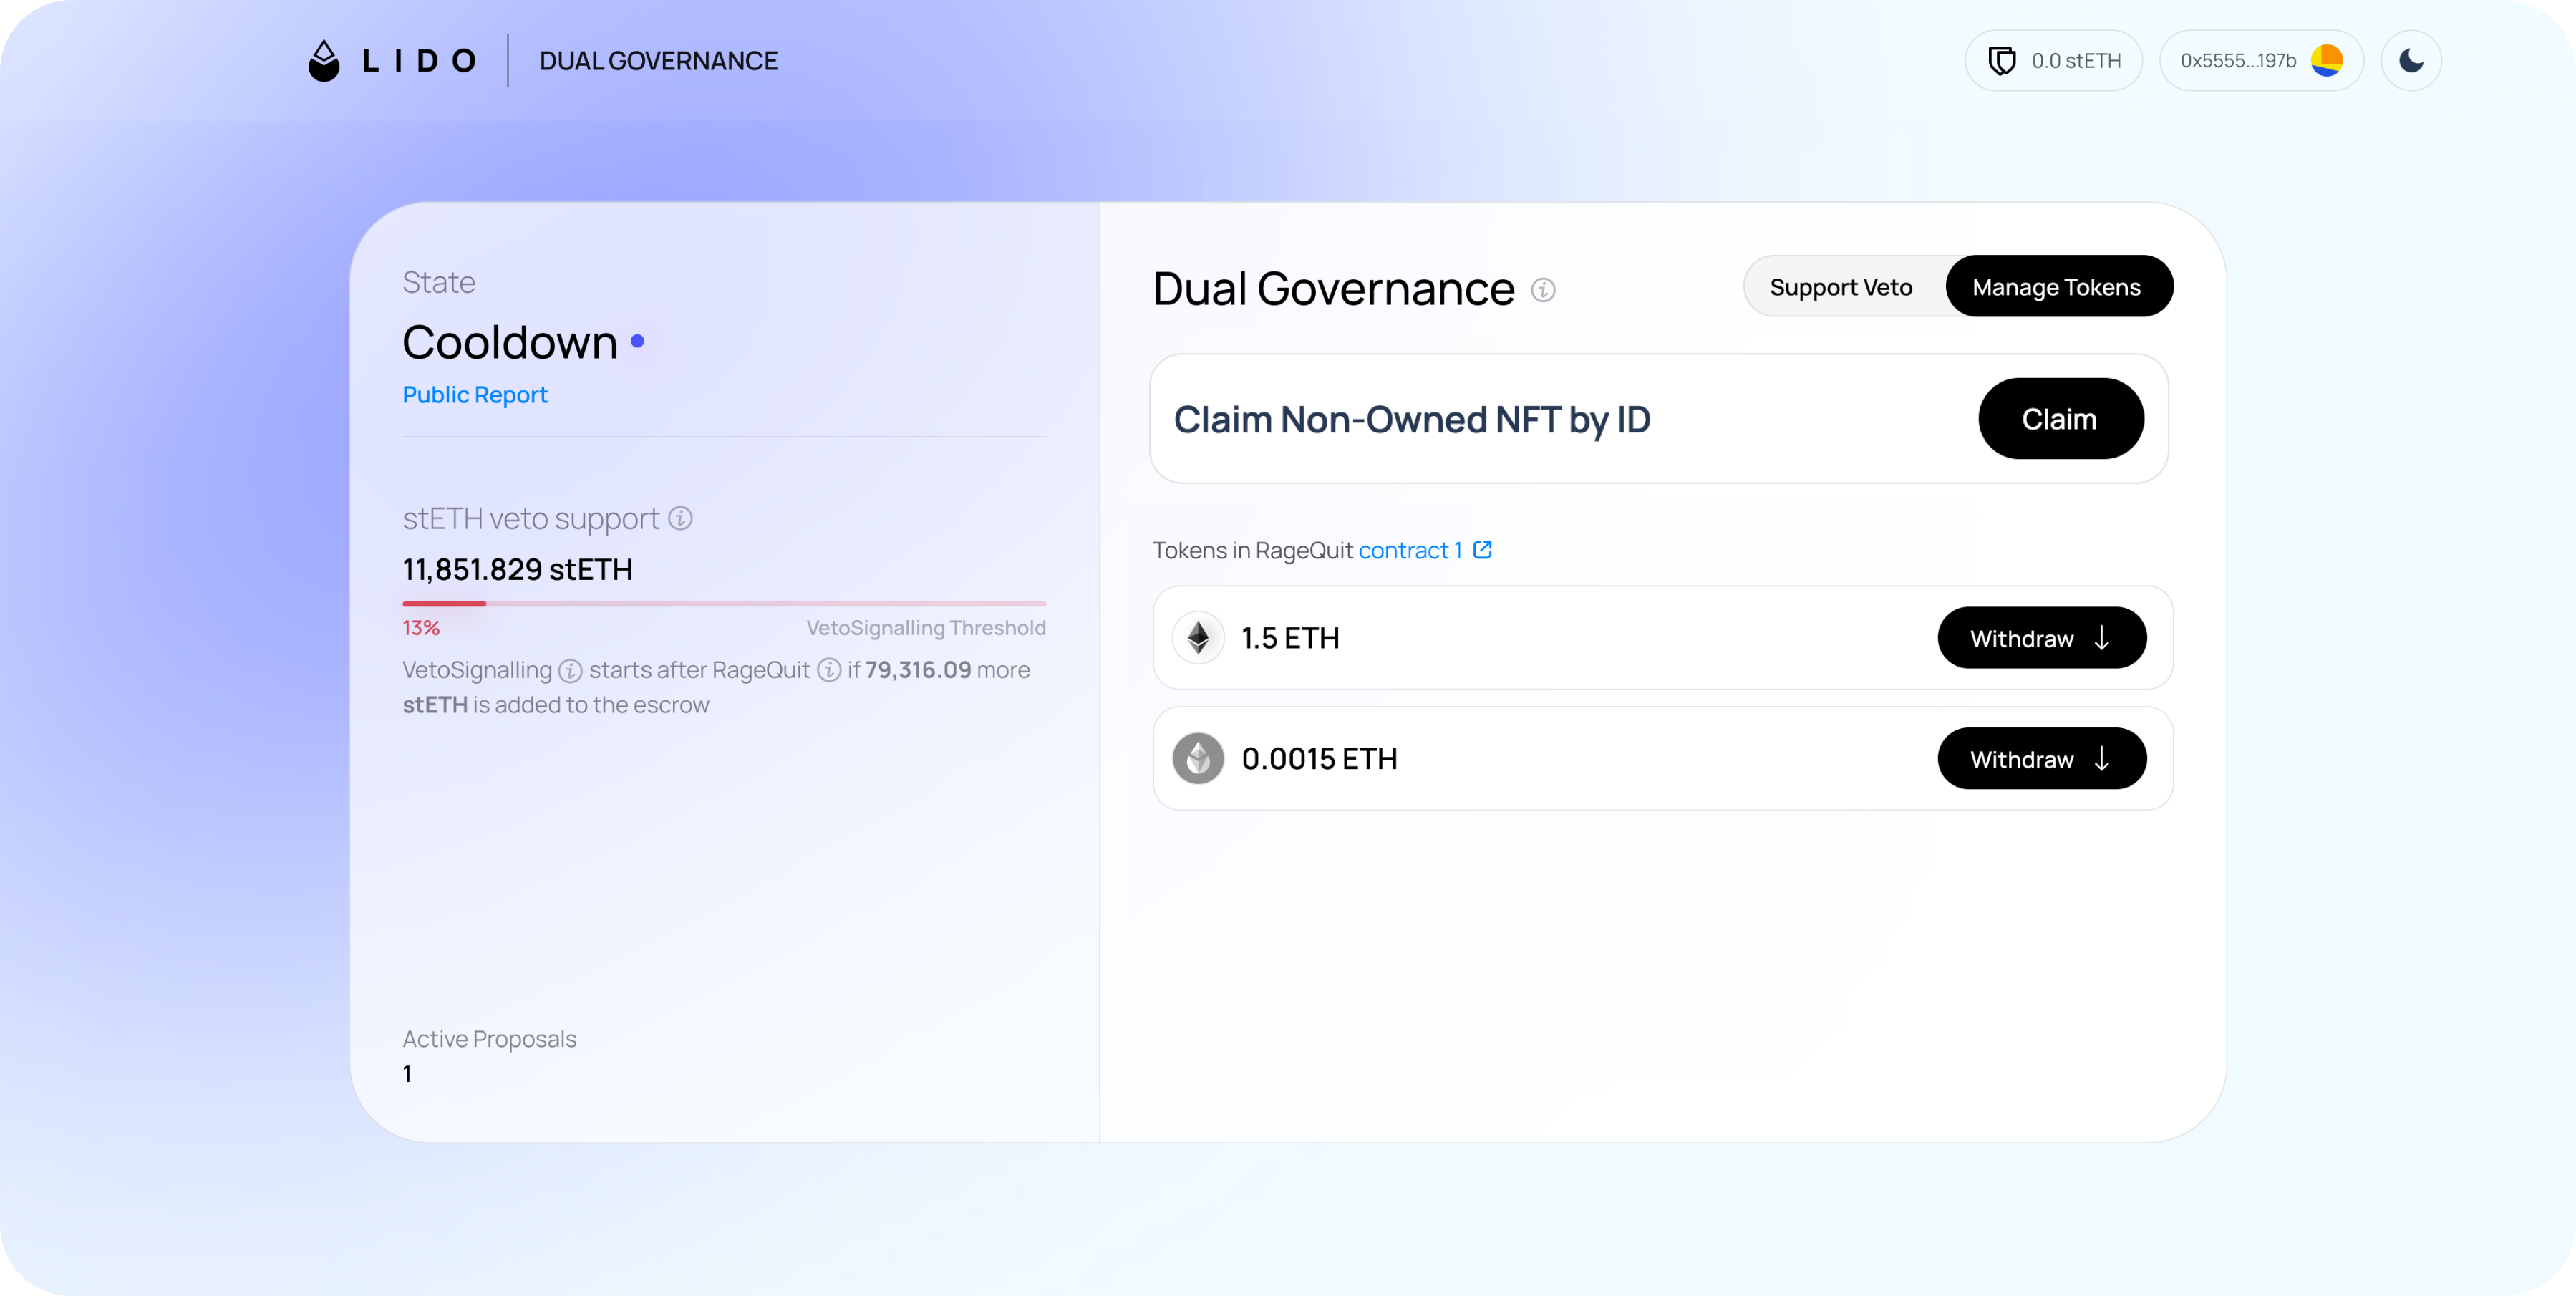
-
Withdraw ETH. It will be deposited into your wallet.
For more context on how Dual Governance works, when to use it, and the rationale behind timelock mechanics, check out:
Need help? If you are having issues navigating the UI, reach out on Discord or Telegram.